
ANTI-SUBMARINE INDICATOR LOOP STATIONS IN THE UNITED STATES - WW2
East Point Loop Receiving Station, Nahant,
Massachusetts
Drawing by Gerry Butler (2000)
Loop Receiving
Stations (LRS), as they were known, were operated by the United States Navy
during WW2 as part of the harbor defenses largely against German submarines
(U-Boats). This
webpage is about the Indicator Loop Receiving Station operated by the
United States Navy at East Point, Nahant, Massachusetts. Other
nearby loop stations include North Scituate (Fourth Cliff to Provincetown,
Massachusetts); Appledore Island (Portsmouth, New Hampshire) and Peaks Island/Fort Williams Loop Station
in Casco Bay (Portland, Maine).
 |
If you worked there or have any feedback please email me: Dr Richard Walding Research Fellow - School of Science Griffith University Brisbane, Australia Email: waldingr49@yahoo.com.au |
My thanks to Gerry Butler and Dave Pierson for their splendid help with this webpage. Liberal use has been made of Gerry's new book for the Nahant Historical Society "Nahant's Naval Secrets" (2012).
LINKS TO MY RELATED PAGES:
Indicator Loops - an overview (YouTube, 70 minutes)
- Indicator Loops around the World (Home Page)
- How an indicator loop works
- Fort Bribie and RAN No. 2 Mine Indicator Loop Station
INTRODUCTION
From the outbreak of hostilities in Europe and the Middle East in September 1939, the US Navy had given some thought to harbor defenses. With the increasing likelihood that the US may become embroiled in the war work became more urgent. In July 1941 - before the US entered the war - the Chief of Naval Operations recommended that indicator loops be installed as harbor defensive measures in all New England ports, including Boston. Before we consider the installation of harbor defenses at Boston in WWII, we should look at the early days of antisubmarine research there, particularly at East Point, Nahant, just to the north.
ANTI-SUBMARINE DEVELOPMENT AT NAHANT
Nahant, one of the smallest towns in Massachusetts, has the solitary distinction of being the origin of United States Naval antisubmarine warfare. In his book for the Nahant Historical Society Gerald W. Butler details the history of the Anti-submarine Laboratory at Nahant from 1917-1919. The following extracts from his Nahant's Naval Secrets have been used with permission.
Detection of enemy ships by their subaqueous sound started to
be investigated in the late 1800s in Europe. However, in 1901 in the US, the
Submarine Signal Company was set up in Boston to realize the commercial
possibilities of underwater acoustics. From then on limited, secret research
soon began at various areas along the eastern seaboard to include Boston,
Gloucester, Cape Cod, and certain military installations.
Due to its strategic location and deep water, the first
laboratory established to detect submarines was set up at East Point, Nahant by
the Submarine Signal Company on the estates of General Charles J. Paine, Mrs.
Knivet W. Sears, and Miss Clara Sears. The facility, designated the Nahant
Antisubmarine Laboratory, (NASL), was completed April 7, 1917, one day after the
United States declared war on Germany and began operation immediately. Enclosed
within a rectangular compound and surrounded by a tall chain-link fence topped
with barbed wire, tents immediately appeared, quickly succeeded by seven wooden
buildings. Two small personnel gates and a main entrance with a sentry box
allowed access and egress.
 |
|
The Nahant Antisubmarine Laboratory -
1917. Drawn by Gerry Butler. |
Under direct control of the U.S. Navy, the laboratory was staffed with scientists and engineers from the Submarine Signal Company of Boston. Additional personnel were brought in from the Western Electric Company who was actively experimenting and building submarine-detection systems for the U.S. Army Coast artillery Corps at Fort Story, Virginia. The General Electric Company was also involved with electronic detection systems both in the US and the UK and provided scientists and engineers for the secret project as well. Between the three major companies, each more or less a rival, were revealing secret information to each other, waiving all questions of patent ownership and cooperating with utmost friendliness and loyalty to each other and the country they served," the submarine detection systems of World War One were developed.
The Nahant facility was now on a "war basis mobilization plan" and more guards were posted in and near the laboratory while security at the station became most strict. Armed patrols were constant all along coastal East Point and no unauthorized person was allowed to pass through the estate area or to walk the beach or rocks within view of the static shore installations. Simultaneously, fishing and small private boats were not allowed to pass East Point at any time.
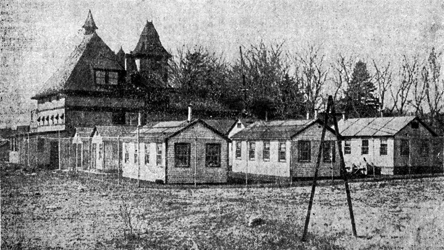 |
|
Photo of the NASL taken from a newspaper report. The three closest huts incorporated laboratories and classrooms. The others at the rear were laboratories only. |
The scientists' first challenge at the East Point facility was to identify underwater sounds produced by various types and classes of vessels and measure the distance at which they became audible. Three months of analysis, testing, and design had created a prototype submarine detector. On May 14th, 1917, the Nahant scientists reported that they could detect propeller noises from a submarine moving nearly ten miles away. This distance, of course, included the measurement from the shore stations at East Point to static apparatus secured offshore. U.S. Navy operations and naval personnel assigned to the secret Nahant station were then commanded by Lieutenant Hicks, USN. Beyond the structures and military systems operating at East Point, the Antisubmarine Laboratory set a new requirement. On August 7th, the General Electric Company expressed a desire to create and "erect an additional experimental station on the eastern point of the estate of Senator H.C. Lodge." Because of the experiments' content and their expected contribution to methods of antisubmarine detection, approval was granted in one day by letter from the District Engineer's Office at Boston.
In May 1918, war officially arrived off the American coastline. Submarine attacks in American waters began on May 25th, when two coastal schooners were sunk off the Delaware Capes. Early in June, a number of coastal craft were destroyed or sunk, including the 5,000-ton steamship Carolina.
Beginning in April 1918, the Army-operated searchlight installed at the Lodge Estate for the duration of the war, was used by the First Coast Defense Command and extensively for naval experiments. Mostly, the powerful 60-inch light use was for target-tracking and illumination projects for the Hammond Radio Research Laboratory. In addition, the static, cliff-mounted 60-inch searchlight at Bayley's Hill, designated Searchlight Number 16, Coast Defenses of Boston, was also used at varying intervals in conjunction with the light and torpedo experiments at East Point.
In the following spring, the military auctioned some wooden buildings and structures and the site leveled. All concrete foundations, blocks, telephone and radio support poles, and the high chain-link fence were removed and the grounds were graded and reseeded. A small guard force remained in place under the direction of Ensign Poteat, USN, while the remainder of cables and few electronic devices were removed and the site returned to its original condition.
By early 1929, no trace of the Nahant Antisubmarine Laboratory remained at the site or at the tip of East Point and the field remains empty at the present date.
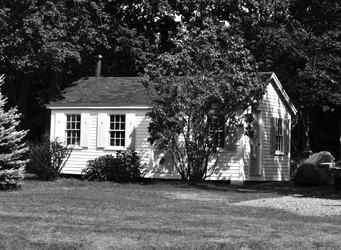 |
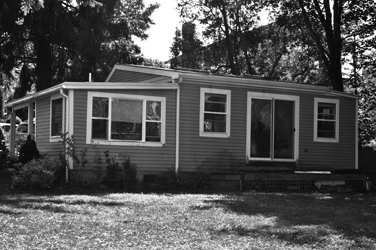 |
| At present, only two of the original wooden laboratory buildings remain in Nahant; the one above is located at 6 Cary Street, on the Herbert J. Motley, Jr. property. HAC | The other remaining hut is located at 172 Willow Road, set back from Willow Road proper. Vi and Mark J. Patek, Jr. now own this structure, with subsequent modifications. HAC |
BOSTON HARBOR IN WWII
In July 1941 the Chief of Naval Operations
recommended that indicator loops be installed for harbor defense at Boston (and
other New England ports). Boston Harbor was to receive four indicator loops, 14 sono-radio-buoys,
and 10 Army hydrophones under the secret code name "Plan 04 - Rainbow". By October 1941 East Point (in Nahant) and Strawberry
Point (In North Scituate) had been selected as loop control stations.
Authorisation to establish the loop station at East Point was requested on 24th
December 1941 and finally approved on 3rd January 1942 by Major General Thomas
A. Terry, US Army.
 |
|
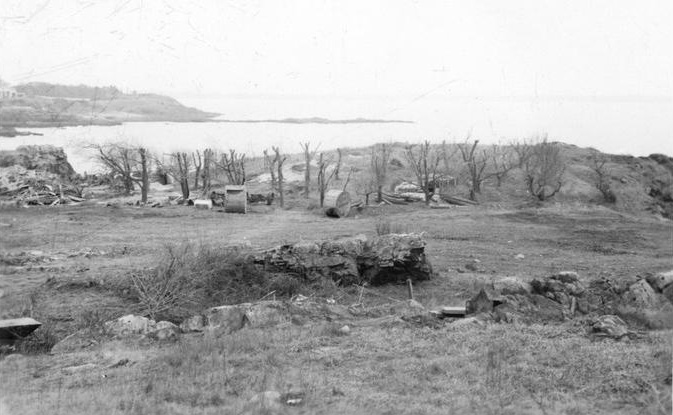
The tip of East Point, 1943.
The blurry image of a white house to the top far left is the Mifflin estate, and had a rectangular tower with SCR-296A radar installed atop it. It was also used by Raytheon Electronic Company from 1943 to 1946 or so for electronic experiments. Mostly the experiments were with small craft radars - including all U.S. PT boat and patrol craft surveillance shipboard radars. This photo was supplied by Gerry Butler. He said that he isn't sure if all of the initial submarine radars were tested here or not. |
Work began in late February but the contractor (for both sites) - Richard White
and Sons of West Newton - was ordered to stop (on 22 April 1942) as the navy
didn't have the permission from the army to build the structures. After an
emergency meeting on 25th April, a modified plan was agreed to. Accommodation
huts would not be built for the naval personnel and they would have to be
transported form barracks at Fort Ruckman. Further, the loop hut (Naval
Operations Building) was to be reduced from a 20' x 24' building to one of 14
foot square. However, the Administration and Power building was to be increased
from 10' x 12' to 12' x 22' to provide standby barracks for two men.
 |
|
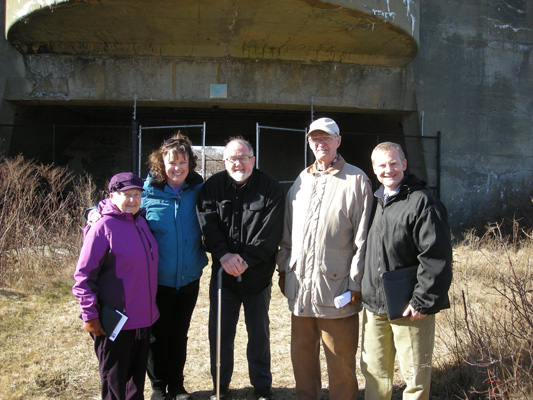
Visitors to the Nahant naval station in February 2012 were Mrs Calantha Sears (Curator, Nahant Historical Society), Miss Carole McCauley (Northeastern University), Jerry Butler (author and researcher), Edmond White (son of Richard White, builder of the naval buildings) and his son Kenneth White (of Richard White Sons, Inc.). |
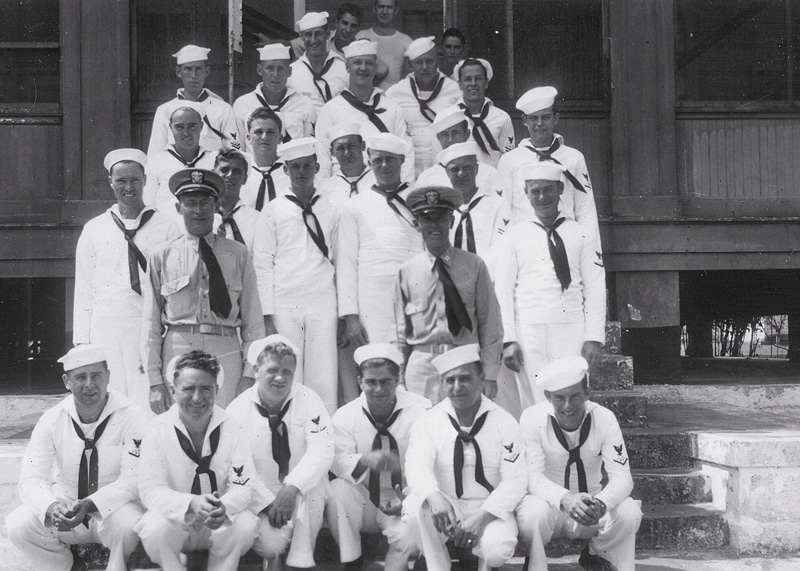
SEAMAN JOHN LOVENBURY'S PHOTOS
The following photos were sent in by Susan C. Johnson, née Lovenbury, whose father John Peter Lovenbury was in the Navy and stationed at Nahant for the early part of the war. He trained at the Naval Sound School at Boston and then the Magnetic Loop School at New York.
At Nahant he helped with the building of fences and laying of the loops, and once they were operational he became shift leader on the watches. He married in May 1944 while living in a YMCA hostel at Lynn, Nahant and a month later he transferred to the Panama Canal station for the rest of his duty. John passed away in 1985. There are a couple of photos of the loop cable on my Panama Loop Station webpage.
If you can identify any of the seamen in these photos please email me (address at start of webpage).
 |
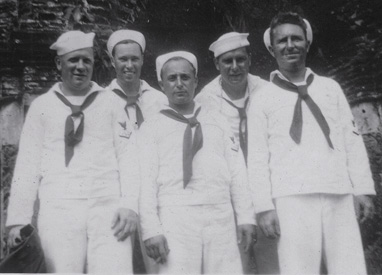 |
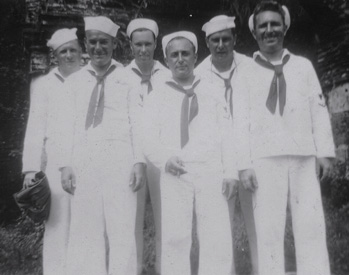
| L to R: George Curtin, Andrew Coffee, John Lovenbury, Irving Katz, Cliff Muse, Unknown (joined group in Panama). | L to R: George Curtin, John Lovenbury, Irving Katz, Cliff Muse, Unknown (joined group in Panama). |
 |
|
Taken in Panama. Front row - third seaman is George Curtin, fifth seaman is Irving Katz. Row 2 (behind officers) - First seaman is John Lovenbury, last seaman is Andrew Coffee. Row 5 - only two seamen: on right, seaman in uniform is Cliff Muse. |
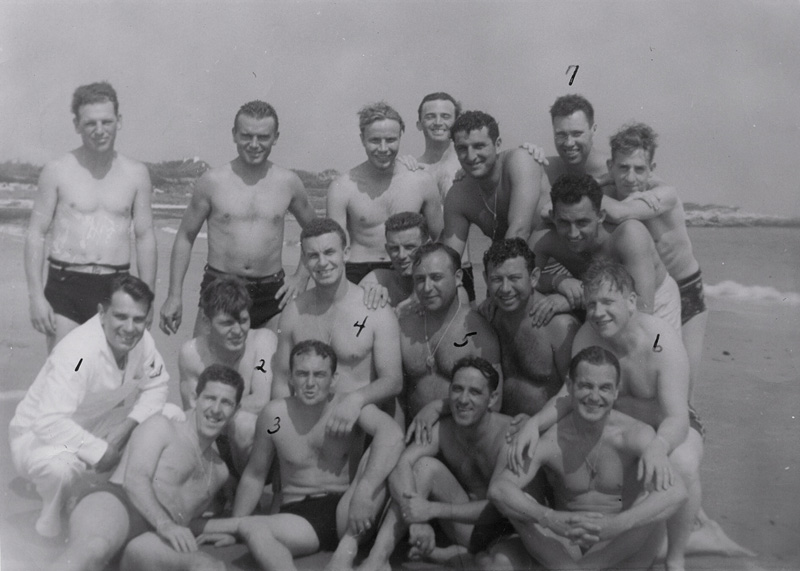 |
|
Former Nahant Naval Station seamen on the beach at Panama. The seaman marked "7" is John Lovenbury. The man he has is hand on was not at Nahant; he joined them in Panama. Cliff Muse is the seaman in the white uniform. |
ANTI-SUBMARINE INDICATOR LOOPS
Indicator Loops are long lengths of armoured cable laid on the
seafloor of harbors to detect enemy submarines. They were developed by
the Royal Navy in the early 1900s and first trialled at the end of WW1.
They were successfully deployed in WW2 in British ports and other
Commonwealth countries such as Australia, Canada, New Zealand, South
Africa, Kenya, Ceylon, Penang, and in allied harbours (Iceland, Holland,
Dardanelles). By 1942 the United States had adapted this technology for
its own needs and a dozen United States Navy "loop
receiving stations" were established along the eastern seaboard of
mainland USA particularly at the ports of Boston and Portland. The Pequot was the main cablelayer for the USN's
indicator loop harbor defense. The deployment of indicator loops was
highly secret and hardly any of the men on the ship knew the purpose of the cables;
most thought they were underwater communications cables. The words
indicator loop were not used - just cable. The sailors
manning the loop huts were given rudimentary (3 week) training in harbor
detection by indicator loops and sono-radio-buoys. To find out more about the role of the Pequot go to
the USCG cableship Pequot webpage.
 |
|
This diagram shows the arrangement of the cables in the loop ("3-legged") and the tail cable connecting them to the shore station. The "HDA" device shown is known in the USA as a HERALD (Harbor Echo Receiving and Location Device) - a form of underwater sonar. The Pequot crew laid the four loop cables at Boston in the correct position and joined it to the tail cable from East Point or Strawberry Point using waterproof splices and junction boxes. |
Naval hydrographers were despatched to find a suitable location for the planned loops. The loops had to cross the shipping channels but could not be in water too deep as the sensitivity would be impaired. The Navy chose Lodge's Beach beside Bennett's Head at East Point for positioning the tail cables ashore. Note: Lodge's Beach was named after Henry Cabot Lodge (1850 – 1924) who owned a summer house nearby, and where Henry Cabot Lodge Jnr was born. It is commonly known as Dive Beach by the scientists at the Northeastern University Marine Science Centre on Nahant Road near to the beach. The cableship Pequot laid all the cables and buried the two tail cables in a shallow trench all around the bluff area to the loop hut. The loop cables were laid in the traditional 3-legged pattern with leg spacing of about 200 yards. In the diagram below the loops are shown as a solid yellow line. However, they are really three parallel lengths of cable but it is too difficult to show at this scale. Loops 3 and 4, known respectively as Loop C ("Charlie" or "Cast") and Loop D ("Dog"). Loop 3 was 3 miles long with a 4.5 mile tail; Loop 4 was 4.5 mile loop but a short (500 yard) tail as it was close to shore. The cable was supplied by the Simplex Wire & Cable Co., Portsmouth. During World War II Simplex produced over 3000 miles of cable for the US Army Signals Corps communications as well as cable for harbor and coastal defence work.


LOOP CABLE
The USN used two types of cable for indicator loops: Type 111 cables was used for the Legs and Type 113 was for the Tails. These differed somewhat to the British cables which had "lead loaded" Leg (or "loop") cable. This meant that lead metal in the form of wire 3.2 mm (1/8") diameter was wrapped around the core to give it extra density. This helped the cable better conform to the seafloor and resist shifting back-and-forth in the currents. The British and US Tail Cables are almost identical. More details can be found on my Cablemakers website.
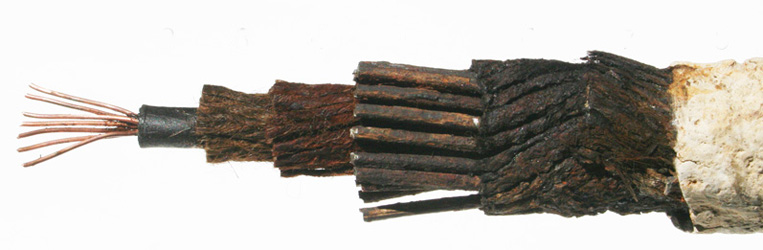
CAPE COD CABLE
The cable
shown below was recovered in
August 2011 off Cape Cod on the East Coast of the USA. It was given to us
by Gerry Butler when he was invited to accompany Greg Brooks from Sub Sea
Research (Gorham Maine) during their search for the ship SS Port Nicholson.
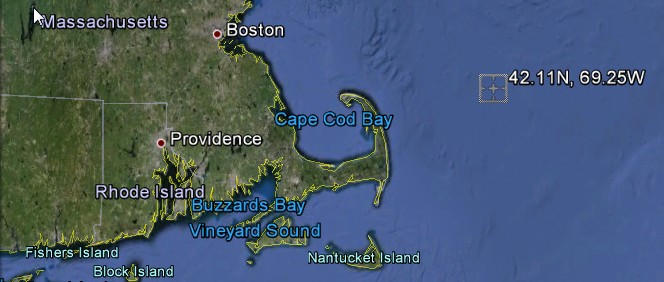
Greg Brooks announced in February 2012 that a wreck he found in 2008 sitting in 700 feet of
water 50 miles offshore is that of the S.S. Port Nicholson, sunk by
German U-Boat U-87 on June 16, 1942. It is located at approximately
42.11N, 69.25W, 50 miles due
East of Cape Cod. Greg Brooks believes Port Nicholson was
carrying a valuable cargo of platinum, gold, and industrial diamonds at the time
of her sinking, payment from the Soviet Union for material delivered under
lend-lease, and would now be worth around £2 billion. He has salvage rights but
his veracity of his claim is hotly disputed. See the Wikipedia entry on Port
Nicholson for more. The cable was located about 150 yards from the wreck.
 |
|
Approximate location 42.11N,
69.25W) of SS Port Nicholson as
announced by Greg Brooks |
 |
 |
| A longitudinal view of the cable was recovered in August 2011 off Cape Cod on the East Coast of the USA. Why the cable would be so far offshore is anyone's guess. It looks like Type 111 Leg Cable. Its diameter is 1 inch (25mm). The cable consists of a single core of seven strands of tinned copper wire enclosed in a single layer of rubber insulation and 32 strands of jute yarn. Protecting this core is a winding of 16 steel armour wires each about 1.6 mm diameter (10 AWG). The armour wire are protected and waterproofed by a braiding of 36 strands of dressed jute yarn over hot pitch and resin. The cable is finished with a bituminous preservative coating. | A cross-section of the Type 111 Leg Cable. The final diameter is 1.00" (25.1 mm). My thanks to Jerry Butler for procuring the sample and to Chip Calamaio for posting it to me in Australia. |
CASCO BAY CABLE
The cable shown below was recovered by Chris Whalen who
operates a salvage business along the coast of Maine. His company, Coastal
Reclaim, LLC salvages abandoned utility wires that riddle the mid-East Coast
ocean floor, as well as lighthouse cables that are obsolete due to solar
technology.
 |
 |
| A longitudinal section of Type 113 Tail Cable from Casco Bay. This cable is a piece recovered by Chris Whalen who operates a salvage business along the coast of Maine. The outer armour wires are badly corroded from 60 years in a salty environment, and are now covered in coral. Chris sent me the Boston cables to Australia where I examined them more closely. The six cores and the copper conductors can be seen clearly, as can the remains of the steel armour wires. | Type 113 Tail Cable from Casco Bay. The original diameter was about 40mm (1.6"). The steel armour wires are 2.5 mm diameter and protect two layers of jute. Under these is a waterproof linen tape which surrounds the six cores of the cable. Each core consists of a tinned copper conductor of 1.3 mm diameter insulated with a rubber sheath of 5 mm diameter. |
NAVAL OPERATIONS BUILDING
The new structure, now more to seaward than originally planned, was to lie near "Roaring Cavern," facing the rock and ledge area on East Point proper. Loose ledge was removed by blasting and foundation footings were set. A raised foundation shoulder held the structure while the instrumentation (fluxmeters) sat on a separate vibration-free concrete block. The reinforced-concrete station that emerged consisted of a low-level, 14-foot rectangle, 10 feet, 3 inches high, with one angular, three-sided face, strategically set into rock outcrops. A wooden door located on the left or southern side of the building provided the only access. Both loop tail ends entered the station's foundation and connected to their respective instruments. Inside, supplementary equipment included a radiotelephone transmitter, radio receivers, shortwave transmitter and receiver, converter, test equipment, heater, water cooler, tables and chairs. Between the fluxmeters was a powerful tracking telescope.
Communication with the tactical headquarters of Boston Harbor, the Harbor Entrance Control Post (HECP) at Fort Dawes, was by semaphore signal flags or a 12-inch signal searchlight. The signal light was of the standard navy blinker type and mounted on a semicircular concrete platform next to and above the roofline of the Operations Building. Messages could be sent thus to warships in the harbor and other naval interests nearby. Short-wave radio units and a 25-foot folding radio mast were a second means of communication. The HECP was singularly the most important tactical facility within the Boston Harbor Defense Command. The tactical control of Boston's surveillance, illumination, detection and all weaponry were directed from this reinforced-concrete structure. Located at the highest point at Fort Dawes on Deer Island, Winthrop, the facility was in constant communication with all Army and Navy elements in the harbor defense.
 |
| HECP - Fort Dawes, Deer Island. Army and Navy crew, short-range radar blister atop. |
The HECP in Boston Harbor was manned by Army and Navy personnel and was in operation after the war. Later used by the United States Naval Reserve, the facility, abandoned in the 1970s, was demolished as part of the Deer Island Treatment Plant. Finalization and construction of the Nahant Operations Building were approved on May 16, but the Navy effected formal completion and transfer only on June 20th, 1942. After final testing and calibration, tactical operation began at 7:00 P.M. on June 22nd. In addition to the task of being a Magnetic Indicator Loop Station, the building also served as a Sono-Radio-Buoy Receiving Station working in conjunction with Naval Unit 1-C at Strawberry Point in North Scituate. The Nahant's naval unit's primary responsibility "was to detect the approach and give the location of enemy sea craft, surface or submerged." Finalization and construction of the Nahant Operations Building were approved on May 16, but the Navy effected formal completion and transfer only on June 20th, 1942. After final testing and calibration, tactical operation began at 7:00 P.M. on June 22nd.
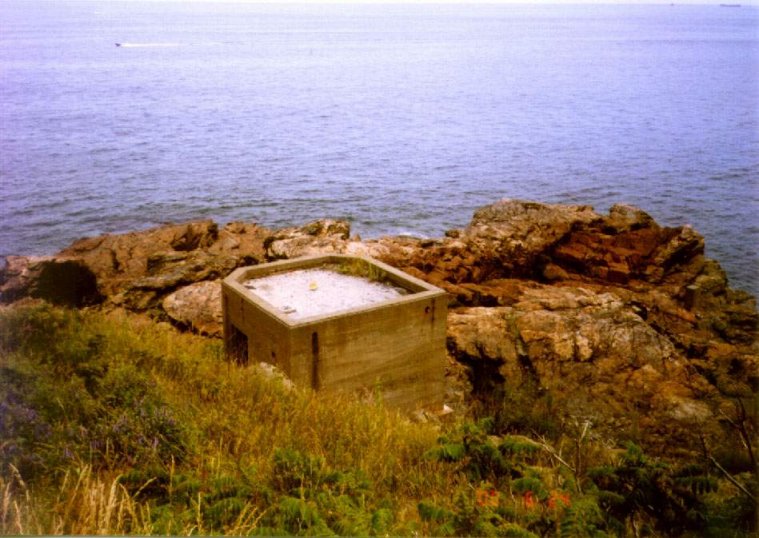
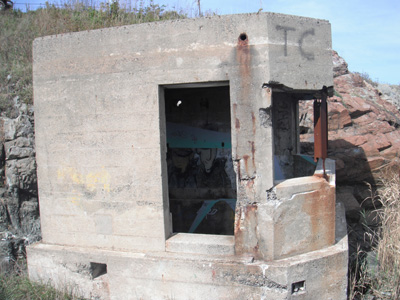
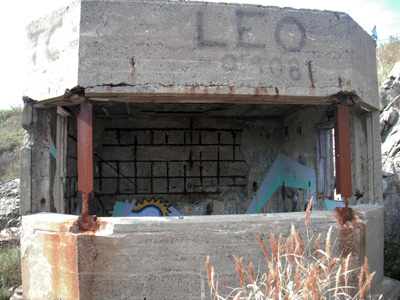
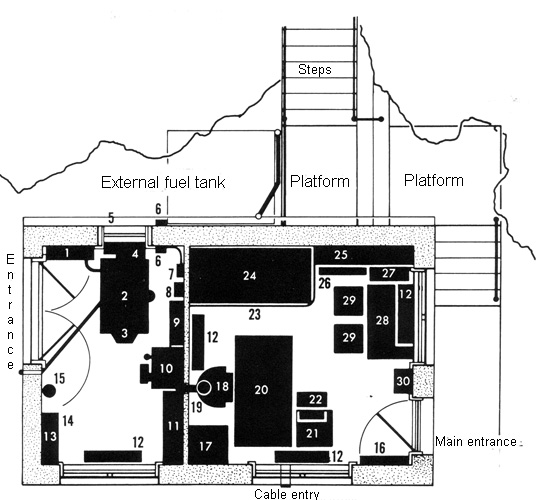
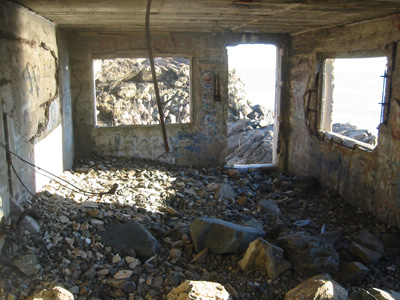
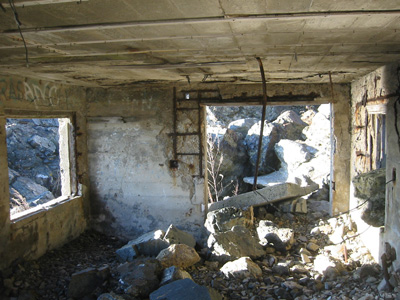
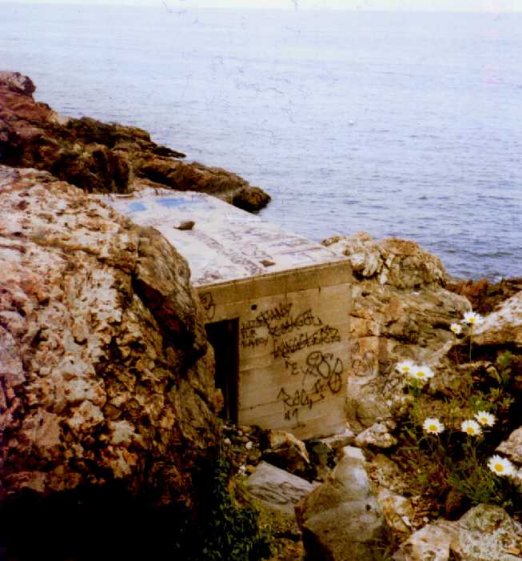
The photos below are of the "Naval Operations Building"
[or Loop Receiving Station - LRS] at East Point which housed the indicator loop equipment, including the GE OS fluxmeter and paper chart recorder. The building is 14 foot square and 10 feet 3 inches high with one angular three-sided face. It faces east and entrance is through a door on the southern side. The small hole at the rear of the northern side was for a chimney. It was completed on June 20th 1942. All photos were taken by
Dave Pierson,
some in June 2000, and again in October 2008. The diagram below is taken from
Gerry Butler's "Military Annals of Nahant, Massachusetts" 1996.
 |
| 1. Sono-radio-buoy | 9. Transmitter control box | 21, 22. Resistance balance boxes |
| 2. Fuse and switch box | 11. Board | 23. Telescope |
| 3, 10, 15, 24. Chairs | 12. Heater | 25. Cable entrance |
| 4. Main switch | 14. Radio transmitter | 26. Binocular shelf |
| 5, 13. Tables | 16. Water cooler | 27. Fire extinguisher |
| 6. Communications system | 17. Arms rack | 28. Light switch |
| 7. Sono-radio-buoy receiver | 18. Cabinet | 29. Inlet aperture |
| 8. Radio receiver | 19, 20. Fluxmeters (recorders below) | 30. Flue and chimney stack |
 |
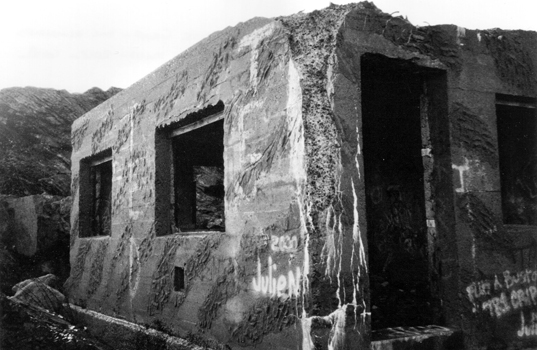
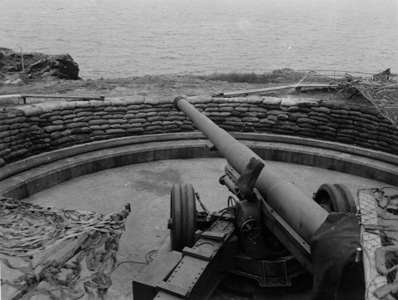 |
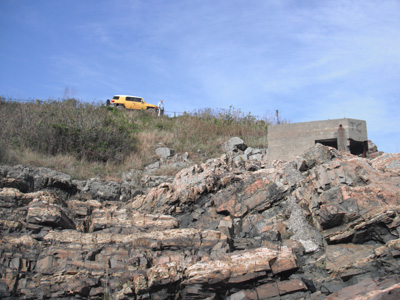
| The Operations Building at East Point - 1943. This photo and the three to the right and below were professionally taken within Boston Harbor and supplied to me by Gerry Butler and who also identified the structures. | The 155mm gun emplacement overlooked the naval station (1943). The Operations Building is just out of view (closer to the water), however, you can see the handrail between the Opn and Admin buildings. |
 |
 |
| This closer view of the Opns Building (1943) shows the gun under camouflage. The blinker / signal lamp is off to the left of the building proper. Gerry remarked "The Navy certainly did not go all out to camouflage the Operations Building - it looks the same now as it did then". | Gerry said "I now wonder if the two concrete "pylons" forward of the Operations building were used as aiming stakes for the guns rather than something the Navy cooked up for the operations". |
 |
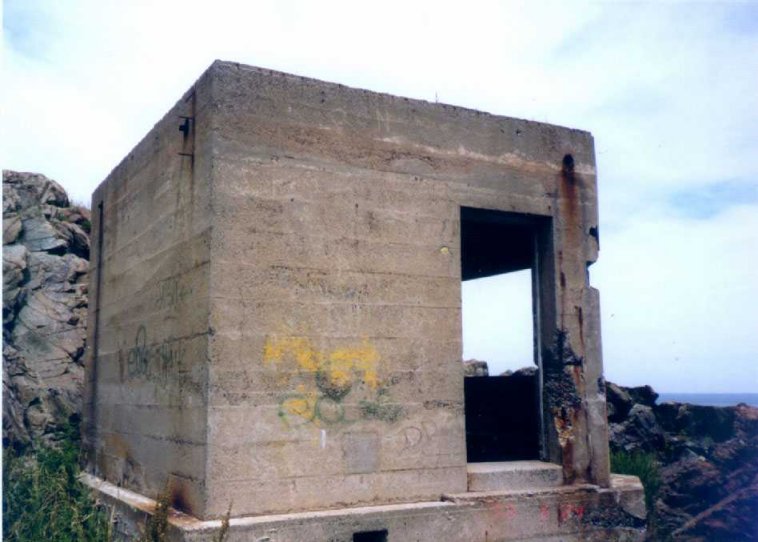 |
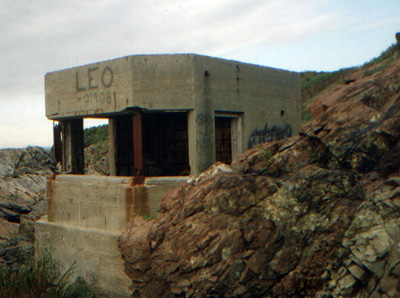
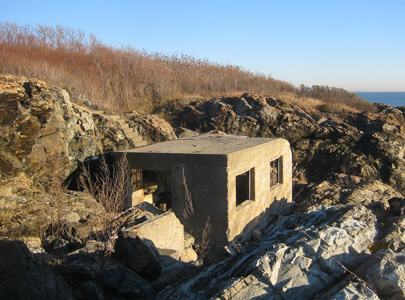
| June 2000 - The naval operations building at East Point - taken from the path at the rear. The hut faces east. East Point more or less consists of angular rock ledge 10-15 feet above mean high water, with narrow, and rarely, wider 'crevices'. Above this is another 10-ish foot rise, variously angled, variously grassy/brushy. The 'top' is relatively level/grassy, the top is 'man made' as part of the defense installations. | June 2000 - A view of the southern side. |
 |
|
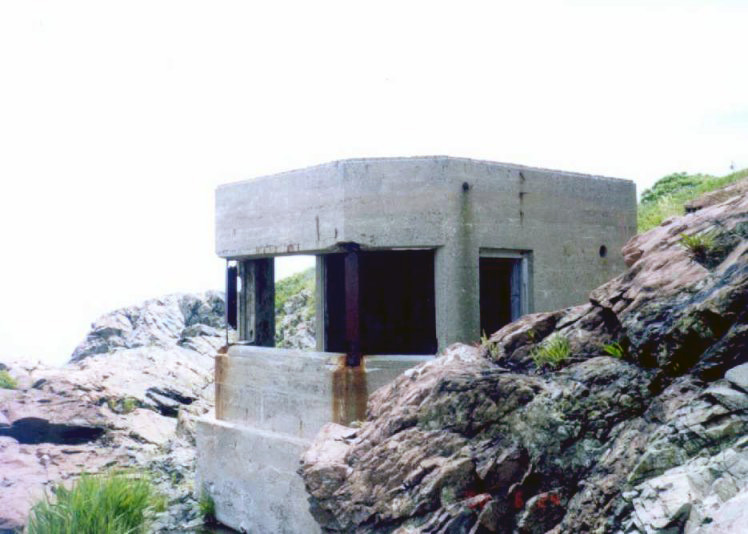
| A view from the north-eastern side. On a bench under the front window were the resistance balance boxes used to ensure the resistance of both halves of each loop was the same. Underneath them were the fluxmeters (galvanometer/amplifier). | Our intrepid photographer Dave Pierson - at East Point. Dave is a professional pyrotechnician. |

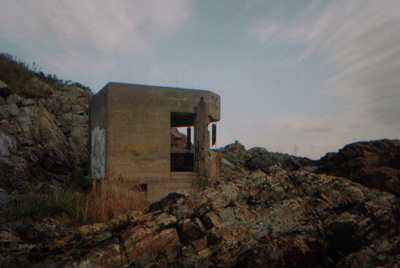
Later Photos
In October 2008, Dave Pierson took another set of photos (below). No further
weathering seems to have taken place. Graffiti - well that's another thing!
 |
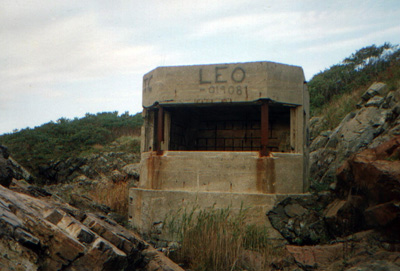 |
| 2008 - the southern side | 2008 - Leo Wanker has left his mark |
 |
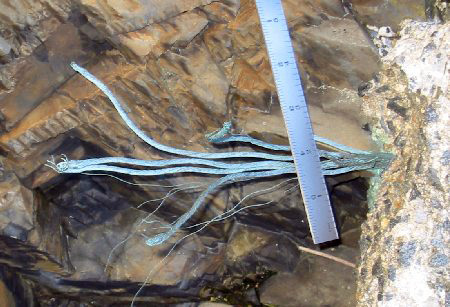 |
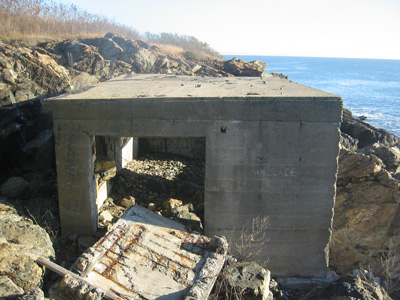
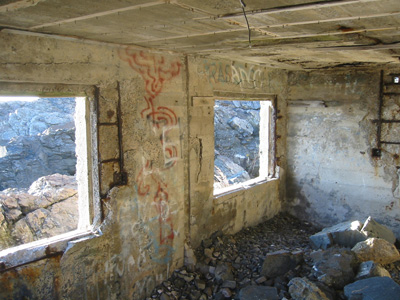
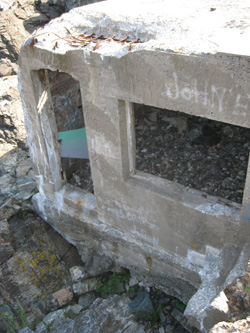
| 2008 - the northeastern side. In the middle of the front window was the telescope. The window facing us had the arms rack underneath. Behind the window on the side was the water cooler and radio transmitter. The small hole to the far right was for the flue and chimney stack. | 2008 - unsheathed cables, just to the north. Most likely 'dedicated ground', for signal integrity, and or lightning protection. |
 |
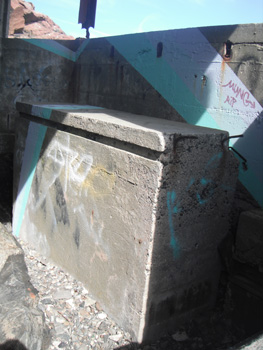
 |
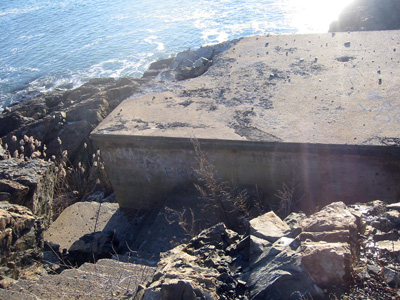
| Lodge's Beach with Bennett's Head in the centre of the photo. To the left there is a trail that leads more or less out Bennett's Head, thence to level patch above Lodge's Beach. This scene looks westish across the beach. | If you descend on to Lodge's Beach at the Eastern End and wander about you'll see a couple of oddities, notably, the concrete lump shown above; a bit under a meter, longest. Might be a cap over/embedding tail cables. |
 |
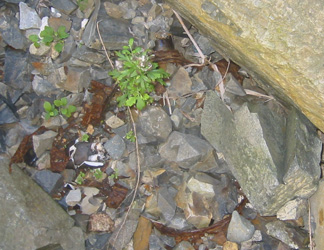 |
| This is indicator loop tail cable and was found just to the SE on the track above Lodge's Beach. It consists of three insulated cables inside the usual sort of iron armour. | Trek along the top ledge to the Admin/power hut. One puzzling observation is that there is no sign on the rocks, etc, of cables connecting the two. The photo above shows what appears to be a power transformer embedded in and filled with gravel, insulator at 'top'. (Picture is 'straight down'). Remnants of power feed from rest of fortification. |
|
|
|
|
The three rubber-insulated conductors of the loop tail cable are clearly visible in the rusted shroud of steel armor wire. |
The coin helps envisage the size of the loop tail cable. It is a US 'quarter' (25 c) which has a diameter of 1" or 25 mm. |


 |
 |
 |
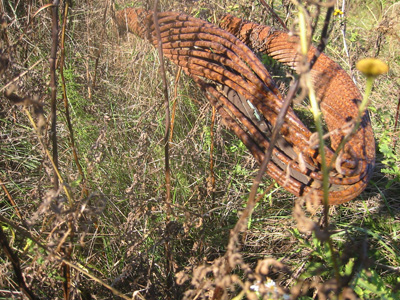
| On along the ledge top above Lodge's Beach, there is one crevice with some remnants of gun positions tipped in, and in the next is the two brown ropy-looking armored cables (loop tails) about 12" apart, hanging in mid air as erosion has removed the soil. From a bit past here, the ledge top trail becomes eroded but you can scramble to the top, where public paved trail is. The cables are JUST barely visible from top, but out of line of sight. | If you walk along the top, public area to Loop Hut access you will see the scene above which shows the loop cable leading to 'access port' on top of ledge. The picture shows rock texture, is about 7' up, near vertical. Right hand area of 'access port' has broken end of 'another' cable, matching the two at the erosion site. There are 4 access holes cast into the hut wall. |
Carole McCauley from Northeastern University
holds a piece of tail cable behind the Operations Building
during a visit in February 2012. Photo by Ken White, grandson of
Richard White (builder of the naval station). Jerry
later told Carole she should have put her tongue on the wires to see if they were
live: ZZZZTTTTTTTT!!!!! Good one Jerry! |
Later photos still...
On Thursday 6th October 2011 in the early afternoon, Jerry Butler and colleague Carole McCauley from the Northeastern University - Nahant Marine Science Centre visited the Naval Operations Building to see if the building had deteriorated any further. Of prime concern to Jerry was the concrete block used for the fluxmeters and the condition of the station due to some vandalism and much sea abrasion and element erosion. The 13 photos below were taken by Carole McCauley.
 |
|
Our intrepid investigator - Jerry "Hot Wheels" Butler - revisits the Operations Building. Flash car Jerry! |
 |
 |
| The last military use of the structure was in the late 1950s and up to August of 1961 when Army personnel from the Nike-Ajax launcher area utilised the little building to sneak a cigarette break. | The holes for the ingress and egress of the loop and power cables are clearly visible in the base. |
 |
 |
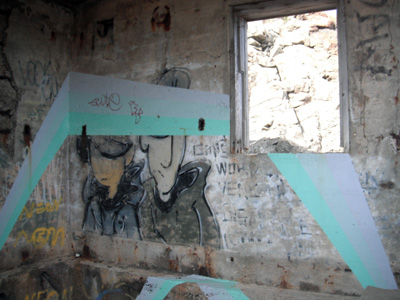
| What's with the blue and aqua stripes? What sort of vandal would do that? | Leo's tag is fading fast. |
 |
 |
| Lens flare...pure art! | The metal window frame has badly deteriorated. |
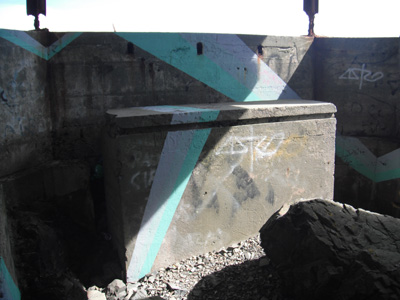 |
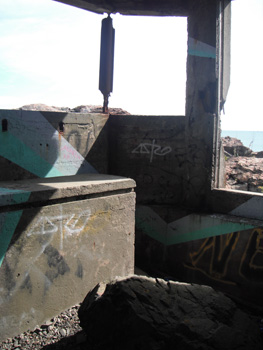
 |
| The fluxmeter pillar (note the huge rock beside it). You would wonder how such a big rock would get inside the building. It was due to extreme wave and storm action. | Notice the lip that runs around the lower segment underlying the door aperture, etc. That was for the flooring, which consisted of wooden beams placed across. |
 |
 |
|
The presence of that big rock makes you think that there were many frightening days in the Operation Building during WW II because of waves and weather (not to mention U-Boats). |
At each end of the fluxmeter pillar there are two bolts that were used to mount a wooden beam to install and secure the fluxmeters. The wooden beam disappeared many, many years ago. |
 |
 |
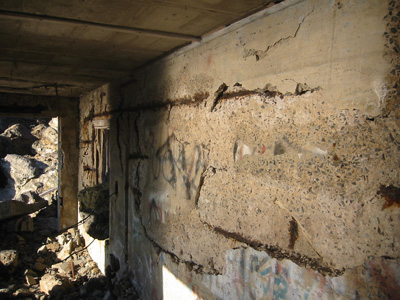
| Note the wooden battens mounted on the ceiling to carry electrical wires. Rusting of the reinforcing mesh has cause the concrete to spall. | It would seem that corrosion is greatest at the weld points where the galvanising is less effective. |
 |
 |
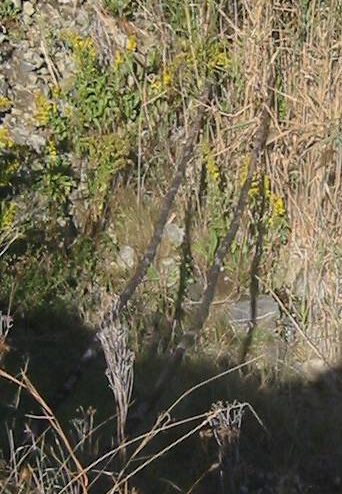
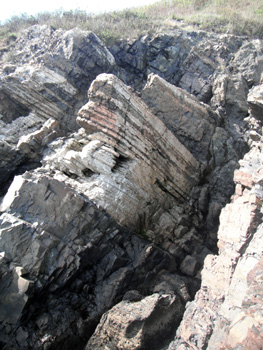
| The rocks of East Point are mostly the layered sedimentary rocks limestone and shale. Some younger igneous rock (gabbro) is also present. The igneous intrusion of the gabbro has recrystallised the shale and limestone to form white sugar marble, tough hornfels, bubbles and knots of dark green chlorite and pistachio-green epidote. | At the same time, water, heated by the magma, steamed the stone, resulting in the formation of red-brown rust, green serpentine, epidote, and chlorite, and white calcite and quartz. Erosion at East Point has exposed all of these on the seaward cliffs. You can see the waves at the bottom of the cliff. |
NAVAL ADMINISTRATION AND POWER BUILDING
Having finished the operations building on June 20th, 1942, the civilian contractor used all means available to complete the second, larger structure at the site, the administration and power building. Sited a short distance to the rear of the operations building, the administration and power building was a reinforced-concrete structure set into the ledge near Cauldron Cliff. Concrete steps, platforms, and steel safety rails led from the bluff to a walkway that completely enclosed the station. A wooden door opened in the northerly face of the administration building, and wooden double doors in the southern face led into the power room. The building was to be 22 feet long by 14 feet wide by 9 feet, 7 inches high. Construction design and materials exactly matched those of the Operations building.
 |
|
Administration and Power Building showing remnants of seaward-facing camouflage. |
The administration room was 12 feet square, and had two windows, all equipment and appliances that the naval unit at Nahant required, including chairs, tables, cabinets, desks, telephone, military style typewriter, small electric range and refrigerator, coffee urn, electric toaster, and double-bunk arrangement fitted with privacy curtains. The power room was 12 feet long, 7 feet, 8 inches wide, and unlike the operations building or administration room, had a solid concrete floor. A double door served personnel, a louvered window ventilated the engine and generator, and one window was set into the eastern wall.
The power plant was a gasoline powered engine and alternator rated at 110 volts with a 12.5 to 15 k-va capacity. All switching, controlling, and cable systems were incorporated into the power plant, including an automatic transfer switch to shift from commercial power to emergency power in an emergency. A small oil-burning furnace in the power room provided heat for the main building. Four cast radiators were secured to the floor, three installed in the administration room and one in the power room.
The administrative and power building was completed and transferred July 17, 1942.
The Naval Administration and Power Building is located about 240 feet to the southwest of the Operations Building and is set into the rocks of Cauldron Cliff. It has two rooms. On the southeastern side (to the left in the diagram below) is the power room with the door clearly visible. It contained the storage batteries, gasoline engine and alternator (110V at 12.5 to 15 kVA) as well as an oil furnace to heat the building. The other room - the administration room (on the right in the diagram) - contained desks, cupboards, a refrigerator, stove, table etc. A doorway lead out to a walkway and then to steps at the rear.
 |
|
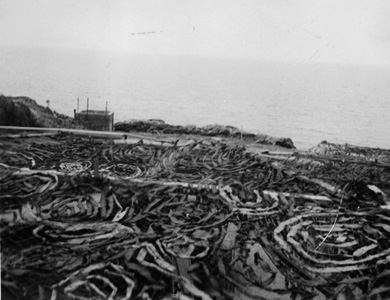
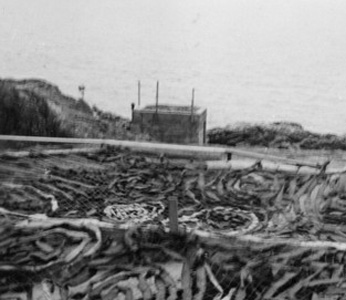
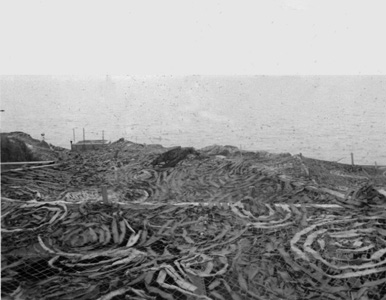
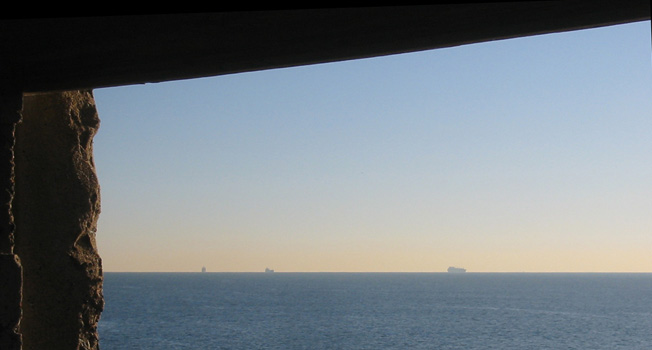
Looking out of the Administration & Power Hut window over the war-time indicator loop field. The shipping channel into Boston is obvious. |
|
|
The diagram above is taken from Gerry Butler's "Military Annals of Nahant,
Massachusetts" 1996.
| 1. Battery | 9. Tool and equipment storage | 18, 22, 29. Chair |
| 2. Petrol (gasoline) engine | 10. Oil furnace | 19. Flue and chimney |
| 3. Alternator | 11, 13, 25, 30. Shelving | 20 Desk |
| 4. Radiator | 12. Radiator (heater) | 21, 28. Table & typewriter |
| 5. Louvered window | 14. Coat rack | 23. Bunk curtain |
| 6. Main junction box | 15. Fire extinguisher | 24. Bunk |
| 7. Main switch box | 16. Arms rack | 26. Electric range |
| 8. Main fuse box | 17. File and safe | 27. Electric refrigerator |
 |
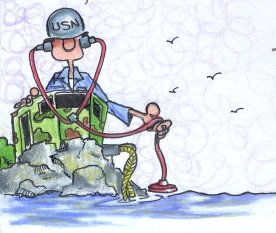
|
During WWII a cartoon was mounted outside the Administration and Power Building at Nahant on the entrance walkway rails. It was of Popeye with a telescope and megaphone (to represent a listening device) as not to divulge the secret systems in place. Redrawn by Gerry Butler. |
The Naval Administration and Power Building photographed in December 2008 by Dave Pierson.
 |
 |
|
The power room end of the building (closest to us) is on the southern side and is 12' wide (from L to R in the photo) and 7'8" deep. There were just the one window, a door and a concrete floor in this end. |
The building measure 22' long by 14' wide and was 9'7" high. The upturned concrete slab is the remains of the 'head' - a toilet constructed outside the main building. |
 |
 |
| The rear of the building. Concrete steps, platforms and (originally) steel safety rails led from the bluff to a walkway that completely enclosed the station. | Looking north-east out to see over the loop field from the path at the top of the bluff. |
 |
 |
| Looking south-east over the loop field at a lobster fishing boat. | The administration room is at the northern end. It is 12' square with two windows and a wooden floor. |
 |
 |
| The power room. Ceiling battens show where the ply lining was attached. Note the concrete slab that was once the foundation for the latrine. | The front wall of the building. The spalling of the concrete from the salt water spray is obvious. |
 |
 |
| The rear wall of the building. Note that the thin internal concrete wall has been demolished. | The hut back in June 2000. Graffiti is periodically removed. |
 |
|
Further decay by August 2011 |
MANNING
To staff the East Point naval station, the Navy advertised to residents of Boston, South Boston, Chelsea and Lynn for volunteers to undertake "special radio training". They were keen to have seamen who could live at home. Upon acceptance, volunteers were given a rigorous security clearance followed by special training at the Boston Naval Shipyard. After completing the technical training they were sent to the US Naval Sound School at Fort H. G. Wright in New York. The first group of seven enlisted naval personnel arrived at East Point (Nahant Naval Station) on 9th June 1942. Staff who could not live at home were quartered at the Lynn Young Men's Christian Association rooms on Market Street. On 1st August 1942, the complement of the station was increased to 12 men. The following text has been extracted, with permission, from Nahant's Naval Secrets (Nahant Historical Society, 2012).
|
Ensign Perry, USNR, and six enlisted naval personnel reported to the Nahant Naval Station June 9th, 1942. One of the original crew manning the Nahant station was Seaman First Class Alfred LeBlanc, who provided this information about selection and training of personnel for loop-station duty. Like many others, Seaman LeBlanc volunteered for the "special radio training" that the First Naval District in Boston offered to qualified and selected personnel. Upon acceptance, candidates were engaged in rigorous security investigation, followed by special training school at the Boston Naval Shipyard. After completing the required classes all successful personnel were transferred to the U.S. Navy Sound School at Fort H.G. Wright in New York. Following a three-week intensive course on theory, operation and maintenance of the magnetic-indicator loop and sono-radio-buoy systems, the personnel were returned to Boston for reassignment. Most of the personnel assigned to the Nahant station resided in Boston, South Boston, Chelsea, and Lynn. Beyond normal duty hours and drills, most elected to live at home when transportation could be arranged. Quarters were provided for the naval personnel at the Lynn Young Men's Christian Association (YMCA), at that time situated on Market Street, in nearby Lynn. Upon arrival at the Nahant station, the new naval personnel assisted the civilian labor force as much as practical to finish the operations building and establish the magnetic indicator loop. Much of the work that the small garrison performed included trenching the landline of the loop tail-end cable. After completion, an armed guard patrolled the landline and building areas day and night. In a very short time, the naval station was operating smoothly but the detection apparatus had yet been completely installed or tested. Passive-defense measures, including building camouflage, were now added. The operations building was spray-painted with varying tones of sand and rock colors, the administration and power building too was camouflaged with color and the rear segment was blended into the adjacent rock strata. The forward, exposed segment was disguised with a cleverly constructed imitation rock and ledge stratum made of concrete and mortar, which remains at present. On the seaward side of the buildings, holes were drilled in ledge and fissures used for metal rods to string barbed wire. At present only the rusted bases of the rods remain. Provisions to include eyelets drilled and fastened into adjacent ledge were made to stretch netting to cover both building areas. The netting was not installed, however, due to the complete effectiveness of the camouflage measures in place. Drills and unannounced inspections were common at the naval site. Coast Guard and Navy warcraft and submarines constantly tested the cables and loops at the shore station. Constant practice enabled the watchstanders to identify specific warships or commercial vessels, including fishing craft, around the Port of Boston by their signatures.
|
The staffing arrangements didn't change over the next two years of operations. Ensign Perry USNR, who was the first commander of the station, relinquished command on 1st February 1943 to Lt J. C. Gamble USNR, but Lt Gamble was transferred on 26th May and Ensign Perry resumed command until 21st March 1944 when Lt M. Preston USNR took over command. The staff included six officers in April 1944 but by June 1944 only two remained. In May 1944 the total complement was 22 enlisted men but this dropped to 11 by June. The station closed at 8:00 AM on 29th May 1945 and was decommissioned soon after.
SOME INCIDENTS
For the eastern seaboard, June was an exceptionally tense month. Numerous
sightings of enemy submarines and saboteur landings were reported, and a
submarine crossed over a loop cable in Casco Bay, Maine, but it escaped owing to
the fact that the cable failed to record it on the way out. Extract from Nahant's Naval Secrets:
|
On June 11th, 1942, ten mines were sown off Boston (U-87) and Delaware Bay (U-373); on the following day mines were placed off Cape Henry, Virginia (U-701); on June 13th, four enemy agents landed at Amagansette, Long Island, New York (U-202). Four days later, four enemy saboteurs were landed by German U-boat U-584 at Ponte Verde Beach, south of Jacksonville, Florida. Agents of the Federal Bureau of Investigation captured all shortly thereafter. On June 16th, two ships in Convoy XB-25 were sunk northeast of Cape Cod in a raging gale within four minutes of each other by the German submarine U-87. The Cherokee, of United States registration and the Port Nicholson, of British registration, sank off Chatham and have become a most controversial matter. The Nicholson purportedly was secretly carrying an immense amount of precious metals and other valuable goods from the Russian Government for payment of lend-lease aircraft and other war materiel. To date the mysterious circumstances involving the Port Nicholson remain unanswered. Newly discovered information indicates that there may have been more than one submarine involved in the premeditated sinking of the Nicholson. |
Despite the new submarine detection systems in place at both Nahant and
Scituate, an incident took place within the Port of Boston on June 25th, 1942
involving the Nahant, Strawberry Point Magnetic Loop Station and the HECP that
remains classified to this date. Gerry Butler has investigated this in detail.
In an unpublished document, "Letters to my Grandson," and by interview with
Colonel Gilroy F. Linehan, the former commanding officer of Nahant and Boston's
tactical north shore defenses, the following incident is described:
|
A signal was reported by the loop station. The watch officer alerted the Coast Guard inshore patrol, which soon reported no surface vessels in the area. It was late at night and searchlights swept the area. Nothing could be seen. Shortly afterward a strange pickup with the mine hydrophones (from the Fort Warren Mine Casemate on George's Island.) The watch officers on duty quickly checked with the Eastern Sea Frontier to see if any of our submarines were operating in the area. The answer was negative. The mine casemate at Fort Warren then reported the arming of a mine. The cautious watch officers delayed firing the mine, not wishing to blow some friendly fishing vessel to Kingdom Come. A short time later, a signal appeared on the mine casemate panel indicating that the mine which had armed had grounded. By that I mean that sea water had entered the case and electrically grounded out the firing circuit. A tense alert condition continued throughout the night, but no further signals were noted. In the early morning, a mine battery L boat raised the mine and replaced it with another. When it was examined on shore by our people and Army Intelligence, the spherical case was found to have two curved gashes in it. Adhering to the cuts were particles of brass, and all concerned believed that an underwater craft had struck it and caused the grounding. We missed what was probably our only chance during the war to take action against the enemy. This incident was never made public. Except for the HECP personnel and very few others no one knew the full story of that alert. |
Gerry Butler reports that the incident locked down Boston Harbor for three days and nights. In a 1968 telephone conversation with Colonel Albert Crawford, the Army officer on duty at the HECP, Gerry had the incident verified, including the mines to be placed on "Set 1" which registered on the mine panel board but did not activate the mine. A letter dated 1979 from the Gerry to the U.S. Navy Historical Office was answered denying the incident emphasizing that no enemy craft ever gained access to the Port of Boston. None-the-less - the Navy's secret WAR DIARY, states: 25 June, 1942: "PC-487 investigated loop signatures, Nahant, Deer Island and Strawberry Point. Submarine was believed to have gone down N. Channel and out Nantasket Roads. No contact of any kind was made. The Port was closed when the signatures were reported." The incident remains classified to this date.