Fort Bribie
 |
 |
 |
 |
Fort Bribie was built on Bribie Island, Queensland, Australia, during WW2 as part of the Moreton Bay harbour defences.
Photos and research by Dr. Richard Walding (copyright).
 |
If you worked there or have any feedback please email me: Dr Richard Walding Research Fellow - School of Science Griffith University Brisbane, Australia Email: waldingr49@yahoo.com.au |

LINKS TO RELATED PAGES:
LOCATION OF BRIBIE ISLAND
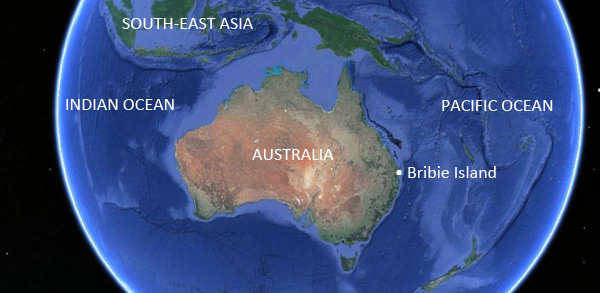 |
Bribie Island is a small island in southern Queensland, Australia. |
LOCATION OF FORT BRIBIE
| Fort Bribie lies at the northern tip of Bribie Island, about
25 km along the beach from Woorim. Details of how to get there are at the end of
this article.
It was constructed at the outbreak of World War 2 as a part
of the defence of Moreton Bay. Originally it was fairly primitive but as
Japanese aggression increased the fort was upgraded to become the major
defence installation in the Brisbane - Moreton Bay area.
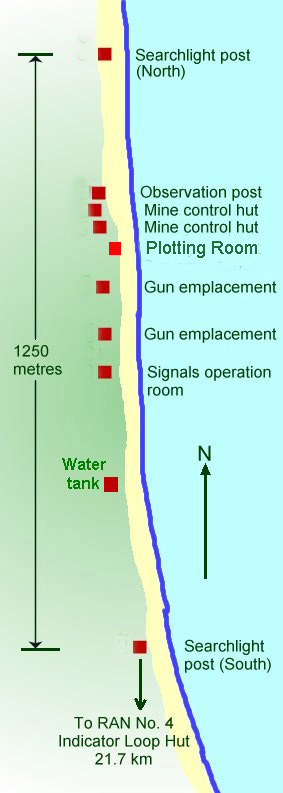
The map opposite shows the location of the most important
elements of the fort. The accommodation area extended from the Battery Observation
Post down to the Signals Operation Room, on the Eastern side of the
defence installations.
The Fort is of great historical value as it provides
material evidence of the preparations for the defence of the country in
World War 2. They also provide an historical record of the technology
of defensive arrangements at the time of WW2. Land based defences such as
these gun batteries have become outdated in the defence of Australia. Those
remaining provide a vital link to the past.
They also provide a site that has been untouched since it
was abandoned in 1945 and apart from the effects of natural forces they
remain largely as they would have appeared after the army left the site.
This web page documents a brief history of the establishment
of the fort and the methods used in its construction. The photos and
commentary detail the state of the remains of the fort today.
|
 |
A BRIEF HISTORY
As the tide of events in Europe and Asia in the
1930s moved the world towards war, batteries were improved or established in the
key areas of Sydney, Darwin and Fremantle. The defence of Moreton Bay had been
concentrated on the mouth of the Brisbane River at Fort Lytton. With the
push for rearmament of Australia's coastal defence and with the improvements in
weapons technologies, attempts were made to enhance the defence of Brisbane and
the greater Moreton Bay region. An artillery battery was established at Cowan
Cowan Point on Moreton Island between the wars and took over the role of
examination battery in the bay.
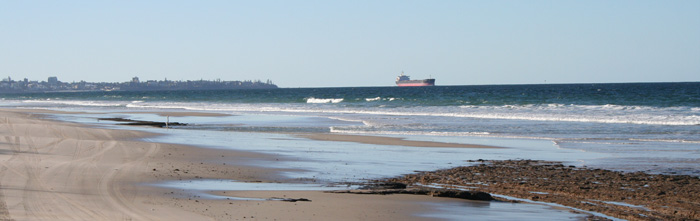
A ship in the main channel of Moreton Bay has just turned south after approaching Caloundra headland.
In February 1939, some six months prior to the start of WW2, a review of the defences of Moreton Bay was undertaken before any more money was spent on Cowan Cowan. Funds made available by the Military Board for Moreton Bay defence included ₤13100 about to be used for Cowan Cowan, ₤6000 for tracks and ₤1500 for water provision. It is worth noting that ₤1000 in 1939 is worth about $84000 today (2022). The report suggested that the main defence should come from 2 x 6" Mark XI guns at north Bribie with the soldiers barracks at Caloundra. It was proposed that the examination battery stay at Cowan Cowan (with 1 x 6" gun); and river defences remain at Fort Lytton (1 x 4.7" QF gun).
The Commandant of the First District Base at Brisbane, Lt Col
Sir D C Cameron expressed his opinion to the Military Board in Victoria that the
defences of Moreton Bay were inadequate. Unfortunately, there was a breach of
security and word of his concerns leaked out to the Minister for Defence who
wanted to know who was responsible for this propaganda. The Military Board were
outraged and wanted to know how it was that "correspondence has been divulged".
After much blood letting, the incident blew over. Nevertheless, the claim was
clear - Moreton Bay was inadequately defended.
Over the next year there was much to-ing and fro-ing about the best place for the major defence base - Bribie or Caloundra. On 17th June 1940, the Major General of Northern Command recommended Bribie Battery. On 16th August 1940, Colonel Gwyn P.W. "Horsey" Meredith, Director of Artillery, recommended that no more work should be done on Bribie and that the guns should be transferred to Caloundra. The main reason was that it would be ₤64000 cheaper at Caloundra (that's $5.2 million in today's dollars 2022), but this included ₤54000 for a bridge. Colonel J S Whitelaw arrived at Bribie on 14th October 1940 as OC Coast Defences, Northern Command. He designed the layout of the fort and recommended its completion. By the beginning of 1942, it had finally been decided that Fort Bribie should go ahead, mainly on strategic grounds (closer to the shipping channel). Construction of the permanent gun emplacements began and by April were almost complete.
 |
 |
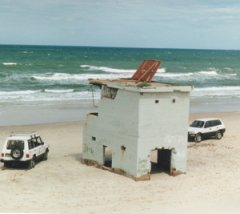
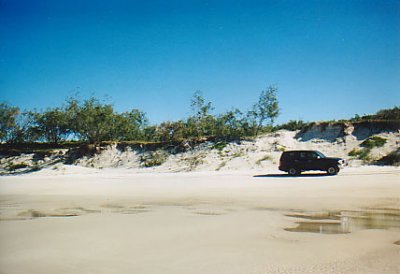
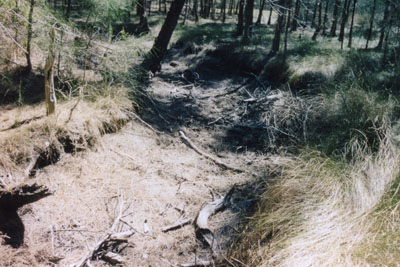
| The frontal dunes at Fort Bribie as they are today | The shipping channel in front of Fort Bribie |
The concrete structures at Fort Bribie took some months to complete and was operational by early 1942. Construction cost was ₤55,000 (about $4½ million in today's dollars, 2022). When completed, Fort Bribie assumed Examination Battery status within the Moreton Bay Region. Fort Headquarters were located at Caloundra, just over the Caloundra Bar at the northern tip of the island.
HOW FORT BRIBIE WORKED
The Fort Observation Post (FOP) was located in a large house (Buena Vista) near the coast at Caloundra. From here the batteries of Moreton Bay were commanded. The positions of the targets were deduced from the range finding apparatus (Depression Range Finder, DRF) and Barr & Stroud telescope. This information was then telephoned to the Fort Plotting Room (not shown on the above map) where the path of the target would be traced. Calculations were made for the required bearing and elevation of each gun to hit the target. Instructions were then passed to the gun crews for aiming the guns. Communications with FOP at Caloundra would be maintained until the command to fire was given.
|
|
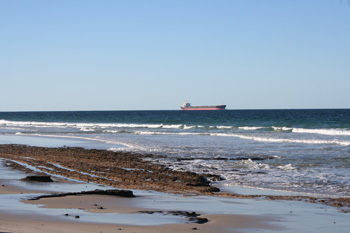
The beach in front of Fort Bribie - looking North to the Caloundra Port War Signal Station (arrowed). |
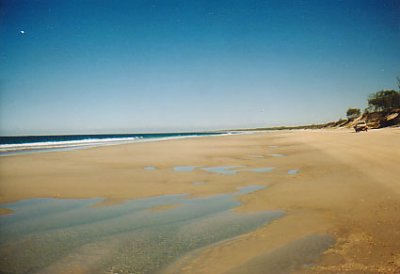
Low tide - looking South at Fort Bribie. Skirmish Battery and the RAN4 Indicator Loop Station are 18 km South. |

ACKNOWLEDGEMENTS
My thanks to Marcus Richardson (Cultural Heritage Planner, Queensland Department
of Environment & Heritage), Peter
Marquis-Kyle (Conservation Architect), Scott Rogers (EPA, Bribie Island) and Ron
Donald (Author, Fort Bribie) for their assistance in compiling this
report. Useful sources are: Bribie Island Fortifications Conservation Study (Queensland
Department of Environment and Heritage, 1993) prepared by conservation
architects Allom Lovell Marquis-Kyle Pty Ltd; and Fort Bribie Camp Layout - NAA File BP378/1.
A useful book on Sydney's Anti-Ship Defences 1939-1945 is "We Stood and Waited" by R. K. Fullford (Royal Australian Artillery Historical Society Inc., 1994). Wartime comments come personally from soldiers who were stationed there: the late Captain John McKenna - RAA Bribie Battery 1943, Graeme Jenkinson RAE and Cpl. Peter Pechy. My thanks to John Groves from Caloundra for providing the War Diary of Bribie Heavy Battery and help locating the Command Post.
Note: GPS co-ordinates are based on WGD 84 datum. To convert from WGD84 to GDA94 add 180 m to the Northings and 120 m to the Eastings (or subtract 6 s to latitude and 4 s to longitude).GUN EMPLACEMENTS
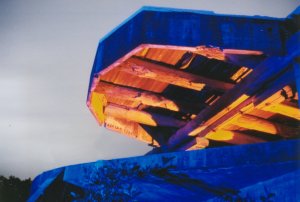 |
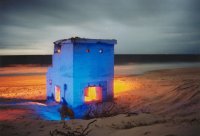
| The southern gun emplacement at full moon in 2002. Lighting by Dave Wicks. Photo by Richard Walding. |
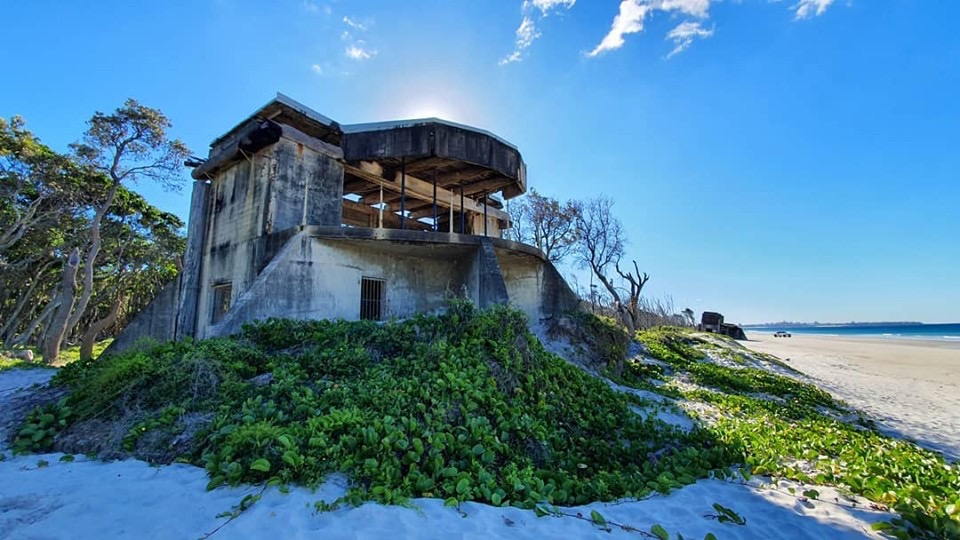
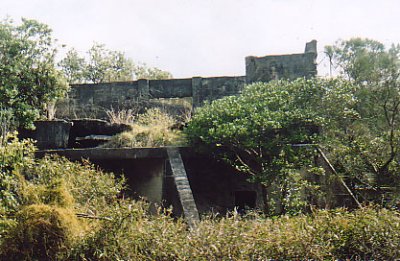
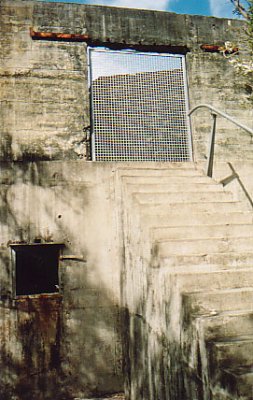
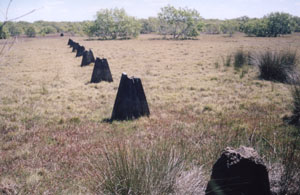
The two gun emplacements are relatively sophisticated structures. They are 15 m square and the roof is about 7.5 m above ground level. The Southern emplacement (No. 1 gun) is right on the sand dunes, whereas the Northern emplacement (No. 2 gun) is one the beach. These emplacements were built as two stories, with a raised concrete platform and buttressed supports, upon which the gun was centrally located facing the ocean, with five rooms below (see Figure 1 below) used for storage of shells and cartridges and accommodation for the duty officer. The buildings are open to the east and curved to allow for a wide range of sight. Steel doors were originally installed along this arc to protect the position. External stairs to the west at the rear of the emplacement give access to the gun level from the ground. Details about the guns and gun histories can be found on the Guns of Fort Bribie page.

The gun floor slab is very thick at 255 mm and has top and bottom reinforcement in good condition. The load capacity is at least 11.5 kPa. The roof is 130 mm thick and sits on strong seasoned hardwood about 50 cm thick. These were 155 mm (6") naval guns with 26 foot long barrels (taken from HMAS Melbourne) and fired 100 pound (45 kg) projectiles at between 4 to 8 per minute at low trajectory and high velocity to a distance of about 16000 yards at an elevation of 20°.
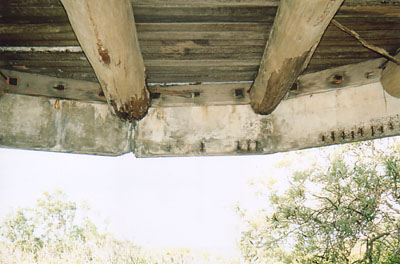
Southern Gun EmplacementThe Southern (No. 1) Gun Emplacement is still relatively intact and the duty roster can be still seen on the Gun Floor Shelter (Room C). Shells were stored in the Shell Store and passed up to the gun floor by a hand-operated hoist. The Magazine contained the cartridges which were made up of sticks of cordite bound into cylindrical-shaped silk bags and stored in metal tubes. They were passed through into the 'handling room' via a flash-proof door and were then hand-hoisted up to the gun floor. The roof of large timber logs, concrete and concrete filled hessian bags remains virtually intact. In the photo below, the termite eaten timber beams and spalling concrete can be seen.
 |
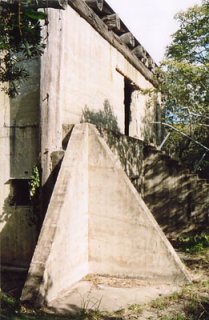 |
| Canopy of Southern (No. 1 Gun) Emplacement | Buttresses at the NW corner. |
 |
 |
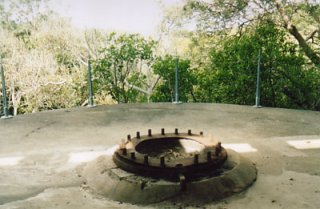
| Gun mount at the Southern Gun Emplacement - looking east towards Moreton Bay. Note that it is on a 6" high concrete plinth which was used to allow a greater elevation of the gun. | The BL (breech loading) cartridge was hoisted up from the magazine below through the opening on the left. The shell door is on the right of this photo. Shells were hoisted up through this opening from the Shell Store on the ground floor. |
 |
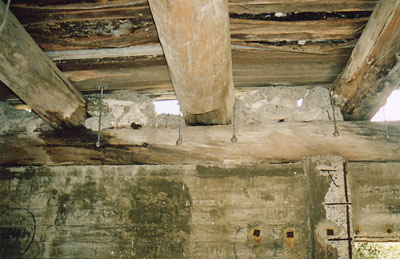 |
| The Gun canopy as seen from gun mount position (looking towards the ocean). | The gun floor roof looking west. Note the bags of concrete used as infill, and the decaying wooden roof. |
 |
 |
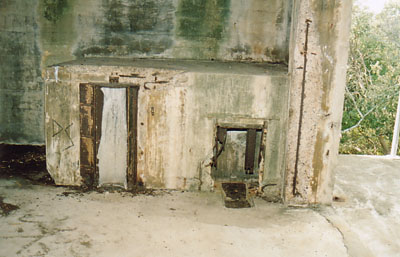
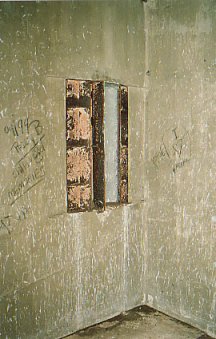
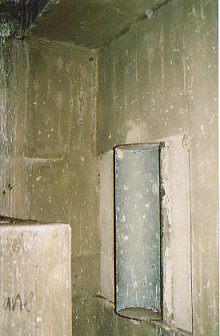
| The entrance to the cartridge Magazine has a metal door frame sheathed in copper (see below). | Entrance to the Gun Floor shelter (duty room) has a wooden door frame. |
 |
 |
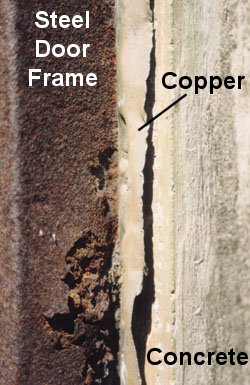 |
| Flash-proof cartridge tube (measuring 42" high and 16" diameter) shown from the cartridge magazine side (Room E). | A cartridge in its metal container is placed in the opening which is then rotated so that the opening faces the handling room where it is then removed. It is then passed up to the cement stand on the left of the photo and hoisted up to the gun floor by hand winch. | Rusted steel door frame to the cartridge magazine (about 5 cm wide). Note the copper sheathing in the middle between the concrete and the metal. This was an anti-flash covering which has since been stripped off. |
 |
| Southern gun emplacement - 6 June 2019. The emplacement is now right on the beach. You can see the northern gun 100 m in the distance closer to Caloundra. |
Northern Gun Emplacement
- is 117 metres to the North of the Southern
Gun Emplacement. It is also called the No. 2 Gun. The roof collapsed in the
1990s after a bush fire set them alight.
 |
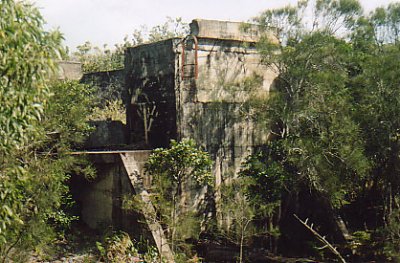 |
| Northern Gun emplacement - view from the front | Northern Gun emplacement - from the NW corner |
 |
 |
| A metal gate was added in 1994 to keep sightseers out of danger. | Duty Roster in the Gun Floor Shelter is still readable. Across the top the headings read: Duty Watch, Alarm, Manning (No. 2), Reserve, Watch. Men would sit, sleep, relax, listen to the radio, drink tea and coffee here while on duty. The room was lit with a red bulb to keep the soldiers' eyes dark-adapted. A lookout would always man the gun floor. |
Six-inch gun being used at Cowan Cowan
battery similar to that used at Fort Bribie.
See: https://youtu.be/fqVQiwOWQRY
|
|
The Artillery Store (Building 48) was about 50m to the west of the Signals Operation Room. Here, the concrete stumps can easily be seen. It contained spares, tools, cleaning and lubricating supplies needed to keep the guns in good condition and to make good any damage incurred in action to the extent possible in the circumstances. |
The Auxiliary Magazine - slab behind No. 1 gun |
|
|
Northern (No. 2) gun after the storms of May 2009. It is now on the beach (2022). |
It is clear the effect the storm surges had on the foredunes. |

COASTAL ARTILLERY SEARCHLIGHTS (CASL)
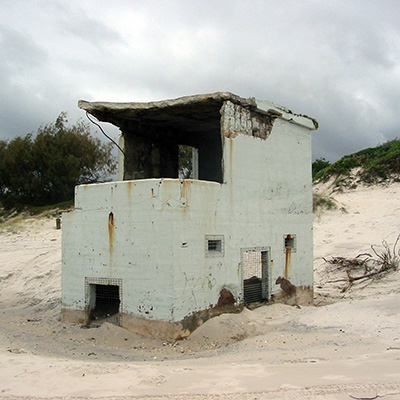
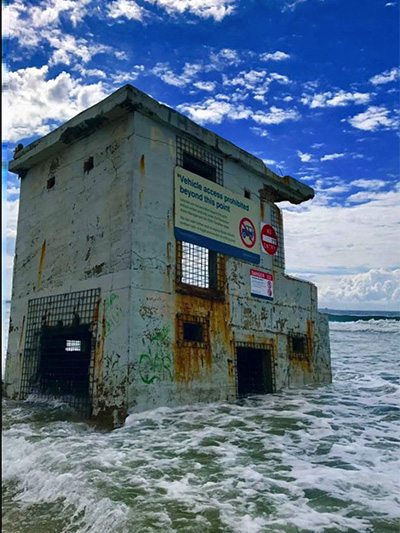
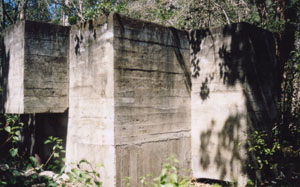
The Coastal Artillery Searchlights were located at either end of the Fort. They are two stories high, rectangular in plan, with an enclosed lower level to house a generator, and an open-fronted upper level to house the searchlight. There are window openings on each of the northern, southern and eastern sides, and a large doorway on the current ground level of the southern side. In the time of its operation (1942-1945), stairs led from the existing ground up to this doorway. There is a large flat concrete roof 6" thick. The Northern CASL (No. 14) structure was dangerous because of cracks and spalling and there was a serious risk of concrete failure and collapse. It was demolished in August 2022.
 |
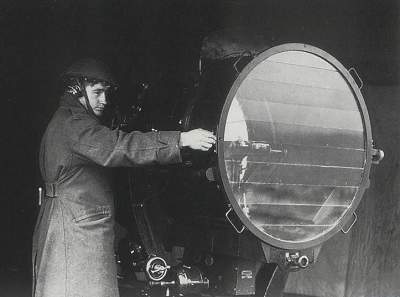 |
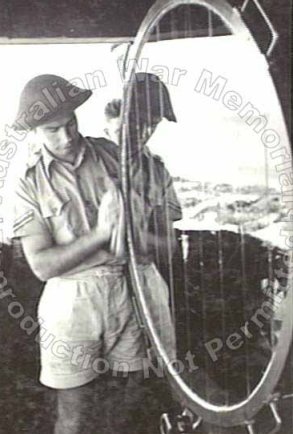
| 90 cm Coastal Artillery Searchlight - Moreton Bay 1943 | |
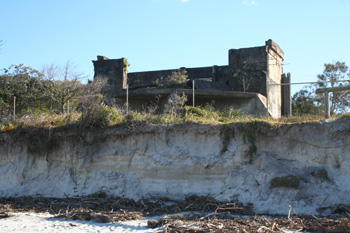
The Southern Searchlight (No. 13) from the ocean side (left) and from the rear. It was behind the dunes and until 2001 it was not visible from the beach but storms and wind owered the frontal dune. The concrete structure was fairly complete up until 2002, although it was leaning 5º to the south. GPS co-ordinates (WGD84): S26°51.986' E153°07.806'.
 |
 |
| Southern CASL facing beach - 14 June 2004. Since demolished. | Southern CASL. View from rear. |
 |
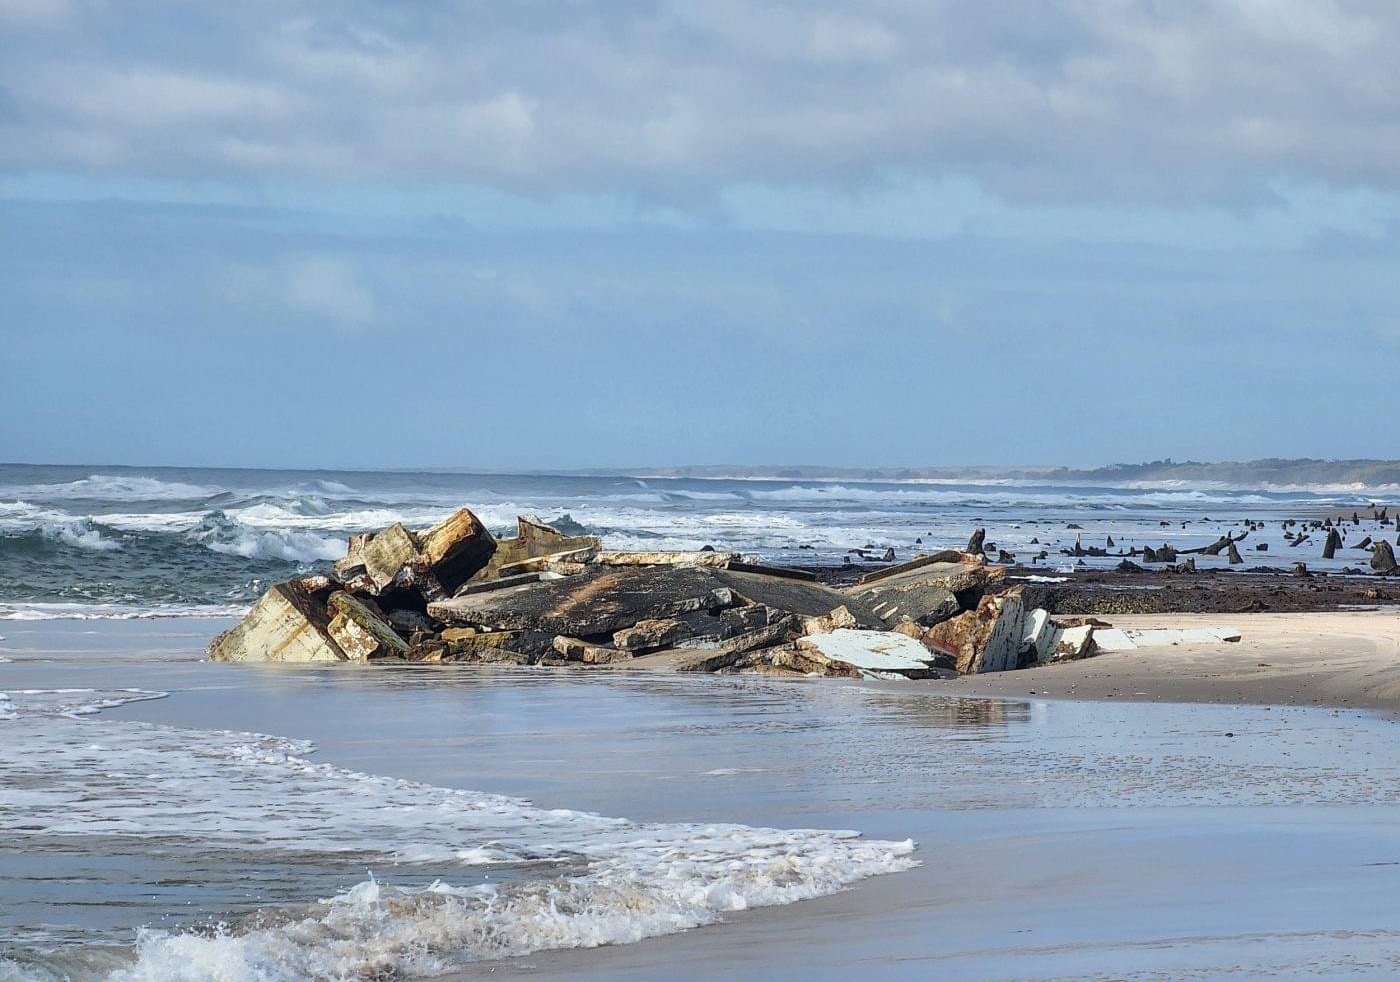
| The Southern CASL in August 2022 as it slowly succumbs to the elements |
Moreton Bay Daily - 4 August 2022by Kylie Knight Parts of the northern and southern WWII forts on Bribie Island will be collapsed following corrosion of the structures, 'as a result of recent severe weather'. The Department of Environment and Science (DES) made the announcement today and say it is in 'the interest of public safety'. Queensland Parks and Wildlife Service Executive Director Neil Cambourn said the natural decay of the WWII structures had led to a serious safety risk to members of the public, and that work was expected to commence later this week, weather depending, to bring the structures to a safe and stable state, which will then be left in-situ. "The Department has been working to find a way to keep park visitors and staff safe while preserving as much of these historically-significant, structures as possible, which form part of the State heritage listed Second World War Fortifications on Bribie Island," Mr Cambourn says. "The Queensland Heritage Act 1992 allows for action to be taken in emergency situations which endanger peoples' lives or health, as is the case here. "These structures were built for a temporary purpose using concrete and steel reinforcing, which is expected to continue crumbling in Bribie Island’s highly erosive coastal environment." Mr Cambourn says the department has taken previous steps to protect the public around the searchlight forts including the installation of fences, security panels and signs. "DES continue to maintain the remaining structures but there is no way to prevent natural coastal processes from taking place," he says. "The Department is committed to ensuring Bribie Island National Park’s dynamic landscape and unique coastal biodiversity is protected and remains in its natural state and there are no plans to interfere with the natural coastal processes that are impacting the searchlight forts."| DES is considering long-term options to further manage all fortification structures on Bribie. These other structures will not be impacted by the upcoming works to secure the searchlight sites. |
 |
| Southern CASL - 4 August 2022 - after being rendered safe by the Queensland Department of Environment and Science |
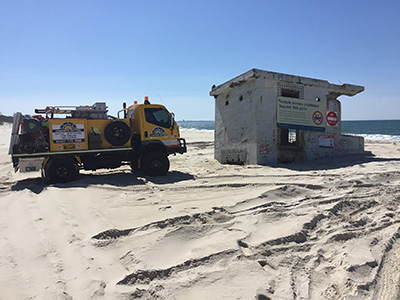
The Northern Searchlight was about 1.2 km north of its companion. In 1944 it was about 50 m from the beach but shifting sand, (awash at high tide), wave and wind action have eroded this section of the island and it now makes long-term preservation difficult. It will continue to deteriorate and the local Council can do no more than protect the public from dangers. It marks the northern-most point for four-wheel drive access. GPS co-ordinates (WGD84): S26°51.247' E153°07.768'. The remaining 5 km to the northern tip of Bribie Island is on foot only.
 |
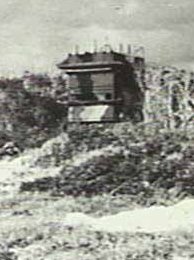
| Fort Bribie CASL - 1950s. Hard to tell if it is the Southern CASL or the northern one. (Susan Clark) |
 |
| Fort Bribie CASL in the late 1980s. Could be southern or northern one. (Sammy Byrne) |
 |
 |
| Northern CASL - 14 June 2004 | 14 June 2004 |
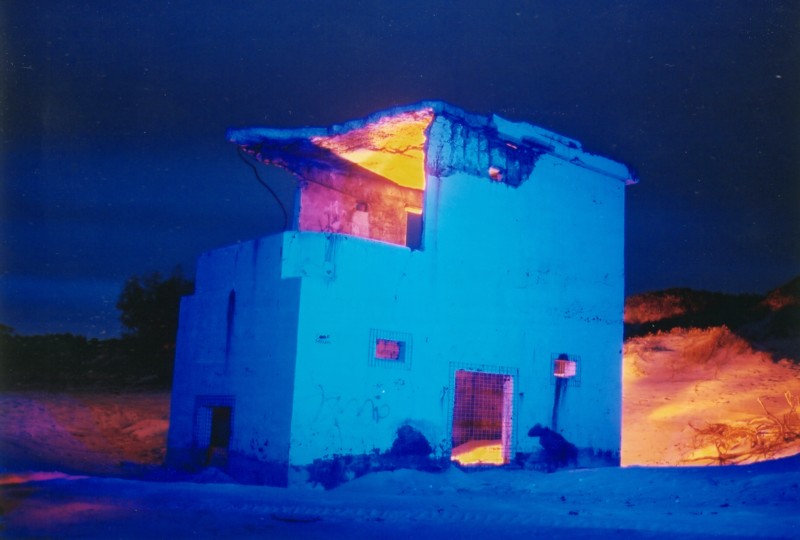 |
| The Northern CASL at 10 pm on the night of the full moon - 20 October 2005. Lighting by Dave Wicks. Photo Richard Walding. |
 |
 |
| Safety work undertaken in 2017. (Moreton Bay Concrete Cutting) | Photo from Moreton Bay Concrete Cutting |
 |
 |
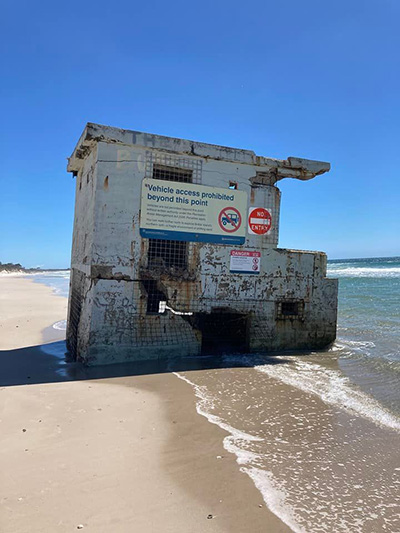
| 2021 - in the water even at low tide | 2021 - the rusting is even more pronounced |
 |
| The Northern CASL - August 2022 - after being rendered safe by the Queensland Department of Environment and Science (Moreton Bay Daily, 4 August 2022) |
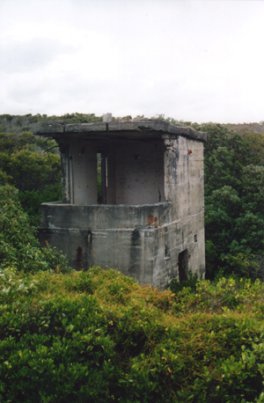
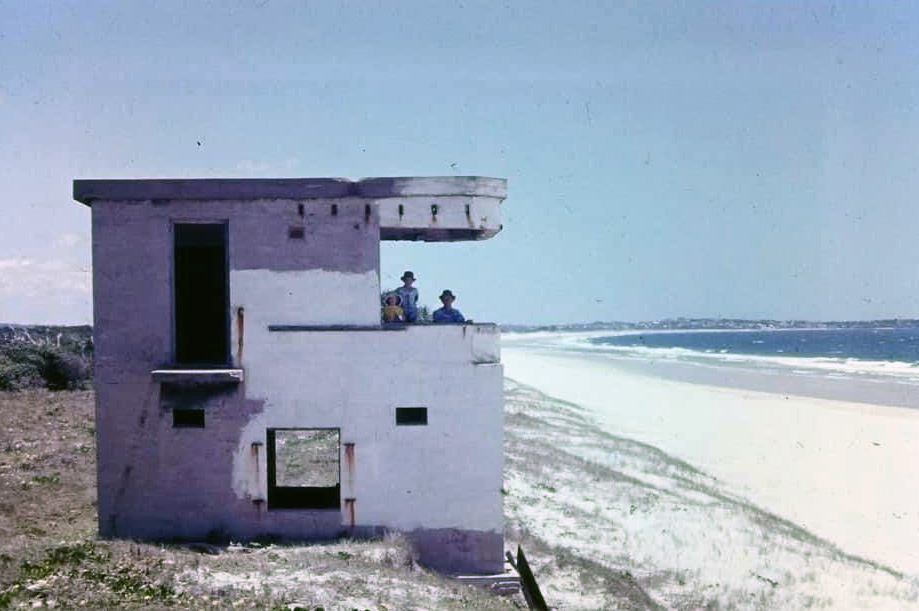
BATTERY OBSERVATION POST (BOP)
As with all counter-bombardment batteries, the Battery Observation Posts used in Australian Coastal Defence in WW2 was displaced from the guns. This was to remove it from the flash, blast, vibration and noise of the guns firing as well as gaining height for the depression range finder (DRF). Like all BOPs, it was housed in a concrete blockhouse with a cantilevered flat roof giving an observation window opening which allowed an unobstructed 200 degree arc for range-finding and observing instruments. It was located about 25 metres to the north of the Mine Control Huts.
Its task was to provide target bearing and range data (by depression position finder) to the Battery Plotting Room; to provide course and speed data (by the Inclination Officer) to the BPR (Battery Plotting Room); to observe fall-of-shot and to order spotting corrections to the BPR (done by the Battery Commander); to be the communications centre of the battery. When in counter-bombardment mode, the Duty Battery Commander was stationed at the BOP.
The staff of the BOP was four: the Battery Commander (who would wear a head and breast set for communication with the BPR), the Battery Commander's assistant who would record orders and fall-of-shot; Fire Command telephonist, Inclination Officer who would also wear head and breast set for communication with the BPR.
The following were housed in the BOP: depression range finder, indicator (time of flight), decoder (fall-of-shot), stereoscopic telescopes (2 pairs), four desk/stools (one for each operator). They also had various manuals: tide tables, ship and aircraft recognition codes; message log; log of sightings; Fire Commander's Standing Orders; silhouettes of own and enemy warships and aircraft; International Code of Signals; Jane's Fighting Ships; Coastal Artillery Training Volume 3. On an 8' high cement platform at the base of the tower was the room for the Barr and Stroud Rangefinder. It was made of fibro and had canvas curtains.
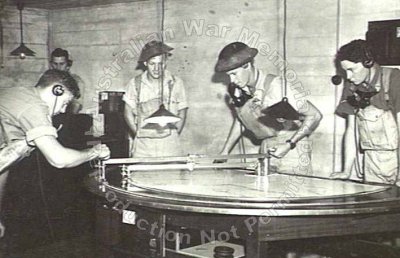
The photos below shows a Rangefinder and DRF in use. Note: good photos can also be found in AWM archives: photos 63471 and 63470.

Left: A 9' Barr and Stroud Rangefinder. Right: An observation detail
in the BOP at Fort MacArthur, Los Angeles in 1944. An M1910 azimuth telescope
Rangefinder is being used on the left and a Model 1907 Depression Position Finder (DPF) - also called a Depression
Range Finder (DRF) - is on the right.
 |
|
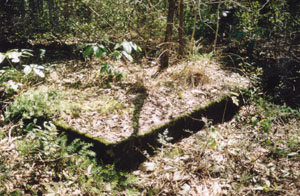
| The only remaining part of the BOP. The base concrete slab was 8' off the ground and was the floor of the Barr & Stroud Rangefinder room. The tower, which was to the left, was dismantled in 1945, |
COMMAND POST (CP)
 |
 |
| CP before being camouflaged - October 1943 (AWM). | CP after camouflaging by 14th Australian Camouflage Unit - possibly 1946 (AWM). |
It is located at the southern end of the camp, about 370 m south of the Southern (No. 1) gun emplacement.
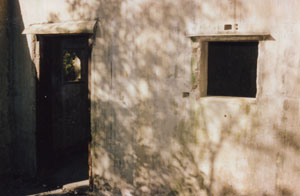
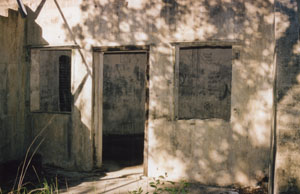
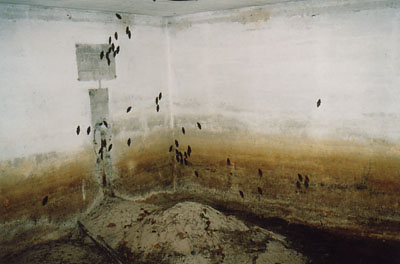
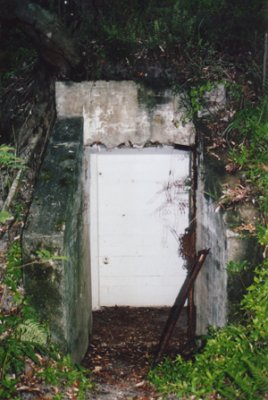
SIGNALS OPERATION ROOM (SOR)
The reinforced Signals Operation Room is about 65 metres South of the Southern Gun Emplacement and was originally underground with a stairway leading down from the northern side. Location: 26° 51.688', E 153° 07.800'.

SOR - view of the NW corner. At the top corner is the top of the
steps (see below).
|
|
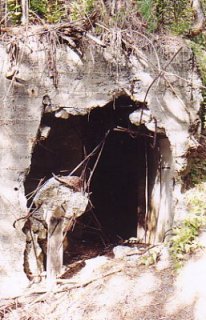
Hole in the blast-proof western wall to let water out. |
Steps leading down to entrance. Photo was taken just inside the hole. |

 |
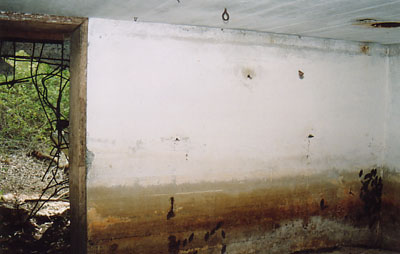 |
| NE corner inside. Outline of equipment (and black moths) can be seen. Water level on wall and sand on floor is obvious sign of flooding. | Western internal wall with hole made to let the water out clearly visible past entrance door. Note hook in ceiling. The door frame is made of beautiful silky oak and is still there. In 1943, the Australian Womens' Army Service (AWAS) began to provide staff for the signals room. |
|
|
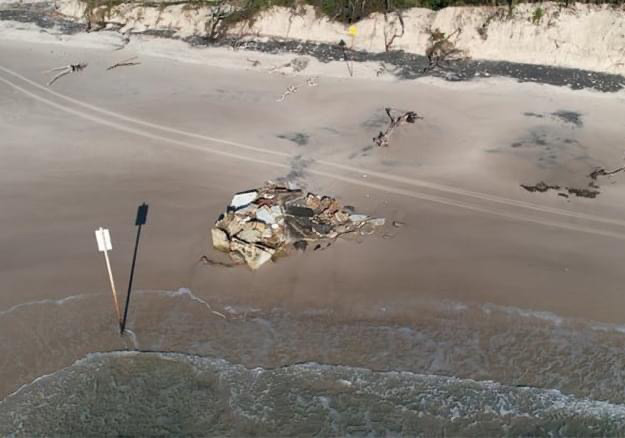
The heavy seas of May 2009 eroded away the frontal dune and in 2009 the SOR sat on the beach. |
The insides were filled with sand in 2009. |
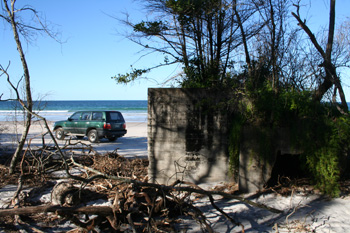
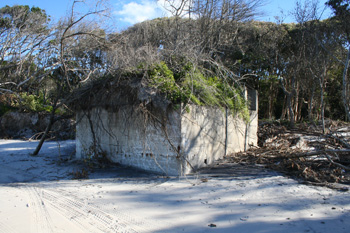
It is now out on the beach (2022) completely filled with sand.
BATTERY PLOTTING ROOM (BPR)
The Battery Plotting Room was located 80 m to the
North of the Northern Gun Emplacement, or about 30 m south of the mine control huts. It was partly protected by the scrub ridge of
dunes and information about the position of target ships given from readings at
the BOP were plotted on a large plotting table. Of all structures, it was the
closest to the beach and was demolished at the end of the war. Since the heavy
seas of May 2009, erosion of the frontal dune has uncovered the foundations of
the BPR. Location: S26° 51.534', E 153° 07.793'. In 2010 is was again covered by
sand and is now no longer visible.
Construction of the BPR began in July 1941 by men co-opted by the Civil
Constructional Corps from Brisbane builders Suburban Constructions under
the supervision of foreman Ern Paget. It was placed just to the north of the
existing northern shell store (no longer there). Originally the BPR was planned
to be a timber framed structure with fibrous cement walls and a concrete floor
but on 21 July 1941 approval was given to use armour plate on internal walls and
roof of the BPR (as well as the BOP/CP). The roof was made from ½" B1
nickel-chrome boiler plate and the walls of ¼" plate supplied by the
Commonwealth Steel Co. Ltd. at £65 per ton. Gravel for the slab (and all
concrete structures at the Fort) was supplied by W. M. Collins and Sons at 31/-
per cubic yard to Caloundra by truck; and nails came from E. Sachs & Co.,
Brookes Street, Fortitude Valley. A total of 1½ cwt of nails were used at
the Fort. The total cost of the BPR structure was £1100 ($72000 in 2008
dollars).
|
|
Battery Plotting Room at Fort Cowan - similar to Fort Bribie. |
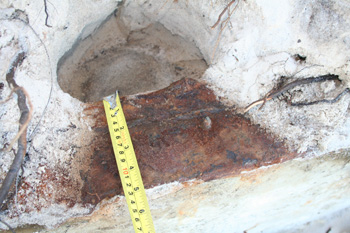
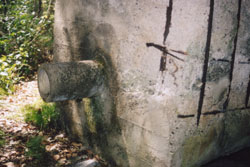
Richard Walding measures the steel support - June 2009. It measures 1240mm high by 930mm wide. |

|
|
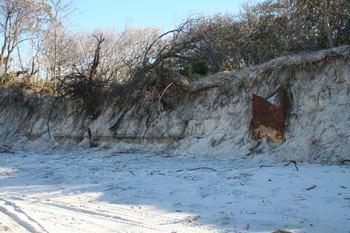
The corner steel support and concrete slab were clearly visible after the May 2009 storms. The slab is 14m (40') long and records show it to be 3.3m (11') wide. |
Door hinge on the steel corner support. The rest of the steel was oxy-torched away after the war. Note the blobs of metal along the top from the cutting. Hard to tell if this was a door. |

|
|
The steel supports meets the slab. The concrete footings are at least 450mm deep and the slab itself is 100mm (4") thick. |
A 4" wide raised concrete lip is on the slab; and the remains of a steel bottom plate are obvious. The slab is of polished concrete as is in excellent condition. |

At October 2022, the BPR no longer is visible.
 |
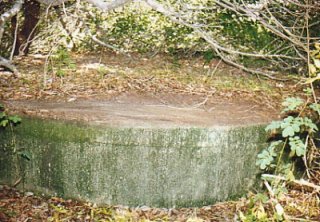 |
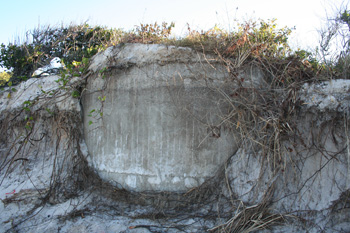
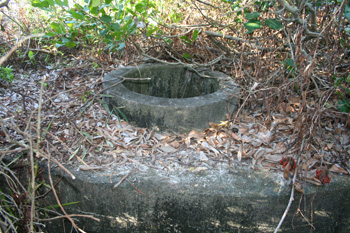
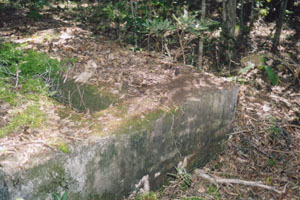
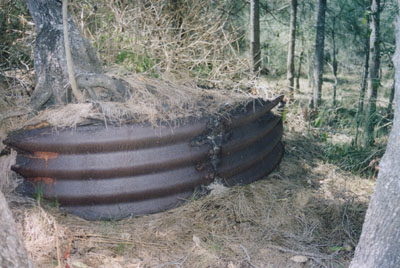
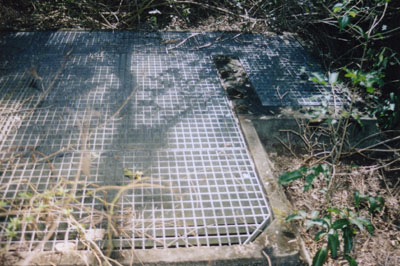
| The Northern Well is about 40' to the south of the kitchen. It is still there and still full of water although DEH has placed a galvanised mesh guard over the opening (this is visible near the top of the photo). The concrete tank is 16' (4.8 meters) in diameter and is now only some 25 m west of the frontal dune. It is very difficult to find as it is usually covered in leaves. I scraped some off to show the top. Location: S26° 51.822, E 153° 07.778'. | The Central Well - identical to the northern one but not discovered by the DEH, hence the opening is uncovered. Diameter is 16' (4.8 meters). Galvanised pipes (2" diameter) carried the water around the camp. Location: 26° 51.915', E 153° 07.786'. |
 |
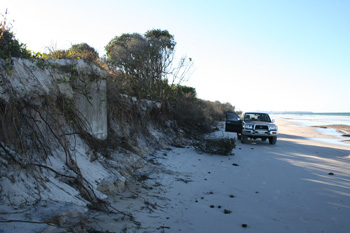 |
| The Southern Well has become visible on the beach since the storms of May 2009. Until then, it's location (and existence) was unknown. Location: S 26° 52.097', E 153° 07.802'. | The May 2009 erosion has removed much of the frontal dune. The tank is visible on the left. The southern well is 1.5 km south of the southern searchlight. |
 |
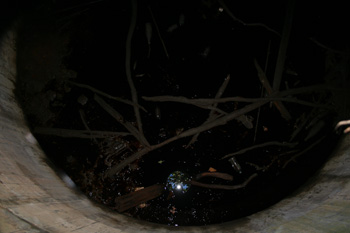 |
| The opening of the southern well is uncovered as DEH workers knew nothing of it's existence. It is about 4 m in diameter. | The southern well is almost empty. The water surface (shown here) is about 3 metres below the top. |
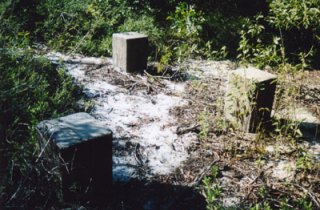
LIVING QUARTERS
 |
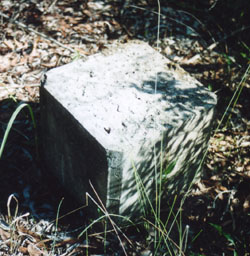 |
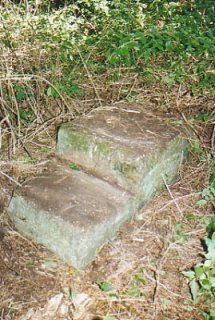
| Concrete stumps of the Orderly Room (Building 47) - about 80 m west of the Signal Operations Room. | Each stump measures 15" x 15" and is 28" long with an underground footing is 3' x 3' and 6" thick. These stumps are at 7' 2" centres. The nearby accommodation huts were 18' wide by 60' long. |
 |
 |
| Left: Steps to the northern side of the Kitchen (Building 30). The kitchen was wooden framed with fibrolite walls and a corrugated steel roof. It measured 70' x 28'. | Right: A 4" earthenware sewer connection under the Canteen (Building 24). The slab measures 4' x 2'. |
 |
 |
| The Mens' Mess Hall (Building 31) was a wooden framed building with fibro walls and a corrugated steel roof. It was just a few meters south of the Kitchen. The foundations measure 18' x 80'. | The Officers' Mess (Building 14) is at the south west end of the site. It measures 18' x 60'. |
|
|
Left: The Northern Well is about 40' to the south of the kitchen. It is still there and
still full of water although DEH have placed a galvanised mesh guard over the
opening (this is visible near the top of the photo). The concrete tank is 16'
(4.8 meters) in diameter and is now only some 25 m west of the frontal dune.
Galvanised pipes (2" diameter) carried the water around the camp. It is very
difficult to find as it is usually covered in leaves. I scraped some off to show
the top. Right: The Southern Well - identical to the other one but
not discovered by the DEH, hence the opening is uncovered. |
|
 |
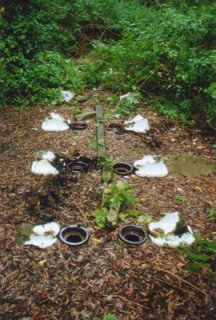 |
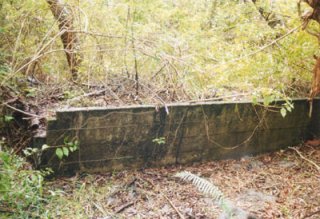
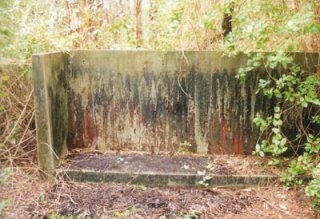
Left: The Men's Latrine (Building 19) has a concrete slab measuring 58' x 18'. The photo above (left) shows the urinal on the eastern side. It is 4' high. Right: There were 8 pedestals in the Men's Latrine - the remains of which can be seen in the photo above. A wood-framed fibro partition separated the two rows. The urinals are a few metres to the left and right. |
|
 |
 |
 |
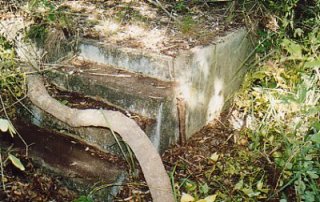
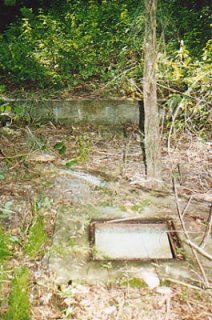
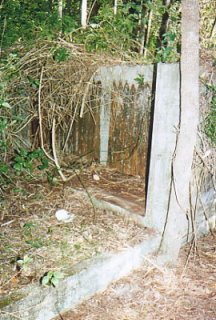
Left: Mens' Shower and Latrine - facing North. The Inspection Opening for the drainage system is at the front. Before the waste water system was installed, men used to take waste water away in rubbish bins and dump it in the sea three times a day. Centre: Sergeant's Latrine slab (Building 18). It measures 20' x 20'. Right: Officer's Latrine and Shower (10' x 20'). For all latrines - water was supplied via 1¼" galvanised pipes and waste taken away via 4" earthenware pipe to the Pump Hose (Building 20) and thence via 4" fibro pipe to the Septic Tank some 600' to the North. The overflow from the Septic Tank travelled the 1230' West to the Pumicestone Passage via 3" galvanised iron pipe. |
||
 |
|
| Incinerator - located next to the Officers' Shower and Latrine block. |
 |
 |
Septic tanks - behind No. 1 gun. (11 Sept 2004). |
Septic tank outlet pipe. (11 Sept 2004). |
 |
 |
Septic pipe stands head for Pumicestone Passage about 800 m away. (11 Sept 2004). |
Powerhouse slab. Steel bolts used to hold generator down protrude from right corner. (11 Sept 2004). |
 |
 |
| Power pole beside Powerhouse. (11 Sept 2004). | Is this a water well. (11 Sept 2004). |
 |
 |
| The Machine-gun position defending the west of the camp. The mound was supported by a corrugated iron shield. (11 Sept 2004). | The moat around the machine gun position. (11 Sept 2004). |
 |
 |
| Corner of the Control Post (CP) slab (note the steel plate). (11 Sept 2004). | Concrete structure near Control Post - about 10 m away. S26°51.812', E153°07.760' (1 Aug 2004) |
 |
 |
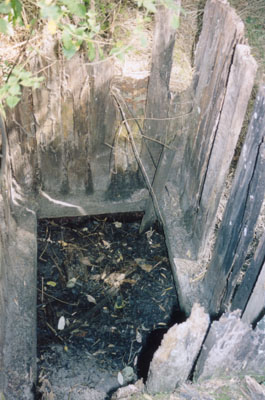
| "Cork's Crew Cabin" is hard to picture with all of the bush growing in it. The "Cabin" was a hole in the ground about 8' deep and about 15' across with a ti-tree roof and a cloth door to keep light from escaping. It was located about 20' behind the No. 1 gun. The gun crew on duty could rest in this make-shift cabin. It was called "Cork's Crew" after one of its builders - Allan Cork - the softdrink manufacturer in Brisbane (Cork Bros.). (11 Sept 2004). | The EPA constructed a mesh cover for the sullage tank in 1994. Waste from the kitchen would enter the tank before being pumped out into the passage. Soldiers would have to enter by steps on the right (also covered) and scrape the solidified fat off the walls which would be then burnt. (11 Sept 2004). |
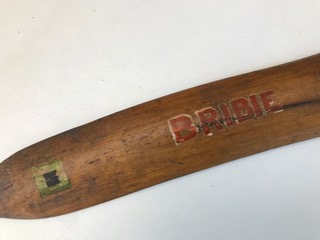
13TH GARRISON BATTALION
 |
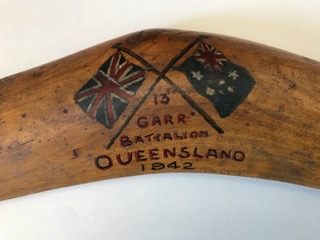 |
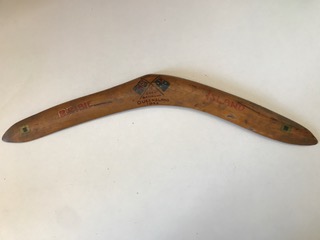
| Carved by members of the 13th Garrison Bn 1942 | Photo courtesy of Lyndell Higham |
 |
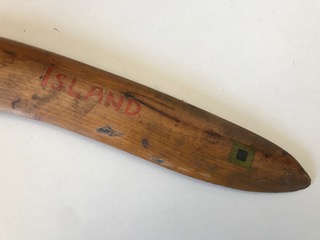 |
The 13th Garrison Battalion was at Fort Bribie in July 1942. There is another boomerang
signed by all members and is held in the RSL at Bongaree. They are: Capt L A Culpitt, Lt
E Wasei, Lt Stanley Jack Grace (N105821), Lt J Gaskill, S J MacDonald, F Moore, L/Cpl A McKinnon, Sgt
H N Patteson, CSM L Askew, G Burns, A H Burton, H A Savell (N104295), J
A Savell (N277990), W Willis, G
Battick, H Sutton, A South, A O Napper (N277924), B J Coust, P L Scobie, W J Irving, J
Chantrill (N277998), H G Arnull (NX152746
(N278065) ), P L Pearson (N277939), D A Pope
(N104304), A G Baxter (N350768), T A Kimber
(V91018), T R C Swann (N104371), G
C Goodchild (Q201279), E F Butt (N391384), L R Ford
(V361766), J Hornsbrook, R Hart.
UNDERGROUND HOSPITAL
Many claims have been made over the years about the existence of an underground
hospital at Fort Bribie. This deserves a separate web page.
Go to: Fort Bribie Underground Hospital
AWAS - Women at Fort Bribie
By 1941, as increasing numbers of men were needed for overseas service in PNG and the Middle East, women were accepted into the army from July (1941). In October of that year, the army formed the Australian Women's Army Service (AWAS). The women had to be single and between the ages of 18-45. They were paid two-thirds the rate of men. The limit was set at 1600 women but was lifted to 6000 and then 18000 as the war with Japan expanded. Some 24000 women served in the war, including 3618 with the Royal Australian Artillery, manning searchlights and radar at fixed defences and 3600 with the Corps of Signals (mostly as drivers, signallers, clerks, storemen and mechanics.
Many of these women served in the defence of Moreton Bay - at Caloundra and Bribie Island. Those stationed at Bribie were stationed at Skirmish Battery (as switchboard operators in the Ocean Beach Guest House and lived in the Bribie Hotel) and with various duties at Fort Bribie. In 1945, AWAS recruits were allowed to serve overseas. The AWAS was disbanded on 30th June 1947 - often regarded as a folly. On 13th July 1950, the AWAC was created.
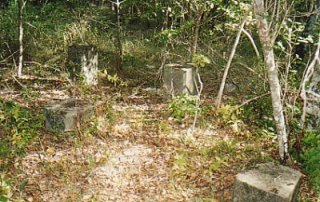
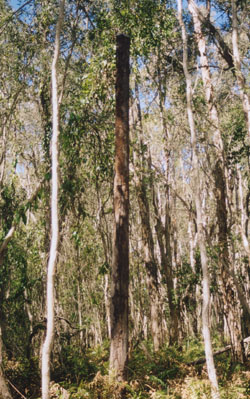
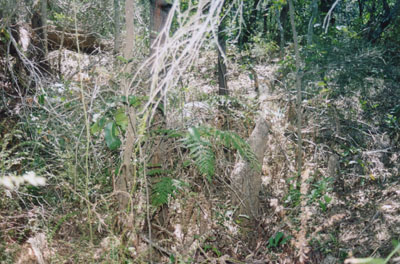
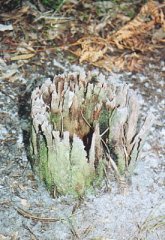
Evidence of the AWAS encampment at Fort Bribie has all but disappeared. They had 5 sleeping huts, a shower block and a earth closet toilet about 60 m south of the Officers' quarters. The photo opposite is of a toilet stump. There was 1 officer and 53 ORs at Fort Bribie. |
 |
NAVAL MINE CONTROL HUTS (RAN 2)
 |
 |
| Southern Mine Control Hut | Northern Mine Control Hut |
Two reinforced Mine Control Huts were located at Fort Bribie. In planning they were known as "Operation Duncan - Control Station No. 67". They were operated by the Royal Australian Navy and became known as RAN No. 2 Station. For more information, please go to the Fort Bribie RAN2 Controlled Mining page.
SKIRMISH BATTERY
Twenty kilometres to the south of Fort Bribie was Skirmish Battery which included in its vicinity the Royal Australian Navy's "Indicator Loop Control Station" RAN 4. The northern Fort Observation Post (FOP) shown below is the only surviving element of Skirmish Battery (apart from a concrete foundation post on the beach 8 km south belonging to the southern BOP of Skirmish Battery, and some electricity cable in the garden of a house at Fourth Avenue). The original Skirmish Battery was first set up in March 1942 about 2 miles south of Woorim for the purposes of maintaining signals contact with Fort Cowan Cowan on Moreton Island.

For more information go to Fort Skirmish Battery,
Woorim, Bribie Island.
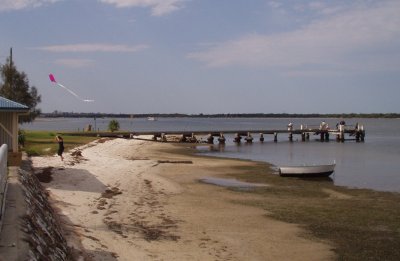
HOW TO GET THERE
1. By boat across Pumicestone Passage. From the Caloundra side, go down to Military Jetty along Golden Beach (see photo below), hire a boat and manoeuver it south around the yellow beacon and then head north towards Caloundra. You'll eventually reach the western side of Bribie Island about 900 metres away. I wouldn't try that until you know what you're doing. Soldiers going "AWOL" (absent without leave) would often swim it. There is a gravel path marking the old jetty (now completely disappeared). Walk through the bush for about 150 metres and you'll reach the surf side (GPS co-ordinates: S26°50.484' E153°07.728'. Then walk about 2 km south along the beach until you hit the searchlight tower on the beach (see photo below). Head south a further 500 metres (550 m to be exact) and walk up over the dunes and on the other side of the dune (about 20 metres in) you should find a massive gun emplacement. Success!
|
|
|
Military Jetty - Golden Beach |
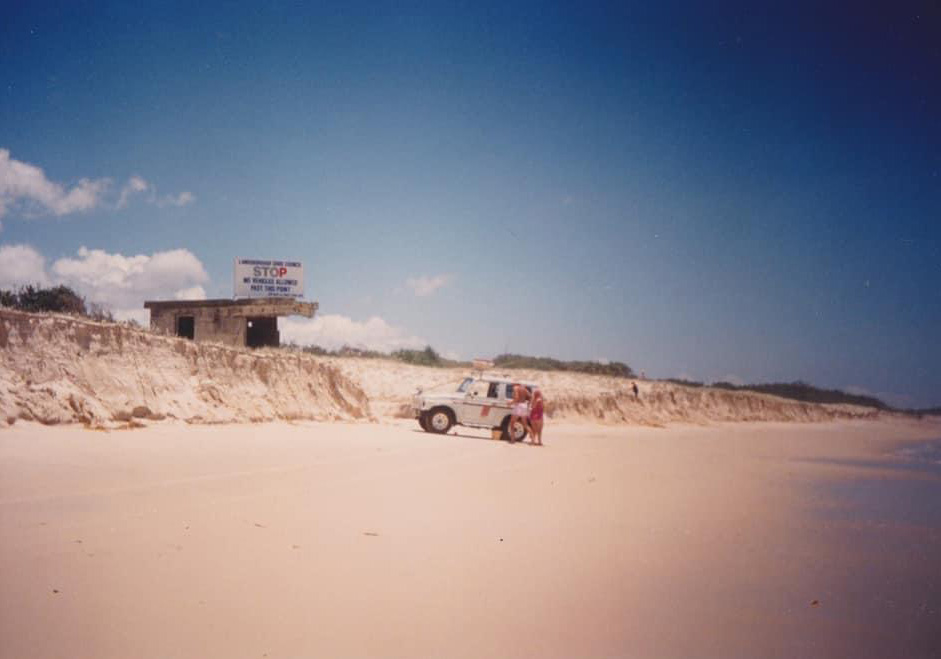
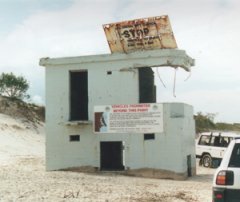
The Northern CASL (searchlight) tower. |
|
2. Drive up the beach from Woorim.
 |
Bogged at 2nd Lagoon - 13 June 2009 |
Your best bet is to go by 4WD from Bribie Island (but you'll need a beach driving permit). Permits are available for the following periods:
- full year - cost $168 (2022)
- weekly - $54 (2022)
- daily (purchase the weekly permit)
Then drive the 10 km to Woorim on the surf side of Bribie Island. At the Blue Pacific Hotel at the end, turn left into North Street. Keep going until you get to the big carpark at the end of North Street and find the start of the long sandy 4WD track (GPS co-ordinates: S27°03.464' E153°11.370'. Set your odometer to zero. After 1.9 km you will hit the beach. Some of the following odometer readings may not be exact as there is a tendency for wheels to slip in the sand and give inflated readings. At 4.6 km you will notice a concrete Fort Observation Post (FOP) lying on it's side in the dunes. That was the northernmost part of the Skirmish Battery. At 18.1 km (GPS co-ordinates: S26°54.441' E153°08.321') you'll pass Ocean Beach Camping Ground. Go to a total odometer reading of 24.0 km North along the beach and you'll meet up with a concrete bunker (searchlight) on the beach as shown above (actually only 22.6 km from the start as the crow flies).
Now turn around and head south 500 metres (550 m to be exact) and park your car. Walk up over the dunes and on the other side of the dune (about 20 metres in) you should find a massive gun emplacement. If you can't see it straight away slowly make your way south along the track behind the dune. You'll hit something sooner or later. Take a compass and some mosquito repellent (especially in summer). Wear shoes and long pants are good to stop the vines cutting you.
Taking the northern CASL as zero northerly displacement, the southerly displacements of the fortifications are as follows:
000m Northern CASL (searchlight - demolished remains are on
the beach)
384m Battery Observation Post
414m Northern Mine Control Hut
430m Southern Mine Control Hut
480m Battery Plotting Room (BPR) - on beach since May 2009
555m No. 2 Gun Emplacement (visible from beach)
684m No. 1 Gun Emplacement (just visible from beach)
750m Signals Operation Room (SOR) - on beach since May 2009
750m to 950m Fort Area: barracks, latrines, kitchen etc (about 80 m behind dunes)
950m Mess Hut
990m Concrete tank/well
1000m Underground Hospital (allegedly)
1005m Control Post (dismantled - no longer in existence)
1142m Concrete tank/well (the AWAS huts are west of this tank)
1220m Southern CASL (searchlight - demolished August 2022 - remains are on the beach).
4000m Bribie Front
Lighthouse (no remains visible except some timber in the swamp).
Happy hunting!
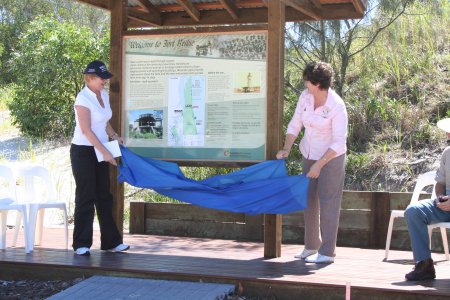
3. Fort Bribie WalkOn March 29, 2007, the then Minister for Environment, Lindy Nelson-Carr opened
the Fort Bribie walk that links the Ocean Beach camping ground with Fort Bribie.
It is about 1.25km S of the Fort. You can also get to the carpark via the
newly-opened inland road from White Patch (22km) but you'd still need a 4WD.
 |
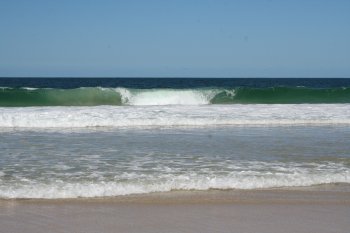 |
| Minister Nelson-Carr opens the walk assisted by State Member for Pumicestone Carryn Sullivan. | Ocean Beach - beautiful as ever. |
 |
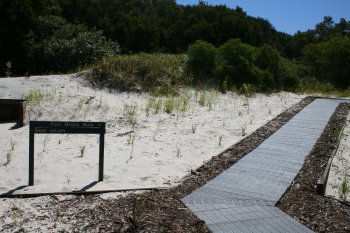 |
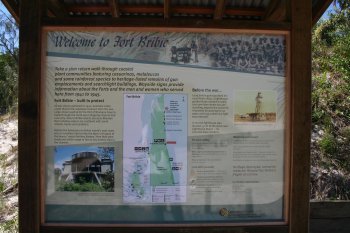
| The map introducing Fort Bribie. | The start of the walk. Interpretative signs help you work out what's what. |