OF THE ROYAL AUSTRALIAN NAVY AT BRIBIE ISLAND
This is the story of the indicator loop station built during WW2 as part of the Royal Australian Navy's anti-submarine harbour defences of Moreton Bay. It is located on the beach at Woorim, Bribie Island, about 100 km north of Brisbane, Australia. It was called the RAN 4 Naval Station.
 |
If you have any feedback please email me: Dr Richard Walding Research Fellow - School of Science Griffith University Brisbane, Australia Email: waldingr49@yahoo.com.au |
LINKS TO MY RELATED PAGES:
- Indicator Loops around the World (Home Page)
- How an indicator loop works
- Fort Bribie and RAN No. 2 Mine Indicator Loop Station
- Moreton Island Defences WW2
LOCATION MAP


The loop hut is at Woorim on Bribie Island (Queensland) - half-way up the eastern coast of Australia.
BRIBIE & MORETON BAY PAGES
Click here for more details of:
Anti-submarine Indicator Loops
Indicator Loops - an overview (YouTube, 70 minutes)
Indicator Loops are long lengths of armoured cable laid on the seafloor of harbors to detect enemy submarines. They were developed by the Royal Navy in the early 1900s and first trialled at the end of WW1. They were successfully deployed in WW2 in British ports and other Commonwealth countries such as Australia, Canada, New Zealand, South Africa, Kenya, Ceylon, Penang, and in allied harbours (Iceland, Holland, Dardanelles). By 1942 the United States had adapted this technology for its own needs and a dozen United States Navy "loop receiving stations" were established along the eastern seaboard of mainland USA.
 |
This diagram shows the
arrangement of the cables in the loop ("3-legged") and the
tail cable connecting them to the shore station. |
|
|
|
|
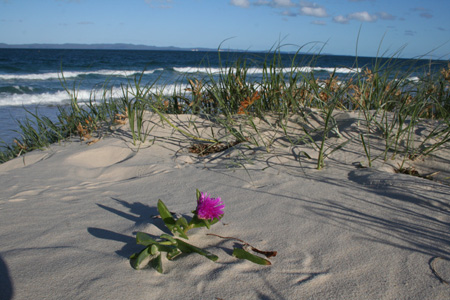
Angular Pigface Carpobrotus glaucesens on Woorim Beach with Moreton Island in the background |
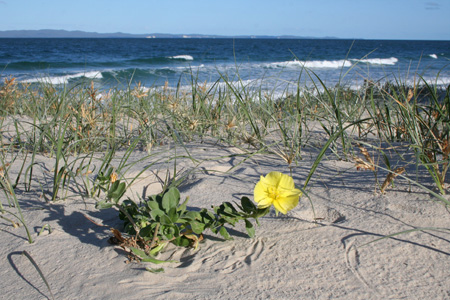
Beach Primrose Oenothera drummondii subsp. drummondii on the beach at Woorim |
Bribie Island is a low sand island about 100 sq km in area, located 100 km north-east of Brisbane within the Moreton Bay region. It is separated from the mainland by the narrow Pumicestone Passage, an important source of seafood for the Aboriginal people who formerly lived on the island. Bribie Island presently supports a population of 15000 people based around the three living areas of Bellara and Bongaree on the passage side; and Woorim on the ocean side. During the early stages of World War II coastal fortifications were built at the northern end of Bribie Island (Fort Bribie), and at Skirmish Point (Skirmish Battery) at the southern end near the seaside village of Woorim, as part of the system of defence of the port of Brisbane. Most of the fortifications were controlled by the Army, but the Royal Australian Navy also operated a system of defences near Fort Bribie and Skirmish Battery. The is the story of the naval defences: the indicator loop hut, the power huts, the cables and the men who worked there.
THE LOOP CONTROL HUT
 |
 |
|
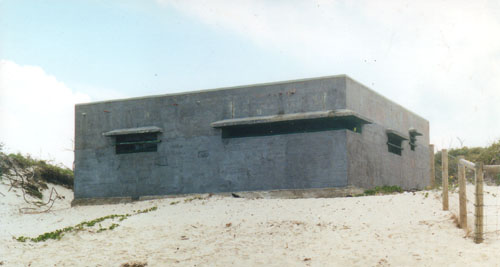
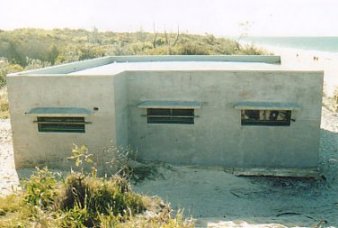
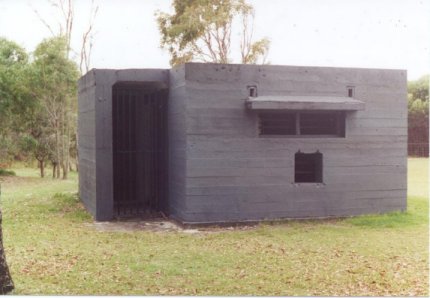
The hut sits proudly on the beach at Woorim, Bribie Island, just at the end of
North Street. It cost ₤1000 to build in 1942. It was constructed in concrete by men drafted from the Main Roads Department called the Civil Constructional Corps. Photo taken in March 2000. |
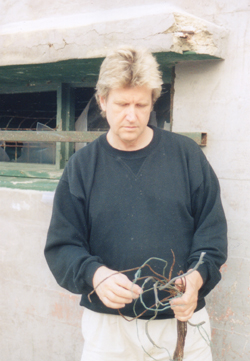
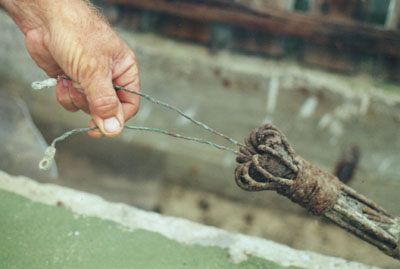
Richard
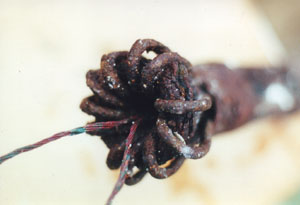
Walding untangles some the the HDA tail cable outside
RAN4 |
 |
 |
|
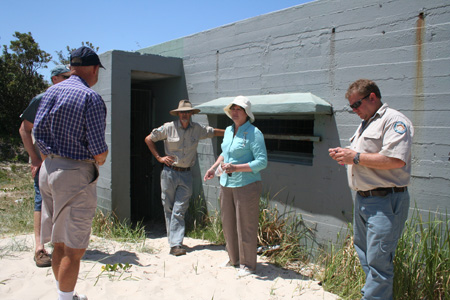
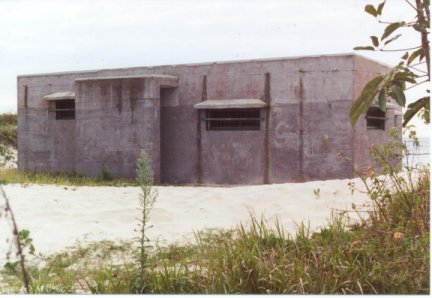
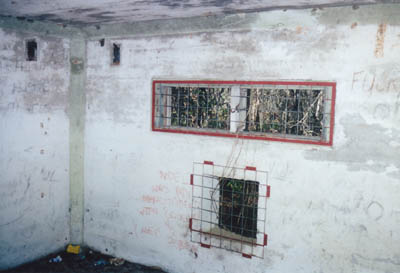
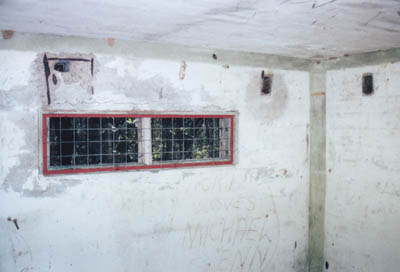
From the rear, the windows and door can be seen. The window on the left is for the ratings' toilet; the windows on the right provide
light to the artificer's workshop. |
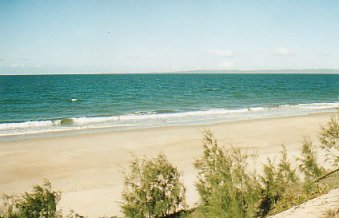
the beautiful view of Moreton
Island from the loop hut window. Cables ran from the hut directly across to the
northern tip of Moreton Island (about the centre of the picture). |
 |
 |
|
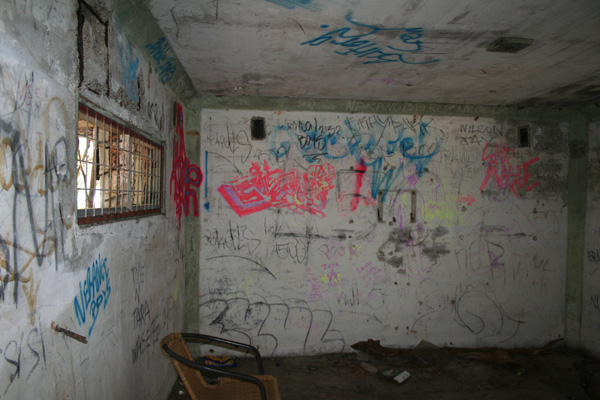
Southern wall of the loop hut. |
Northern wall. |
 |
 |
|
Looking North from the hut roof, with Caloundra in the middle distance. |
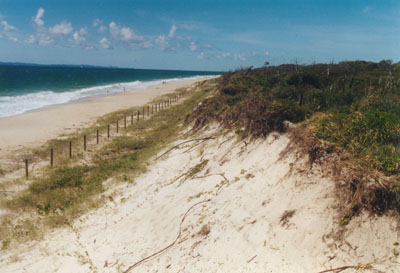
Looking South along the beach from the loop hut. Note the cables
exposed on the middle of the dune. |
 |
 |
|
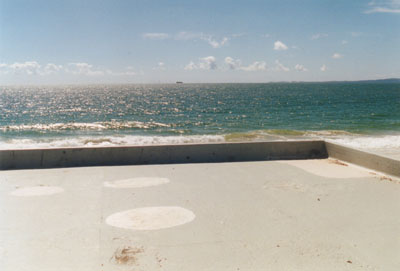
Looking Southeast from the hut roof to Combouyuro Point, Moreton Island.
The roof slab was 9" thick with a 3" slope from the centre to the front and
back. It was reinforced with ½" steel rods at 5" centres and transverse ⅜" rods
at 12" centres. The roof was waterproofed with ¾" compo rendering and covered
with two layers of bituminous felt. The 12" high lip can be seen in the photo.
It is 4" thick and has ten 3" x 1½" weepholes. Three of the four loop cables ran from the hut to Combouyuro Point.
A fourth cable ran from the RAN7 loop control hut at Bulwer (just south of
Comboyuro Point). |
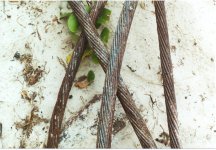
Left-over cables are rusting away on the beach. |
 |
 |
|
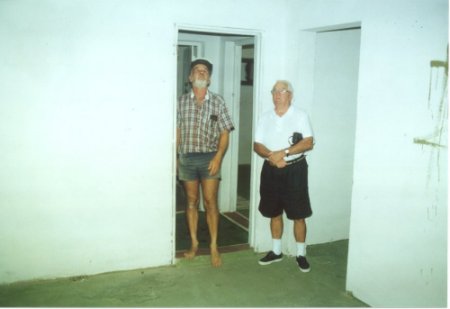
Indicator Loop Room. Rotary Club restorer John Price is on the left and on the right is Ron Donald - author of Fort Bribie. |
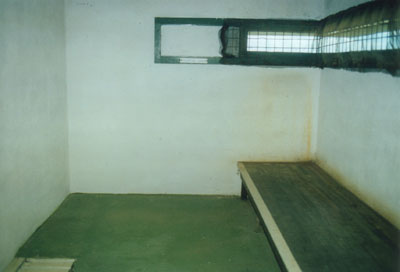
The Harbour Defence Asdic (HDA) Room. In this room the ratings monitored the Asdic equipment at night when surface vessels could not be observed. During the day binoculars were sufficient. Headphones were worn to listen for changes in the 'ping' when contact with a ship was made. The sloping table was on the original plan but never installed; all there was in this room was a table and chair and the Asdic equipment. The sloping bench was added by the Rotary Club in 1997.
The front (eastern) wall (on left) and the opposite (western) wall were
lined horizontally with 4" x 1" T&G VJ hardwood on 3" x 1½" splayed battens (see
figure below) built into the concrete (these are still there). |
 |
 |
 |
How the studs and lining were fixed. |
The rear wall of the HDA room shows where the equipment was located. |
Some of the loop tail and power cables in the ducts under the
floor (two 7-core cables, a 4-core and a 2-core). |
On the rear wall of the loop room was the equipment. This included the High
Frequency Motor Alternator (HFMA),
the Tuning Panel, The Send/Receive Key, the Bearing Control Panel, Amplifier,
Recorder and Headphones. There was also a telephone switchboard connected to
Skirmish Battery and to the Officers' Wardroom (RAN 4). Note the ducts in the floor. For more details on how an HDA works, see the Harbour Defence Asdic (HDA) web page.
 |
 |
|
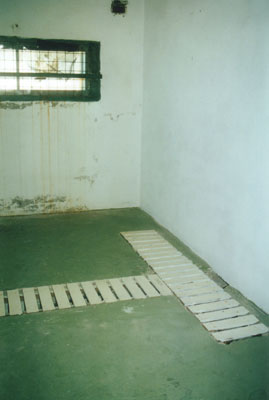
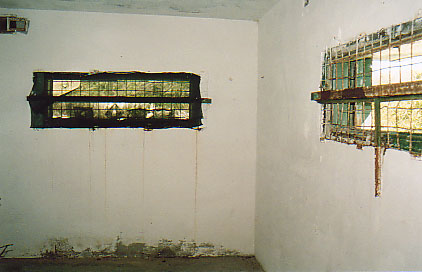
The Binocular Room. Here officers could look out through the slit window to confirm if a crossing of the loops has occurred. You can see the beautiful blue ocean through the window.
Sometimes called the Plotting Room but the Plotting Table was never installed. |
This is the platform used to see out the window. It was constructed in 1997 - the original was 4 ft x 4 ft and had been destroyed by vandals. |
 |
 |
 |
|
The cable duct in the Binocular Room. Two 7-core cables, a 4-core and two 2-core
cables. |
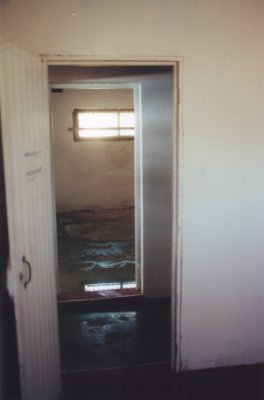
From the Wireless Telegraphy Room looking south across the central
passageway into the Indicator Loop Room. |
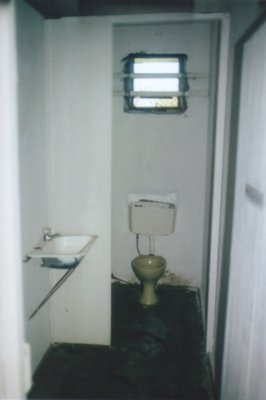
The Officers' Toilet was destroyed by vandals. The plastic cistern and
porcelain pedestal are recent additions. |
 |
|
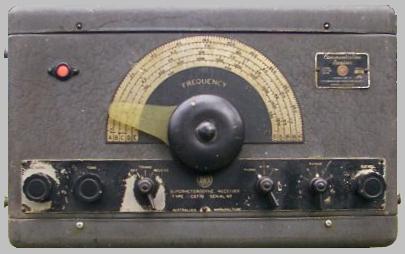
Transmitter |
|
Artificer's Workroom - looking south. The original plans allowed for
benches to be built around the walls but it is not clear if this eventuated. |
An AWA Teleradio Type 3BZ (photos above) was used for communications
mainly with Harbour Defence motor launches. It was about 2' x 1' x 1' and had
two 6V batteries (6V for receiver, 12V for transmitter and operated at the
harbour defence frequency of 2.99 MHz (2990kc). In daylight, it could transmit
voice for about 650 km and Morse for 1000 km. |
|
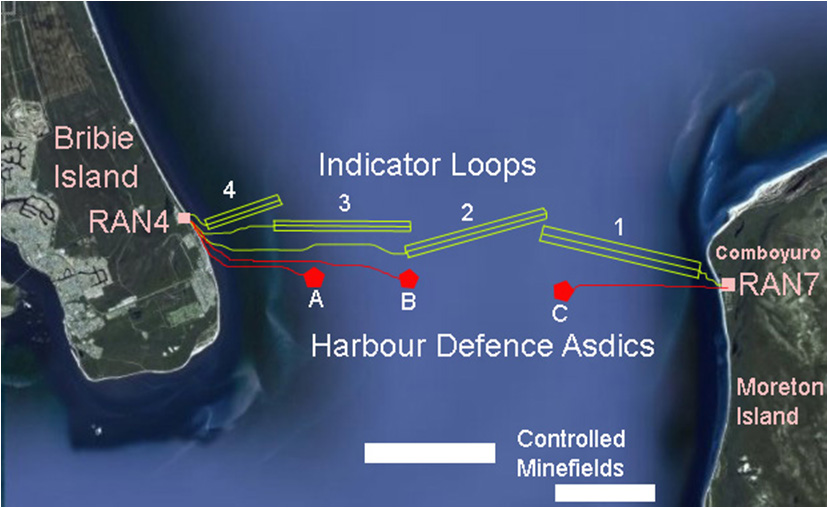
LOCATION OF LOOPS
Four indicator loops
and three HDAs were laid were laid between Woorim and Comboyuro Point on Moreton
Island - a distance of 16 km.
CABLE TYPES
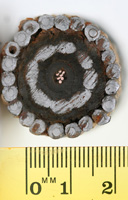
SINGLE CORE LEAD LOADED CABLE - ADMIRALTY PATTERN 1989 (W. T. Henley's Telegraph Works Co. Ltd.)
This is the cable that actually detected the crossings. This is the cable that actually detected the crossings in WW2. It was made principally by W.T. Henley's Telegraph Works Company at Holborn Viaduct, London or by Siemens, London. A full description of the cable can be found on my Cablemakers webpage.
 |
 |
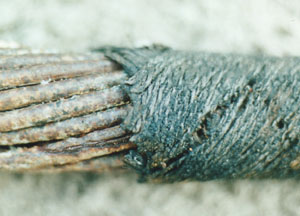
| "1989" Cable - the inner silvery circle is the lead windings. The outer shiny circle is the armour wires coated in lead. | The “1989” cable consists of a single core of seven strands of tinned copper wire, rubber insulation, weighted with pure lead wire (#6). The whole is protected with a clockwise winding of 22 steel armour wires (#10), each about 1.9 mm diameter covered in pure lead 0.8 mm thick. It has a linear density in British imperial units of 6.09 tons per 2000 yard mile in air (6.8 lb per yard) or in metric units: 3.4 tonnes/km (3.4 kg/m). Final diameter (1.35") 33 mm. |
2 CORE CABLE (possibly ADM
Patt. 841B)
 |
 |
2 core, 7 strand, 0.029" cable as used in the HDA loops for sending out the signal. It was made by
British cablemaker W T Henley (London) in 1940. |
Longitudinal section shows the two cores insulated with white centered black india-rubber wound in silk with jute beddings. This is wound with more silk and oiled jute insulation and 21 strand steel
armour wire. A double layer of tarred hemp wound in opposite directions encloses the steel.
|
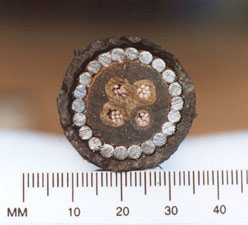
3 CORE CABLE - ADMIRALTY PATTERN 5700
 |
 |
The 3 core, 7 strand, 0.029" was used for 110 V DC power. It was made by
British cable maker Hoopers in 1940. |
The 3 cores are insulated with 5 mm black rubber and printed with numerals 0, 1 and 2. Each is wrapped in cotton gauze and there is more cotton gauze around the three cores. Six strands of hemp beddings is used, followed by 12 strand armour and two layers of tarred jute braid (not shown in photo). |
4 CORE CABLE - ADMIRALTY PATTERN 7048 and 9610 (and Patt. 13139 & 13140)
 |
 |
The ADM Patt. 9610 was a 4 core, 7 strand, 0.029" cable used for loop tails. It was made by
Johnson & Philips (UK) in 1941. It has a diameter of 25 mm.
|
The longitudinal section shows the four central cores insulated with 5mm diameter rubber
(3 are white, one black), surrounded by 18 mm diameter rubber bedding. Also visible is the 25 mm wide cotton gauze around the rubber; the central square
white rubber core (not visible) and the 22 strand steel armour.
This cable was supplied by Johnson & Philips. You can just make out the reversed
name transferred on to the white rubber (see photo below for a better image). |
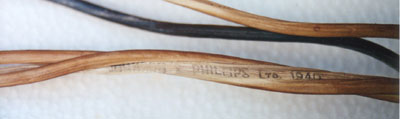 |
The Johnson and Phillips name is clearly visible on the cotton.
Any attempt to move this fabric results in its destruction as it is made of single strands of
cotton, not woven together. |
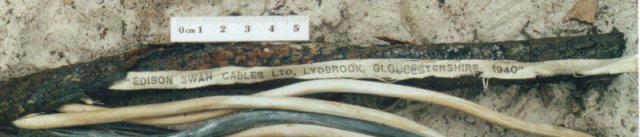 |
The ADM Patt. 7048 Edison Swan cable.
This is also a 4 core, 7 strand made by Edison Swan Cables Ltd, Lydbrook,
Gloucestershire in 1940.The details on the tape can still be seen quite clearly after all these years on the beach.
This cable has 3 cores in white rubber and one in black rubber. The cente
divider is black rubber, square in section. |
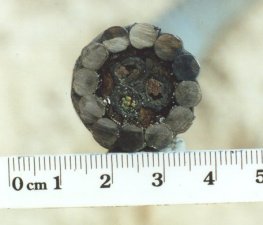
7 CORE CABLE - ADMIRALTY PATTERN 660
 |
 |
|
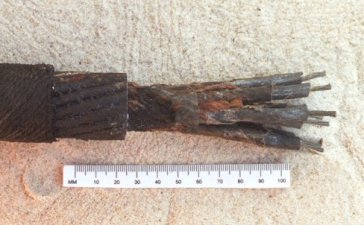
7 core, 7 strand, 0.029" was used for 220 V DC power and for the HDA
"Training" tails. It was made by Hoopers in 1941. |
Longitudinal section. The 7 cores were each insulated with india-rubber and wound in silk and separated by jute beddings. This was wrapped in more silk and tarred jute braid and protected by 15 steel armour wires (30 mm diameter) and two layers of tarred hemp braid wound in opposite directions.
Similar to Admiralty Pattern 13135. |
 |
 |
Terminating lugs on a 2-core cable in the HDA Room. |
The same cable showing how the steel armour wires were layed back over "pudding
rings" (Adm Patt 841B) on the ends.
|
 |
|
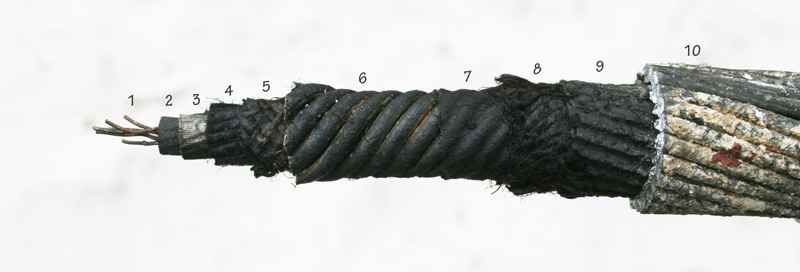
Close-up of a 7-core cable armour wire and braid. A hot pitch and resin
mixture was applied by the cablemaker (in England) over the armour wires and
then two layers of braid were wound on in opposite directions. A waterproof
protective coating was added to the outside. |
For more details on the cables
and the cable makers go to the Cablemakers Webpage.
POWER HUTS
There were two identical concrete power huts located about 100 yards to the north and south of the loop hut. Each was about 18 ft x 14 ft and stood 10 ft high. Inside was a Mark 2V60 Ruston Vertical Diesel Oil Engine producing 16 HP at 1000 rpm. This drove two DC generators
made by Braybon Bros (Sydney): one was 7 kW producing 220 V at 1000 rpm; and the other - 2 kW 110 V at 1600 rpm.
The diesel engine cost ₤260 (On 6 April 1943, War Cabinet approved the purchase
of 500 of these engines).
 |
 |
The Northern Power Hut is covered in bush. The small rectangular slot on the front is for the exhaust vent. The windows were originally made of silky oak with florintine brass handles, stays, hinges and bolts. The glazing was 1/4" wired mill-rolled glass. Below the window is the emergency exit. This is the eastern wall which faces the beach. |
The same wall (eastern) as seen from inside. The cornices still show the original Brunswick Green paint. |
 |
 |
The interior western wall of the Northern Power Hut. |
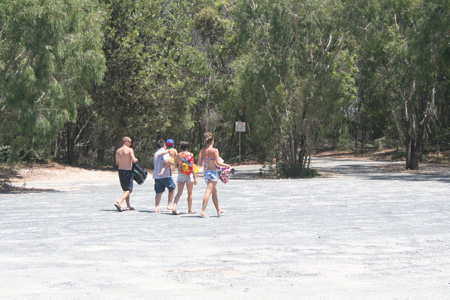
The Southern Power Hut now stands in the middle of the picnic grounds at Woorim. Local volunteers keep it painted. The roof is covered with bituminous felt and all walls are 12" thick. Steel bars have been added to keep vandals out. This wall of the hut faces south east. |
CONSTRUCTION AND LAYING DETAILS, 1942-1943
The Royal Australian Navy approved the construction of anti-submarine defences at Moreton Bay on 22nd June 1942. Under the code name Operation Robert and Arthur, the Navy was to lay four indicator loops on a line from Bribie Island - Skirmish Banks - Spitfire Banks - Salamanda Bank - Comboyuro Point (Moreton Island). This was Operation Robert.
Operation Arthur consisted of four H.D.As (Harbour Defence Asdics) approximately two miles south of the loop system. The cable was to come from Sydney stores which were imported from London. Three were monitored from RAN4 and one from RAN7 (at Bulwer on Moreton Island).
On 18th July 1942, cableship HMAS Bangalow left Sydney and laid Indicator Loops 1 and 4 from 1st to 7th August.
Construction of the Loop/Power Huts and Accomodation were completed by 30th September for a cost of
₤1000 and ₤2100 respectively.
Loop laying continued with No.3 being laid on October 8, its tail on October 13 and loop No. 2 on 24th October. The tails cables were connected to the Loop Hut on 16th November. Operation Arthur commenced in November with the HDA Dan Buoys being positioned on the 1st and some of the HDA tail cables being laid from the 2nd to the 5th. Problems were occurring with the centre leg of No. 1 loop and several attempts were made to repair it. They gave up on this and relaid a new centre leg on November 26th. On December 7th, 9th and 16th the signal
(transmitting) cables for HDA-B, -A and -C were laid although HDA-B was recovered and relaid in a new position on the 17th.
By the end of the laying process, the following had been installed out in the
bay (in addition to the cables themselves): 3 HDA oscillators (Adm Patt 2053), 3
tripods (AP 5965), 3 slings (AP 5971), 8 Junction Boxes (AP 142), 8 Junction
Boxes (Adm Patt 16518), 20 Cone Rings (AP 16519) & 20 Cone Rings (AP 16520).
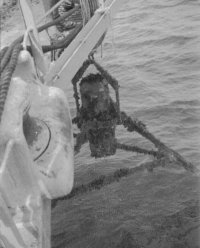
Type 135 HDA oscillator (Adm Patt 2053) and tripod (Adm Patt 5965) being lifted from the waters of Trincomalee Harbour,
Ceylon, by the cable-layer HMS Bullfrog in 1945. This photo was supplied
by Captain Walter J S Flett (RN), Findochty, Scotland who was an Ordinary Seaman
aboard Bullfrog from late 1945 to early 1946. This is the only photo of the HDA
dome known. Further details of HDAs are on the Harbour Defence Asdic (HDA) web page.
CABLE LENGTHS
The optimum loop length was about 4000 to 5000
yards (3500 - 4500 m). Each loop consisted of three legs space about 250 yards
apart making a total width of 500 yards (450 m). The RAN4 loops were about 420 m
wide.
|
Loop No. |
Loop length |
ADM 1989 |
ADM 7048 |
|
1 |
4500 |
14300 |
12150 |
|
2 |
5300 |
16700 |
6950 |
|
3 |
4900 |
15500 |
2400 |
|
4 |
3240 |
10550 |
550 |
|
57050 |
22050 m |
Note: The Navy ordered 70,500 yards of ADM 1989 for the loop and 30,000 yards of ADM Pattern 7048 and Patt. 13139 for the loop tail.
|
HDA No. |
|
ADM 660 |
|
A |
520 |
520 |
|
B |
10190 |
10190 |
|
C |
5370 |
5370 |
|
16080 m |
16080 m |
Note: HDA "A" was controlled from the RAN 7
control hut at Comboyuro Point, Moreton Island. The three HDAs supplied were the
ones originally planned for Darwin and Port Moresby. The Navy supplied 10000 yds
of training cable, 10000 yds of transmitting cable, 24000 yds of heavy duty
training cable and 24000 yds of heavy duty transmitting cable.
OFFICERS AND RATINGS WHO SERVED AT RAN4, 1942-1943
|
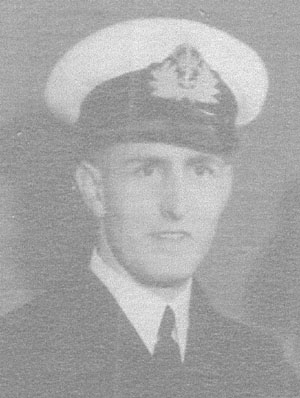
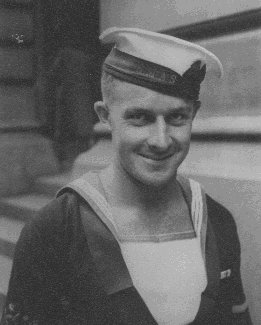
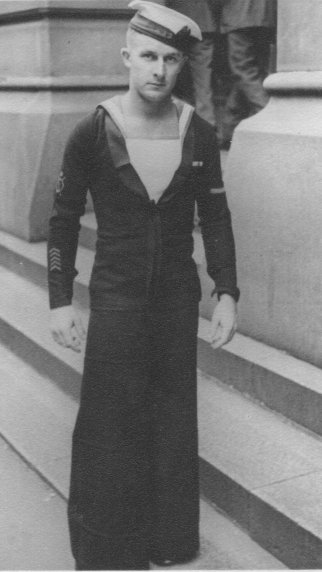
Lt Syd Sharp - 1943 |
The Navy approved the staffing of the Loop Station by five officers and 21 ratings. This was made up of 1 Lt Cdr as Extended Defence Officer (XDO), 4 Lt or Sub Lt, 1 Petty Officer (PO), 3 Leading Seamen, 16 Able Bodied (AB) or Ordinary Seamen (OS) and 1 Engine Room Artificer (EA). The names of the officers and ratings are as follows. Note: SD = Submarine Detector; HSD = Higher Submarine Detector. The people mentioned in the following table all served at RAN4 at one time or another. |
|
Rank |
First |
Surname |
Status (D = deceased) |
Service No. |
|
Lt |
Frederick Sydney |
Sharp |
|
|
|
Lt |
Laurence William |
Harvey |
D 1962 |
|
|
Lt |
Horace John Harold |
Thompson |
D |
|
|
Lt |
Leslie Alderson |
Smith |
D - Jan 97 |
|
|
Lt |
Joseph Michael Reddy |
Duggan |
|
|
|
Lt |
Osmond Raymond |
Jarvis |
|
|
|
S/Lt |
Albert Edward |
Dean |
D |
|
|
S/Lt |
Harry Vivian |
Newman |
D |
H1301 |
|
S/Lt |
Percival Ferdinand |
Crabbe |
D |
|
|
S/Lt |
Thomas James Peter |
O'Byrne |
D 1994 |
|
|
S/Lt |
|
McDonagh |
D |
|
|
AB |
Kevin Alan |
Arkinsall |
|
S/6762 |
|
AB |
Geoffrey Watt |
Batchelor |
|
S/4070 |
|
AB |
J |
Bell |
|
|
|
AB |
Victor Gordon |
Bradley |
|
B3792 |
|
AB |
Kenneth George |
Chisholm |
|
PM3152 |
|
AB |
William Joseph |
Cooper |
|
S4802 |
|
AB |
Frank Sherlaw |
Cross |
|
B/2591 |
|
AB |
John Alick |
Craig |
|
PM4213 |
|
WO |
Alfred William |
Earle |
|
15394 |
|
AB |
Victor Roy |
English |
D |
B/3199 |
|
AB (HSD) |
Max Cornelius |
Enright |
D |
S4960 |
|
CPO |
George Richard |
Grimmond |
D |
S1 |
|
AB |
Douglas Weir |
Haig |
|
20878 |
|
AB |
William Frederick |
Hamilton |
|
B/2674 |
|
AB |
Alfred George |
Hicks |
|
F/4669 |
|
AB (Cook) |
Arthur Edward |
Jackson |
|
|
|
AB |
Gordon Henry |
MacDonald |
|
13734 |
|
AB |
Kenneth Gordon |
MacDonald |
|
S/5412 |
|
OS |
William John |
Marx |
|
PM8600 |
|
AB |
|
McDonnell |
|
|
|
AB |
Henry Alfred |
McGee |
|
PA3309 |
|
AB |
Stanley Emmitt |
O'Hara |
D |
20506 |
|
AB |
Leslie Alfred |
Passtoors |
|
S4782 |
|
AB |
David William |
Phillip |
|
PM4208 |
|
AB |
Francis Robert |
Ramsay (HSD) |
D |
S/4403 |
|
AB |
Basil Frederick |
Roach (HSD) |
D |
PM4006 |
|
AB |
Robert Arthur |
Schluter |
D |
B1621 |
|
AB |
Bruce Kennedy |
Seymour |
|
S4549 |
|
AB |
Arthur Edward |
Sheldon (HSD) |
|
S5977 |
|
LSeaman |
Walter Henderson |
Smith |
D |
S6077 |
|
AB |
Ronald Ernest |
Smith |
|
S5337 |
|
PO |
Jack |
Standring |
|
S1206 |
|
AB |
Cedric |
Standring |
|
S4003 |
|
AB |
Maxwell Renton |
Towell |
D 2003 |
H/1236 |
|
|
Arthur |
Waddell (RN) |
D |
|
|
AB |
Kenneth Alfred |
Watson |
|
S2828 |
|
AB |
Ray Victor |
Young |
D |
R23545 |
VALE LT SYD SHARP All Ship All Shore message sent by Chief of Navy, Australia, Vice Admiral Tim Barrett, AO, CSC, RAN, 16 June 2016 With sadness I inform you of the death aged 99 on 9 June 2016 of retired Lieutenant Frederick Sydney Sharp, RANR. On behalf of the Navy I extend condolences to his family and friends. Born in 1917 Sydney Sharp joined the RANVR in February 1939 under the Yachtsman Scheme and he remained active in the RANR for 40 years. Amongst his medals were two long service medals, the reserve decoration with two bars and the reserve force decoration. His war service was in Darwin, serving in HMAS Tolga, HMAS Terka, HMAS Bendigo and HMAS Vigilant. During the first Japanese air raid on Darwin, on 19 February 1942, he fired at a low flying Zero fighter with a .303 rifle. Subsequently one Zero crashed on Melville Island with clear evidence that its oil filter had been penetrated by a .303 bullet. It is quite possible that this Zero's destruction was the result of Sydney's marksmanship and courage earlier in the day. He was assigned on three occasions to the RAAF and USAF to act as a naval observer. Post WWII he was a participant in the Sydney to Hobart yacht race, and was a keen yachtsman, sometimes with senior officers, including VAdm John Collins, as members of his crew. His funeral service will take place at Somerville Chapel, Allambe Gardens, Nerang, Gold Coast at 11:30 am Friday 17 June 2016. Information courtesy of Roger Cawthorn Captain RAN Rtd |
WARTIME PHOTOS
The following photos were taken at RAN4 during WW2.
 |
 |
|
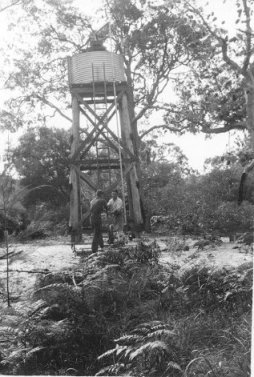
Ron Smith and Frank Ramsay pumping water at the Moreton Island water tower (RAN7) - 1943 |
The Army makes a delivery of fuel to RAN 4 - 1943. |
 |
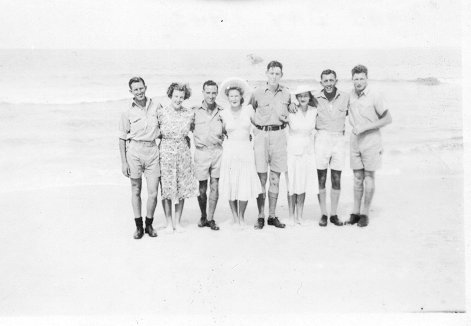 |
| Refreshments at the well - RAN4, Christmas Day 1943. R to L: Ken Watson, Vic English, Ray Young, Frank Cross. | Christmas Day 1943 on the beach at Woorim just outside the Loop Hut. (L to R): Frank Cross, Mrs Cross, Ray Young, "Tiger Lil"(?), Frank Ramsay, Muriel, Ken Watson, Vic English. |
 |
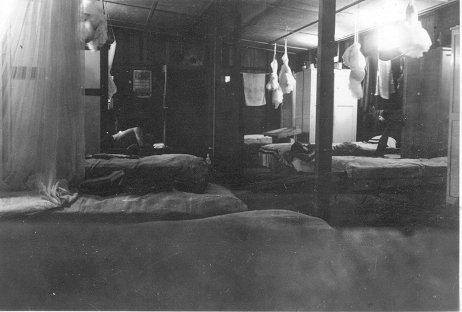 |
| Christmas Day 1943. (L to R): Ken Watson, Frank Ramsay, Ray Young on beach at Bribie Island (RAN No. 4) | Ratings’ sleeping Quarters RAN 4 - 1943 |
 |
|
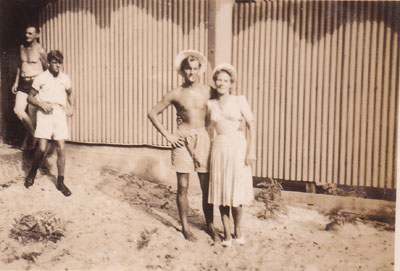
Bill Cooper and Muriel outside the Rating shower block - Christmas Day 1943. Cedric Standring
is making his way up to the happy couple. The man in the swimming togs is a
soldier from Skirmish Battery (about a mile south of RAN 4). |
|

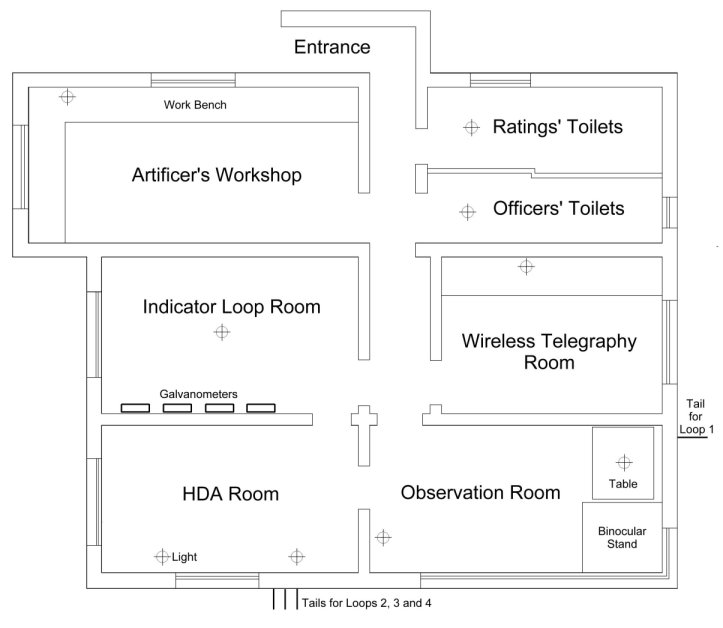
LOOP HUT FLOOR PLAN
The following floor plan was copied from the original
blueprint used by the Civil Construction Corps in 1942.
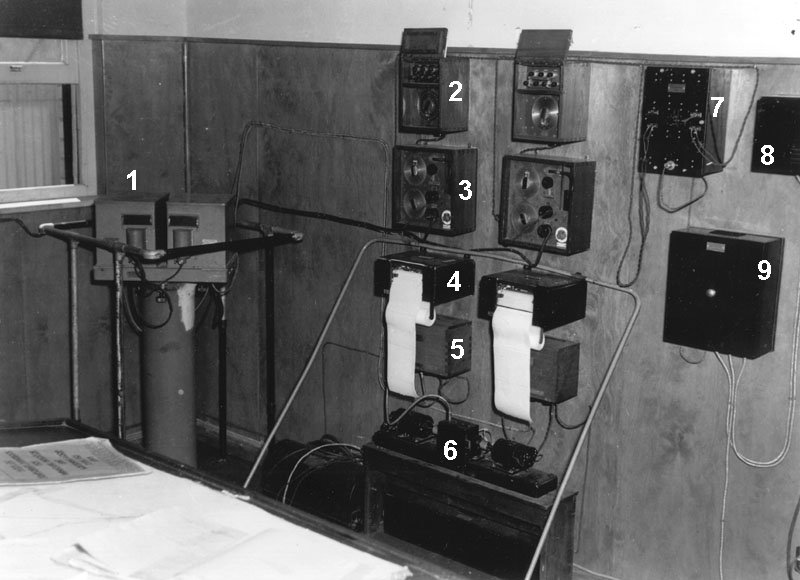
INDICATOR LOOP ROOM
No photos exist of the loop room but the following gives an idea of the arrangement of integrators and recorders. It was taken at HMAS Rushcutter
Anti-submarine School (Sydney) on 7 February 1946. The tails from the loop cables entered the hut
and were connected to the Box Balancing (No. 2 on the photo below). This was
connected to the Box Adjusting (No. 3) followed by the Integrator (inside No.
1). Light from the Integrator shone on to Photo Electric Cells (inside No. 1)
whose signal was fed into the Amplifier (no. 5) and on to the Recorder (No. 4).
The Recorder was driven by a motor (No. 6). Morse code signals picked up by the
loop cables were amplified by the Loop Indicating Signal Apparatus (LISA) (No.
9) and were fed into the LISA Loudspeaker (No. 8) to be heard. Power for the
equipment came from the Input Transformer Box (7).
CLOSING DOWN
As the threat from the Japanese subsided, War Cabinet
decided to downgrade many of the Harbour Defences around Australia. One of the
first to go was RAN 4. It's closing reads like this:
AUCTION RESULTS
The Commonwealth Disposals Commission (113
Edward St., Brisbane) was responsible for overseeing the auction of all
remaining equipment and buildings left at Bribie Island. They appointed
auctioneers B. Frost and Co. of 366 Brunswick St., Fortitude Valley, Brisbane.
Advertisements were run in the Brisbane Telegraph on May 19th, 26th, 30th,
31st and 1st June 1945 and Courier Mail on May 19, 26, 30 and June 1 & 2 under
the heading "Important Sale by Public Auction - Bribie Island". The
auction was held on 2nd June 1945 at Bribie Island.
A total of £747 was achieved, less auctioneers fee of £37, advertising £15, transport £2 and Stamp Duty 6 s, leaving the Government a nett amount of £693. Purchasers included Ern Koppe (the Storeroom £15, the Ratings' Sleeping Hut £80, the Ratings' Mess, Kitchen, Laundry and Garage building £120, the Jeep Shed £10, a timber and iron hut £7, a 1000 gal tank and stand £2, a galvanised iron hut £2, and last but not least - the Indicator Loop Control Hut £82 purchasd by Ern Koppe). Other major purchases were: Officers' Wardroom and Mess (H. Dalton £175), the Ratings' other Sleeping Hut (F. C. Hodel £80). The rest of the equipment (tanks, toilet cisterns, wash basins, urinals, sinks, stoves, toilet shed and other tanks) were sold to a variety of other bidders. The only items passed in were the Generator Huts which are still there. The original cost of all buildings and fittings (excluding the Indicator Loop equipment) was £9390 in 1942 (about $440 000 in 2002 dollars).
CABLE RECOVERY
In November 1945, the Navy attempted to
recover the loop and HDA cables with mixed success. Of the 60600 yds of loop
"leg" cable (Adm Patt 1989) laid, only 27900 yds (46%) was recovered. The rest
is still out there. The cable was buried too deep in the mud and silt and was
encrusted in barnacles so when recovery was attempted it kept breaking. On
November 12, 1945, the Navy stressed to the cable recovers that it all has to
come up in case more has to be laid in an emergency. By 23 rd November the
instruction became "just leave it". However, the tail cables came up much
easier. 21200 yds of the 23800 yds of tail cable (Adm Patt 7048 and 13149) was
recovered (90%), as well as 30800 yds (90%) of the 34600 yds of HDA cables (Adm
Patt 13135 and 13138).
POST-WAR HISTORY
As mentioned above, the Loop Control Hut was sold
for £82 to Brisbane butchers Bertha and Ern Koppe who were granted a special lease (164370) on June 1st 1948 to use it as a weekender until 31st May 1953.
They installed three double bunks and turned the loop room, the HDA room and the
binocular room into bedrooms. The Artificer's work room acquired a table and
chairs to become the kitchen. A special lease (19030) was granted on 1 June 1953 to them for 10 years but on 15th December they
quit and the lease was taken by Ray and Joan Craft who held it until 12th March 1958.
During this time the Craft family stayed there on weekends and for longer holidays when possible. They brought a wood stove over from Albion (Brisbane) and installed this in the kitchen. Joan's weekend consisted of "cook, cook, cook, clean, clean, clean and go home". As she couldn't leave anything good there (risk theft and get dirty) she had to bring it all with her each trip. At this time there was only a sandy track from the hotel to the Loop Hut with two other families having leases on former defence buildings. One was the gun emplacement on the corner of Fourth Ave and North St; the other was the southern Generator Hut about 100 m south west of the Loop Hut. This was leased by Leanne and Viv Daddo who used to erect a awning off the side when visiting.
The Crafts paid £450 per year for the lease of the Loop Hut. On the 12th March 1958 Frank and Oral Olsen took over the lease. Another lease was granted to them and extended until 31st January 1969. Julia Pederson took this over on 25 May 1965 and on 1st April 1966 this was extended to 31st March 1986. It was so broken down by 1970 that the Caboolture Shire Council resumed it on 6th April 1970 under Special Lease 30011. They are the current trustees. Although the loop cables were recovered in 1944, the power cables running from the generator huts to the loop hut and to the quarters were not removed until mid-1955. Former US resident George Doss was awarded the contract to remove them and they were sold for scrap.
RESTORATION
In 1995, a project to restore the loop hut was begun by the Rotary Club, the Naval Association, the Returned Services League and the Caboolture Shire Council. A truckload of broken glass, garbage and sand was removed; the doors and windows were secured against vandals; the walls were scrubbed; the concrete was repaired and all walls were painted. Restoration of benches, toilets and walkways then began.
 |
 |
 |
| John Cordwell (plumber) and John Price (former PMG linesman) inspect the badly corroded northeastern corner. | The rear of the loop hut before restoration. |
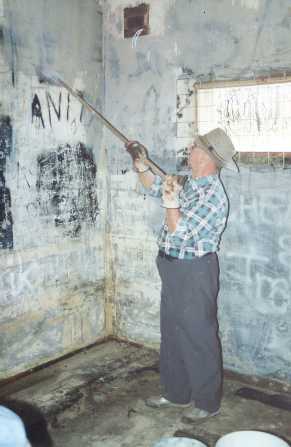 |
Roy Pierce scrubbing the walls of the radio room. Roy is a former RAN radio mechanic
was co-ordinator of the restoration project. |
 |
 |
|
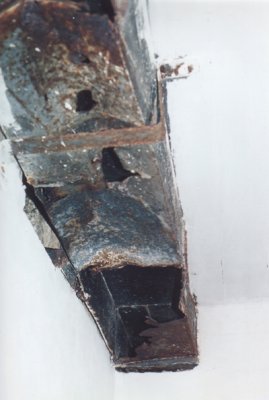
Storm surge erosion:
High tides are washing away sand from under the 12" thick slab of the main hut. Storm surge loads and erosion are likely to remain a severe threat as Moreton Island is too far away to provide much protection. The slab and walls are quite sound. Rebound hammer measurements by T.A.Taylor (waterproofing
consultants) give high compressive strengths of 38MPa. |
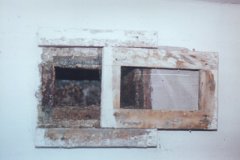
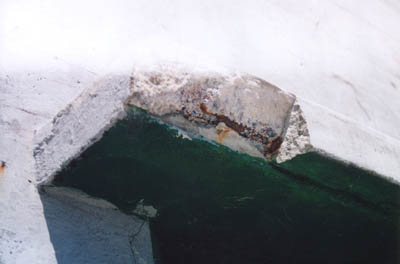
Spalling: The concrete slit window hoods are spalling in places because of the closeness of the steel reinforcing to the surface and the extremely high chloride ion concentration (5.5 kg/cu.m) from the salt spray. Carbonate is present to a depth of 20mm due to the rain. The photo shows the southern hood for the HDA room. Repairs have not been successful and the steel reinforcing needs to be cut out. |
Waterproofing: the walls were waterproofed with a ¾" compo rendering
consisting of a cement mix containing
Nonporite Number 2 Paste
made by
Nonporite Pty Ltd, Melbourne.
This formulation contains
ammonia stearates which were designed to coat capillaries within the
concrete matrix to reduce the permeability of
the mix. This is still used as a waterproofing compound under the brand name of
Aftek No 2 Paste.