Skirmish Battery
Woorim, Bribie Island, Australia
 |
 |
 |
 |
Fort Skirmish was built on the southern end of Bribie Island, Queensland, Australia, during WW2
as part of the Moreton Bay harbour defences.
 |
If you have any feedback please email me: Dr Richard Walding Research Fellow - School of Science Griffith University Brisbane, Australia Email: waldingr49@yahoo.com.au |
LINKS TO MY RELATED PAGES:
- Indicator Loops around the World (Home Page)
- How an indicator loop works
- Fort Bribie and RAN No. 2 Mine Indicator Loop Station
- Moreton Island Defences WW2
Note: GPS co-ordinates are based on WGD84 datum. To convert from WGD84 to
GDA94 add 180 m to the Northings and 120 m to the Eastings (or subtract 6 s to
latitude and 4 s to longitude).
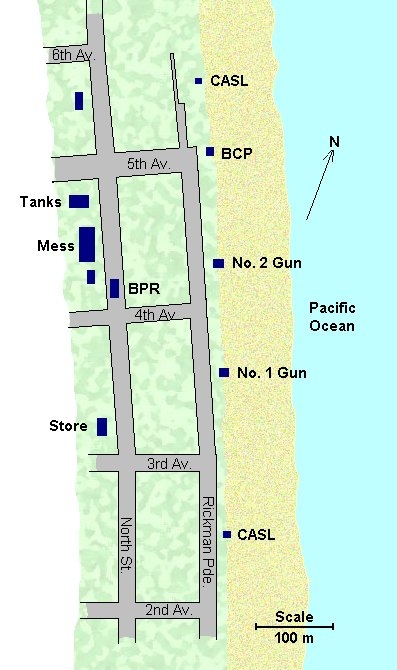
Skirmish Battery was located in the township of Woorim during WW2. The gun emplacements were at the beach end of Fourth Avenue and the huts were along North Street. Included in its vicinity was the Royal Australian Navy's "Indicator Loop Control Station" RAN 4 up at 8th Avenue. The northern Fort Observation Post (FOP) shown below is the only surviving element of Skirmish Battery (apart from a concrete foundation post on the beach 8 km south belonging to the southern BOP of Skirmish Battery, and some electricity cable in the garden of a house at Fourth Avenue). The original Skirmish Battery was first set up in March 1942 about 2 miles south of Woorim for the purposes of maintaining signals contact with Fort Cowan Cowan on Moreton Island. They did this by heliograph during the day and Aldis lamp at night. It was manned by soldiers from Fort Bribie and consisted of 1 corporal, 2 signallers and 7 privates. A more permanent fort was built later in 1942 at Woorim. The battery became operational in late 1942 under the command of Major Greet. It had two 6" field artillery guns from the USA which were mounted on Panama Mounts.
The gun emplacements
 |
|
Skirmish Battery - Gun Emplacement - December 1953 |
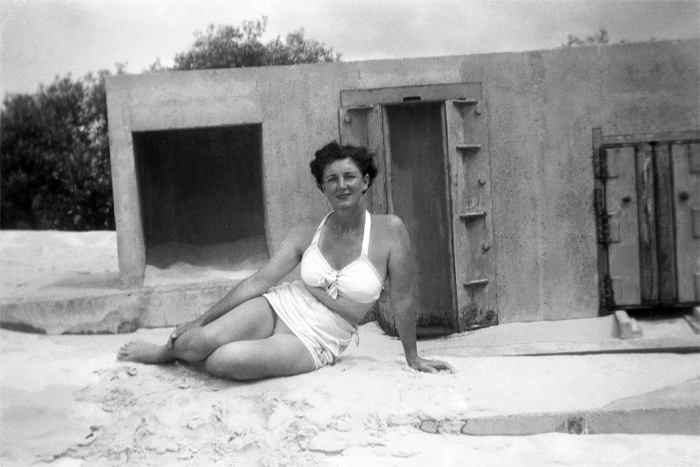 |
Sadie Robinson on holiday at Bribie in 1946. This picture was taken on the beach at Woorim in front of the shell elevator housing of the gun emplacement at Skirmish Battery. The gun floor shell tube is directly behind Sadie and the spent shell chute is to the right. Compare with the photo above and you'll see this structure on the left. Photo is from a Kodak Box Brownie negative supplied by John Frame. John wrote "In the 1940s my mother's family often stayed at a rented holiday home at Woorim. My aunt - Sadie Robinson (nee Hammill, 1912 - 2011) - was the eldest of eight siblings. |
No. 1 Gun
Materials required for building the No. 1 gun included 18.5 tons of steel
reinforcement (₤740), 494 cu. yds of 4:2:1 concrete ( ₤7410), excavation of 630
cu. yds. of sand (₤126) and doors, windows, shutters and louvres (₤250) making a
total cost, including 10% contingencies, of ₤9378. Prices quoted were as
at October 1942.
No. 2 Gun
Materials required for building the No. 2 gun included 20.25 tons of steel
reinforcement (₤810), 557 cu. yds of 4:2:1 concrete ( ₤8355), excavation of 954
cu. yds. of sand (₤191) and doors, windows, shutters and louvres (₤250) making a
total cost, including 10% contingencies, of ₤10566. Both prices included
magazines at each gun.
Command Post, Fort Observation Posts (2), Plotting Room and Reserve Magazines came to a total of ₤5500.
PHOTOS FROM 1968
The three colour photos below of the Fort Skirmish Gun Emplacements were
taken in 1968 by Norm Broughton - a sergeant in the AIF 2nd Australian Jungle
Trunk Line Maintenance Section during WW2 - who brought his family to Bribie on
holidays. The emplacements were demolished by the council a couple of years
after these photos were taken. Photos supplied by Mark Broughton.
|
|
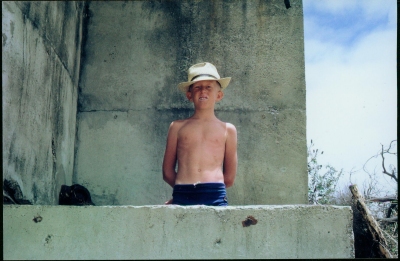 |
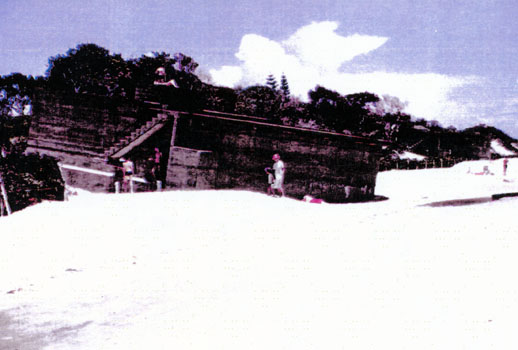
| Number 1 and Number 2 Gun Emplacements - 1968. These were adjacent to Fourth Avenue, Woorim, Bribie Island. | 13 year-old Mark Broughton at the doorway of a gun emplacement in 1968. |
 |
 |
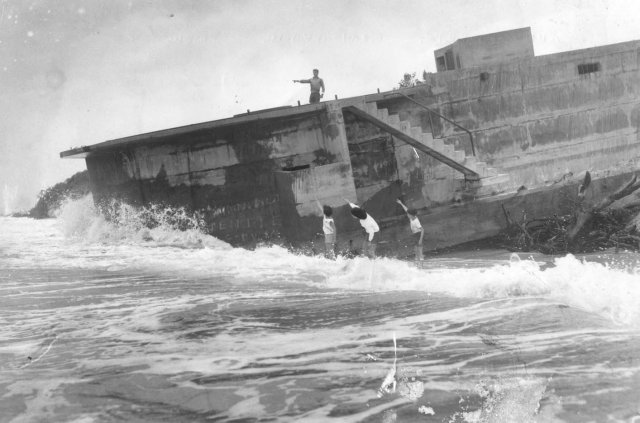
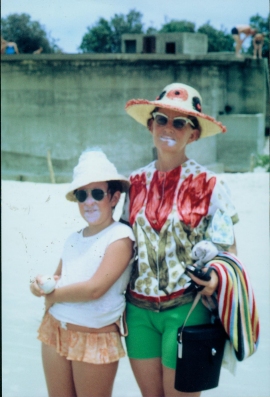
| Mrs Vivienne Broughton and 11-year old daughter Julie in front of the northern emplacement in 1968. The shell elevator housing is clearly visible on top. | The No. 1 Gun Emplacement suffers in the regular storm surges on Woorim Beach in the 1950s. |
|
|
 |
|
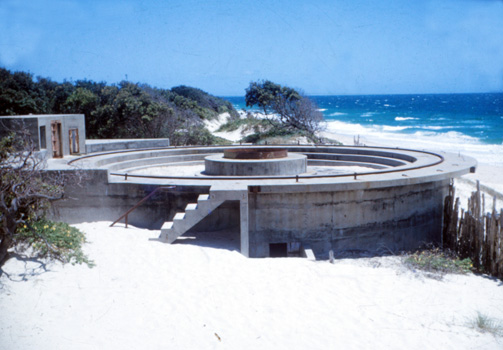
The Southern (No. 1) Gun emplacement - 1950s |
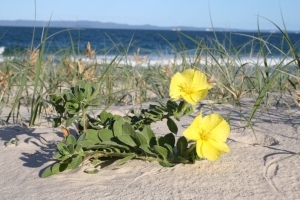
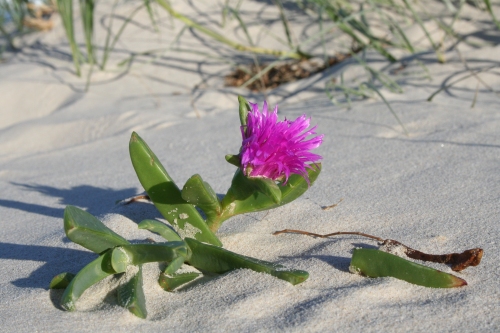
Pigface (Carpobrotus Glaucescenes) now grows on the dunes where the guns once were. Photo 2007. |
 |
| No. 1 Gun Emplacement photographed in February 1976 by Bill Campbell of Woorim. The No. 2 Gun is visible in the background. Photo courtesy of David Spethman - whose parents were good friends of Bill Campbell. |
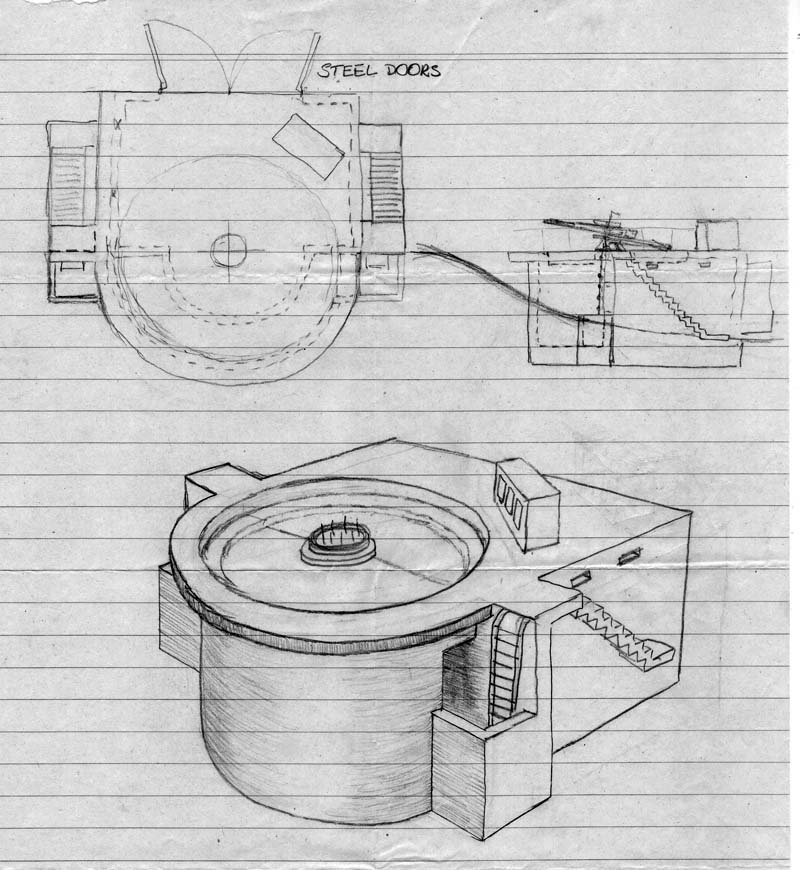
Drawing of the gun emplacements (from memory) by Mark Broughton, 10 June
2008
The Fort Observation Posts
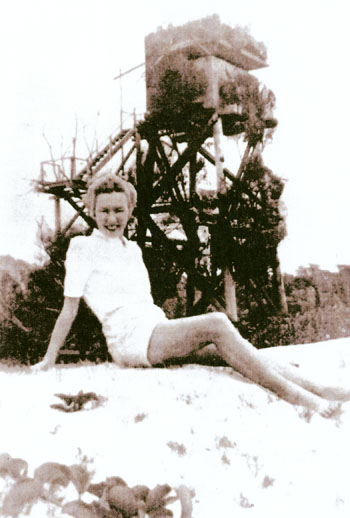 |
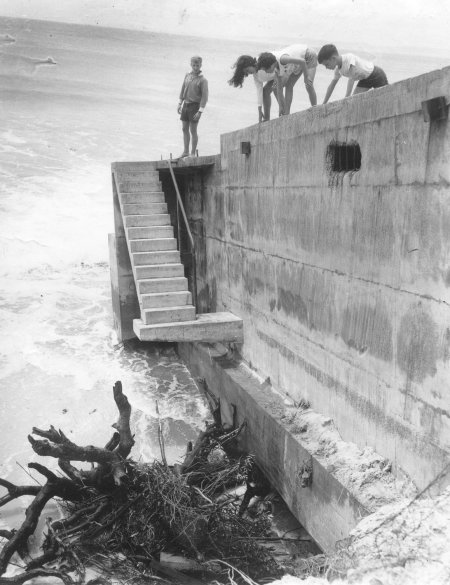
| Miss Hazel Campbell of Woorim photographed in 1946 in front of the southern Flank Observation Post (FOP). Photo taken by Bill Campbell - Hazel's brother. Bill served on HMAS Nizam in Burma and in the Indian Ocean during the war. Some of the camouflage netting was visible when this photo was taken. Photo courtesy of David Spethman. |
|
 |
| Woorim Beach today - where Skirmish Battery was in WW2 | Northern Fort Observation Post - Skirmish Battery - 2006. This is about 5 km north of the gun emplacements. They call it "The Toaster". |
Located at the northern and southern flanks of the battery were observation posts consisting of a concrete 'pill box' 4.8 m x 3.0 m x 3.0 m (16' x 10' x 10') on a platform raised about 10 m (30') in the air on (30 cm) 12" diameter wooden stumps. These were known as the Fort (or Flank) Observation Posts (FOP) - Skirmish Battery. In the photo above, the
high timber stumps were burnt out during a bushfire. The northern FOP now sits on its side on the
beach 4.7 km north of the RAN 4 Loop Station and is known locally as "The Toaster". It measures 4.8m wide, 3.0m deep
and 3.0 m high (when in correct position). GPS co-ordinates: S2°01.270'
E15°10.636'.
There was a southern observation post about 1 km south of the flagged swimming
area at Woorim. This was demolished for safety reasons and the concrete footings removed.
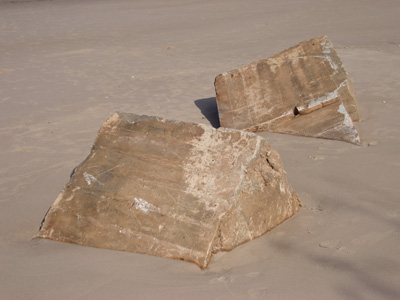 |
| Remains of the southern Fort Observation Post (FOP) footings in November 2009. The imprint of the 6" formwork is visible on the sides. These were dragged here by the Council to get them out of the way. They were later shifted to the park near 8th Avenue. |
 |
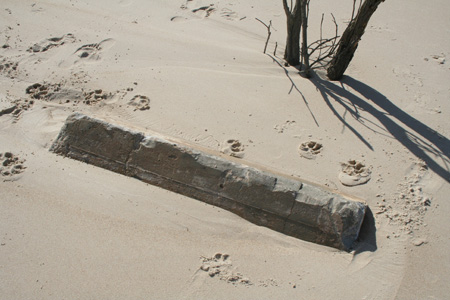 |
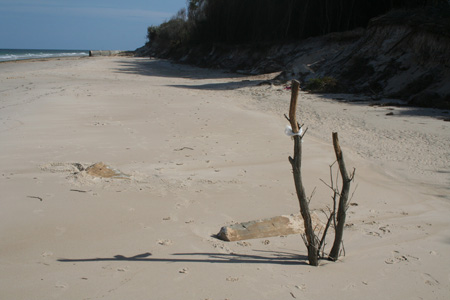
| Remains of the southern FOP were partly covered again during heavy seas in January 2010. They are now on display at 8th Avenue. | A corner is just visible on
the beach. |
.jpg) |
| There are 9 footings blocks from the southern FOP near the Indicator Loop generator huts at the end of North Street, Woorim. They are just opposite 8th Avenue. The Moreton Bay Regional Council is responsible for the beach and they saw that these blocks were placed here by Council Officer Alan O'Leary for historical reasons and also to make the beach safer. |
 |
 |
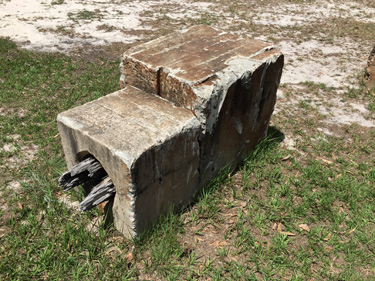
| This is one of the 5 blocks that secured the timber stumps. The stumps were typically 12" diameter. | Here's a block used to tie down the structure. There is a steel bolt on the top, about 30 mm in diameter. |
Communications cable
A communications cable ran between the Fort Observation Posts and the Battery Command Post on the dunes at 5th Avenue, a total distance of about 7 km. The cable was a single cored lead-insulated cable of 1" diameter (25 mm). A description of it is below.
.jpg) |
.jpg) |
| This is the track to the beach from the southern side of the Bribie Island Surf Club. It is just past the helicopter pad. The red-handle of my hacksaw shows where the wire crossed the path. More cable was found up at 5th Avenue some years ago. | Here is the communications cable running into the sand dune to the south side of the path. Council Officer Alan O'Leary cut the wire with an angle grinder in November 2016 to stop it being a tripping hazard. My thanks to Alan for providing me with a sample. |
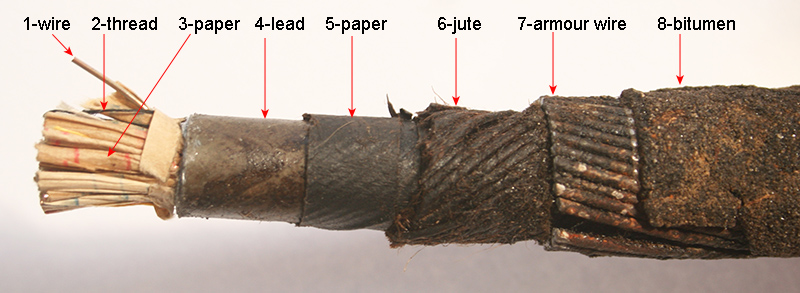 |
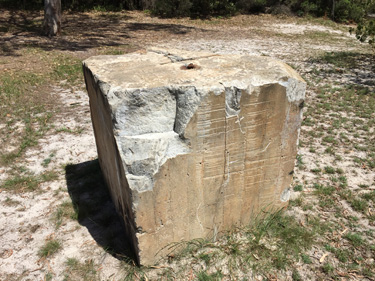
| I cut open a piece of the wire to reveal its innards. This photo shows a section about 15 cm long. It is 2.5 cm wide. |
 |
 |
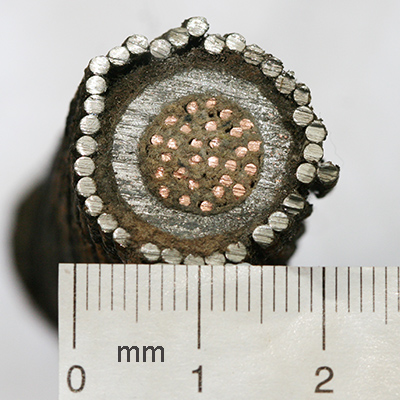
| A cross-section of the cable reveals its components. The bitumen adds another 5 mm to the diameter but fell off when I cut it. The tarred hemp (or jute) between the steel and the lead is of the first order. | A close up reveals the excellent condition of the wire after 74 years (1942-2016). The bitumen has broken off but the steel is in fine condition. The lead and copper are as good today as when it was made. (R. Walding 11 December 2016) |
 |
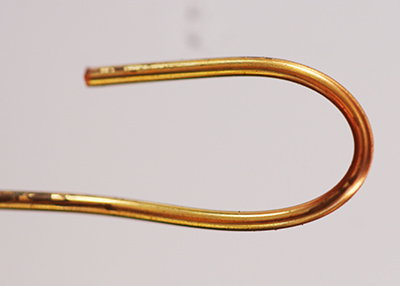 |
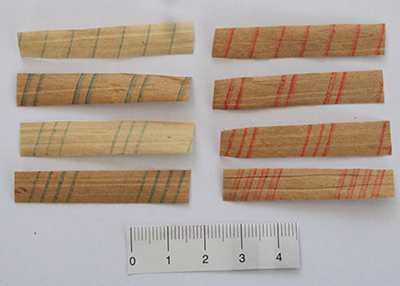
| The copper wires had identification paper wound around them. There were three wires for each of the 1, 2, 3 and 4 striped paper windings, and four wires for each of the red papers. This made a total of 28 wires (12 blue, 16 red). | A close up of the 20 SWG copper conductor (0.036" or 0.9 mm diameter). Some wires appear more silvery so they may have been tinned. |