
OF THE ROYAL NAVY AT MAY ISLAND
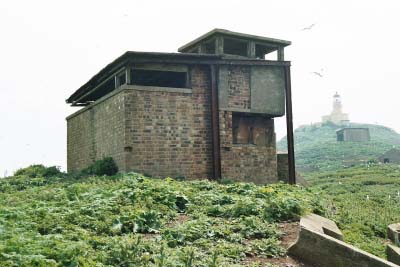
The buildings shown below are disused harbour defence control huts used by the Royal Navy for its antisubmarine indicator loop defences in World War 2. They are located on the Isle of May in the Firth of Forth, Scotland.
 |
If you worked there or have any feedback please email me: Dr Richard Walding Research Fellow - School of Science Griffith University, Brisbane, Australia Email: waldingr49@yahoo.com.au |
I'd like to thank Ron Morris of Fife (Scotland) for his help with this page. I am also grateful for further assistance from Steve Liscoe, Professional Assistant (Archaeology) with the Fife Council's Archaeological Unit at Wemyssfield, Kirkcaldy, Scotland.

LINKS TO SOME OF MY RELATED PAGES:
Indicator Loops - an overview (YouTube, 70 minutes)
Indicator Loops around the World (Home Page) How an indicator loop works Oban Bay (Scotland) indicator loop station United States Navy Indicator Loop Receiving Station
WHAT ARE INDICATOR LOOPS?
Anti-submarine 'indicator loops are long lengths of cable laid on the seabed in shipping channels of strategically important ports. They rely on the production of an induced current in a stationery loop of wire when a magnet (in this case, a submarine) moves overhead. Even if wiped or degaussed, submarines still have sufficient magnetism to produce a small current in a loop. The current is detected by galvanometers at a Loop Control Station on the shore. This technology was developed by the Admiralty's Board of Investigation and Research in 1915 and further developed after WW1 by British Royal Navy at HMS Vernon and HMS Osprey (Portland Naval Base). Loops were use extensively during WW2 but ceased in 1945 when more sophisticated methods (Asdic/sonar mainly) were shown to be more useful.
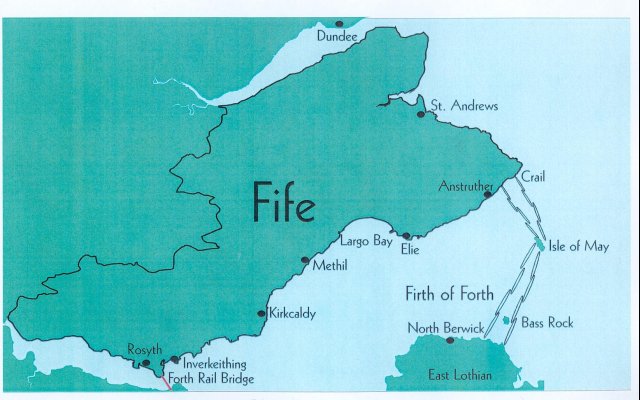
MAY ISLAND
May Island lies at the mouth of the Firth of Forth about five miles from the port of Anstruther, Fife. It is best known for its important seabird colonies, bird observatory, three lighthouses and its ancient monastic ruins. However, during both world wars, the island was manned by the Admiralty and played a vital role in the defence of the approaches to Rosyth Naval Base, as well as the naval and mercantile anchorages in the estuary.
Firth of Forth loop layout
 |
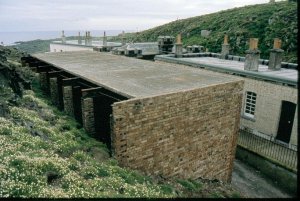 |
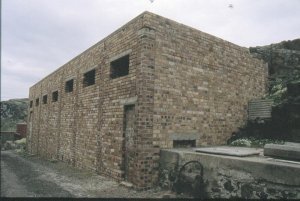
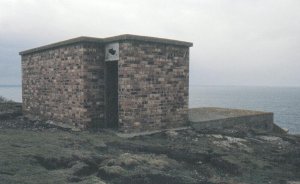
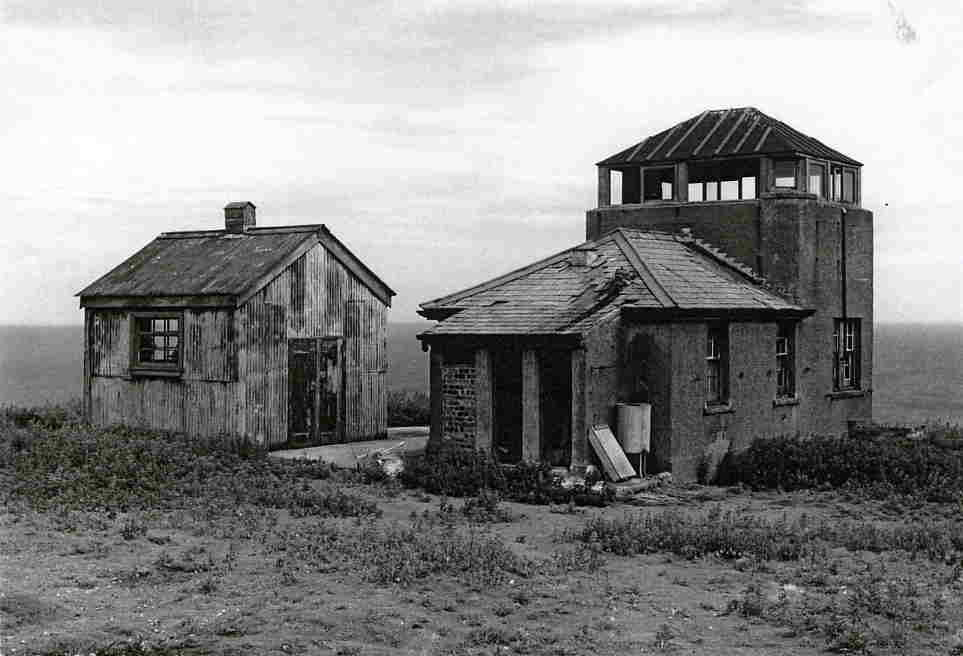
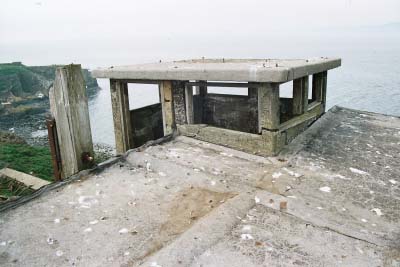
| May Island Indicator Loop Control Hut (front) | May Island Indicator Loop Control Hut (rear) |
Early in 1940, the lines of indicator loops were doubled. Each line was made up of about four large looped cables which were numbered and overlapped to give a complete double submarine or ship detection capability right across the full width of the estuary mouth.
The two lines of loops were approximately one nautical mile apart, and the loops covering the north channel terminated on the sea bed at two points between Anstruther and Crail (see photos below). Similarly the loops covering the south channel passed either side of Bass Rock and terminated in Canty Bay.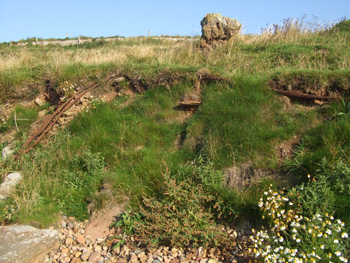 |
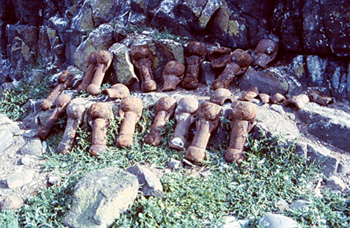 |
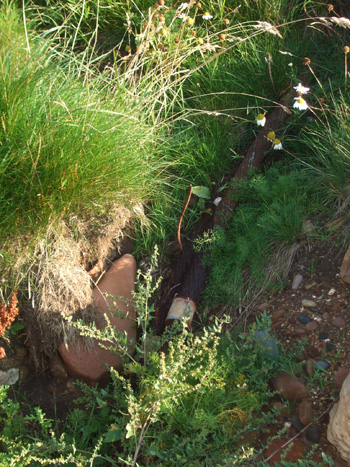
| The cables that ran from Crail to the May at the Fife landfall site. Photo: Steve Liscoe, January 2008. | A cluster of iron collars that sheathed the indicator loop cables in the intertidal zone, many of which can still be seen in Pilgrim's Haven (May Island), where they came ashore. Photo: Steve Liscoe. |
 |
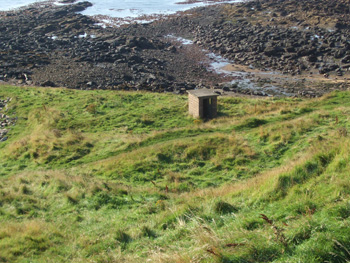 |
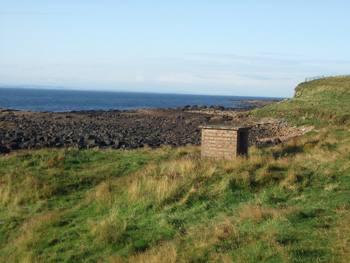
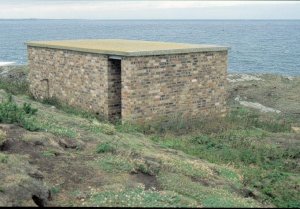
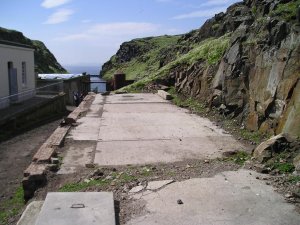
| The wooden buildings have gone long ago but the brick and concrete one with the connection panel remains. This is on the Fife mainland near Crail. Photo: Steve Liscoe, January 2008. | Another view of the brick and concrete hut at Crail that housed the loop connections. Photo: Steve Liscoe, January 2008. |
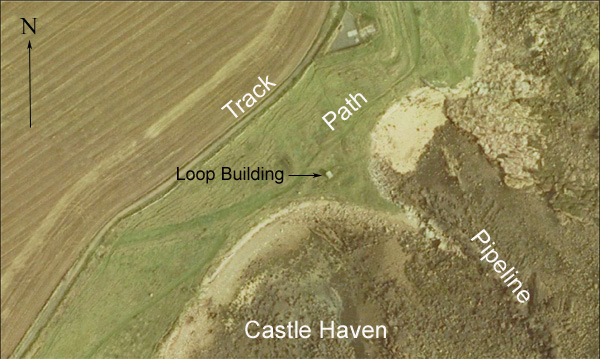 |
| Aerial photo of the Loop Building at Castle Haven just south of Crail. Courtesy of Fife Council. |
 |
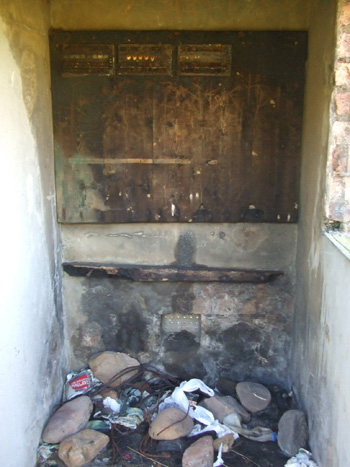 |
| A closer view of the loop tail cables from Crail to May as seen on the Fife landfall. Photo: Steve Liscoe, January 2008. | Inside the hut that housed the loop connections (at Crail). Evidence of the wiring and meters mounted on the rear wall can be seen. Photo: Steve Liscoe. |
PHOTOS FROM 2013
The following photos were supplied by Steve Liscoe, Archaeological Unit, Fife Council, Glenrothes, Scotland. A combination of low sand and water levels had exposed the cables. Photos taken on 2 February 2013 and are courtesy of SCAPE Trust, University of St Andrews.
 |
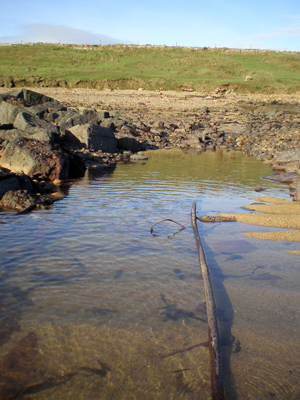 |
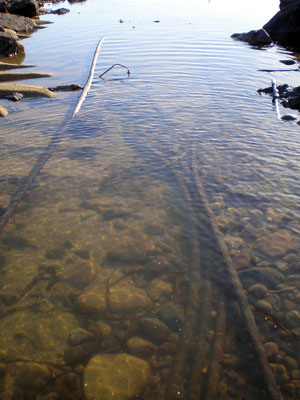
Looking out from the shore with several cables visible in the shallows. |
View NW with cables running toward the shore. |
 |
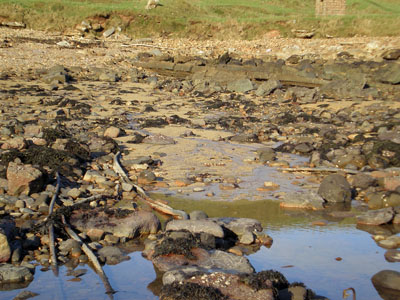 |
Looking toward the shore with the Loop Building visible to the right. |
Point at which the cables disappear under the beach with the Loop Building in the background. |
 |
 |
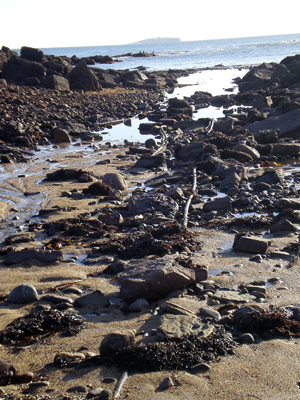
Looking SE from the beach with the Isle of May on the horizon. |
Cables recently parted by wave action and corrosion where they leave the beach. |
1946-1947 - Post war aerial photo - the central small white objects casting a shadow are the loop buildings. |
DSCF2438 - Identification collars crimped onto the cables. |
The decision to double the loop system meant that the speed and course of crossings could also be determined. This was especially important in the case of unidentified vessels, and during times of darkness or poor visibility. The control station was staffed by a Chief Petty Officer, four telegraphists, and twelve asdic ratings, divided into four watches.
Six harbour defence asdics (HDAs) were also anchored to the sea bed at strategic locations west of the loop system. As with the loops, they were connected by cables to the control station on the May from where they were operated. These asdics were likely laid down during the 1938 - 39 period. The control station was also known as the H.D.A. hut, or the loop room. It consisted of three apartments, these being from west to east, an engine room containing two diesel generators, a central monitoring room housing the instruments for operating the indicator loop and asdic devices, and a wireless telegraphy office or radio room, from where radio contact was made with the anti-submarine trawlers on patrol. The main radio transmitter was a Marconi TW12 model, and the call sign for May Whenever a crossing of the loops was not identified the Asdics were manned and the A/S trawlers were alerted. Unlike the indicator loops, they were not manned continuously, and were only brought into operation whenever an unidentified crossing had occurred. Throughout the course of the war no enemy submarines or surface craft succeeded in entering the Forth. There were, however, frequent false alarms, more often than not caused by local fishermen clandestinely fishing at night, or even large shoals of fish which could cause a "swing" on a loop.
 |
 |
| May Island Generator Hut | May Island Operations Room |
 |
 |
| The Loop Hut was demolished in 2004. Photo: Bob Baird |
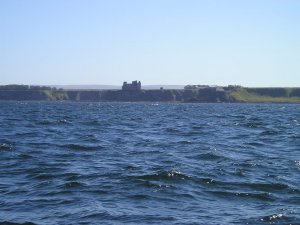
Photo taken from Canty Bay, May Island. It shows, in the distance, Tantallon Castle sitting at the top of the cliffs. To the right of the castle is a group of buildings which were the Indicator Loop control buildings on Gin Head, at the eastern end of Canty Bay. It is difficult to distinguish the Ministry of Defence buildings from other farm buildings behind them. Photo: Bob Baird |
 |
 |
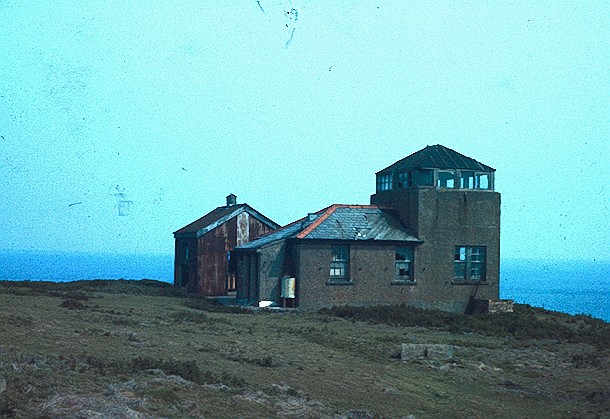
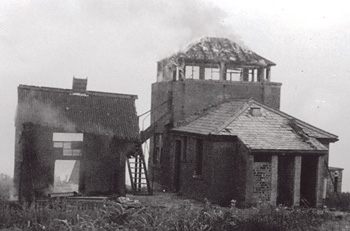
| May Island Signal Station in 1975 - before demolition | May Island Signal Station 1980 |
 |
|
| May Island Port War Signal Station (WSS) being deliberately burnt in 1980 before demolition. |
DAVID BROWN'S STORY
- from his son David.
Able Seaman David Brown. RNVR. ASDIC Rating, (superior efficiency), posted to
May Island Nov. 1 1939 to 17 Jan 1940. (HMS Cochrane 11). Service record
signed by Lt. R J H Williams.
My father used to tell an interesting story about his time there. At one period
the weather was so bad that they were unable to get any supplies of food,
tobacco etc. for some weeks, and although the lighthouse keepers shared what
they had, they were eating rabbits, fried, boiled, or stewed as the island was
overrun with them. As the tobacco came in "pricks", they cut up the sisal rope
that bound them and smoked that! The RAF tried an air drop that missed the
island and landed in the sea.
Although the fishermen in Anstruther were unwilling to put to sea in such bad
conditions, the local butcher and his boy volunteered to take the supplies and
set off. Dad said that they watched the boat fighting all the way to the island,
but as it reached the island it foundered. The butcher was a very large man and
floated like a cork while holding the boy by his collar. Fortunately they were
close to shore and they were rescued none the worse for the dip. Dad also told
about having to erect a radio aerial on a base which was underwater, diving down
to give the bolts a turn or two at a time, three sailors taking turns in the
freezing water.
INCHKEITH HARBOUR DEFENCES
Inchkeith is an island in the Firth of Forth, Scotland, located off Leith. In conjunction with the other islands in the forth - Inchgarvie and Inchcolm - Inchkeith formed an important part of the defence of the Firth of Forth (including the Rosyth Naval Base). The Isle of May (as mentioned above) was also a part of the harbour defence and it had indicator loops and Harbour Defence Asdics to detect ships and submarines.
In 1941 there were over 650 Royal Artillery (TA) personnel on Inchkeith along with Royal Engineers, Naval Personnel and many sundry personnel that he estimated there were in total almost 1,000 men on the island. Inchkeith had one major full-time battery. It consisted of two 6" guns covering the North side of the island, two 6" guns covering the South side and the water between the island and Leith, a further two 6" guns in the West Fort, and two 9.2" guns defending the Rosyth dockyards. By 1943, after the country transformed from a defensive role to an offensive one, the island went into care and maintenance with personnel vastly reduced - possibly down to 160 personnel. The defences were dismantled straight after the war and within a few months only a small number of troops with a "nucleus" of coastal guns remained. In 1957 all military use of the island ceased, and the Northern Lighthouse Board assumed ownership in the early 1960s and began repairs, renovations or demolitions. Many of the dozens of buildings, emplacements, observation posts, signal stations, fire control centers, and nissen huts remain today in varying states of repair. Below are some photos of the buildings - The Port War Signal Station (PWSS) and the Battery Observation Post (BOP) - taken by Ron Morris on 3 June 2007.
 |
 |
|
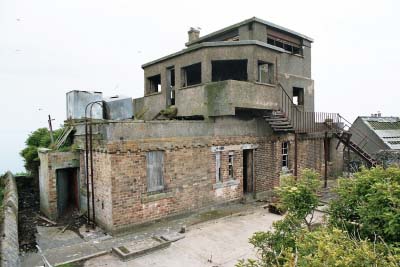
Port War Signal Station |
Battery Observation Post for the NE 6" gun (East Stell) with the subsidiary Signal Station built onto its rear (top left). |
 |
 |
|
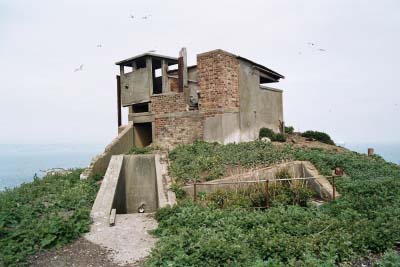
You can understand why this little signal station was necessary as this point of the island overlooking where the Boom and Indicator Loop were laid is obscurred from the PWSS by the Lighthouse complex (in the background). |
The subsidiary signal station (NAVAL) which was built at the rear and on top of the BOP (Royal Artillery TA). The upright to the left in the photo is a rather thick beam of timber. Behind that there is an iron/steel girder (several feet tall) affixed to it. This is consistent with other flagstaff supports seen on Inchkeith and elsewhere in the Firth of Forth. |